You built 802.1Q trunks back in your CCNA.
Let's rebuild one from scratch.Why We Need a Trunk
Look at the topology below: VLAN 10 and VLAN 20 exist on both switches, but no link connects SW1 to SW2.
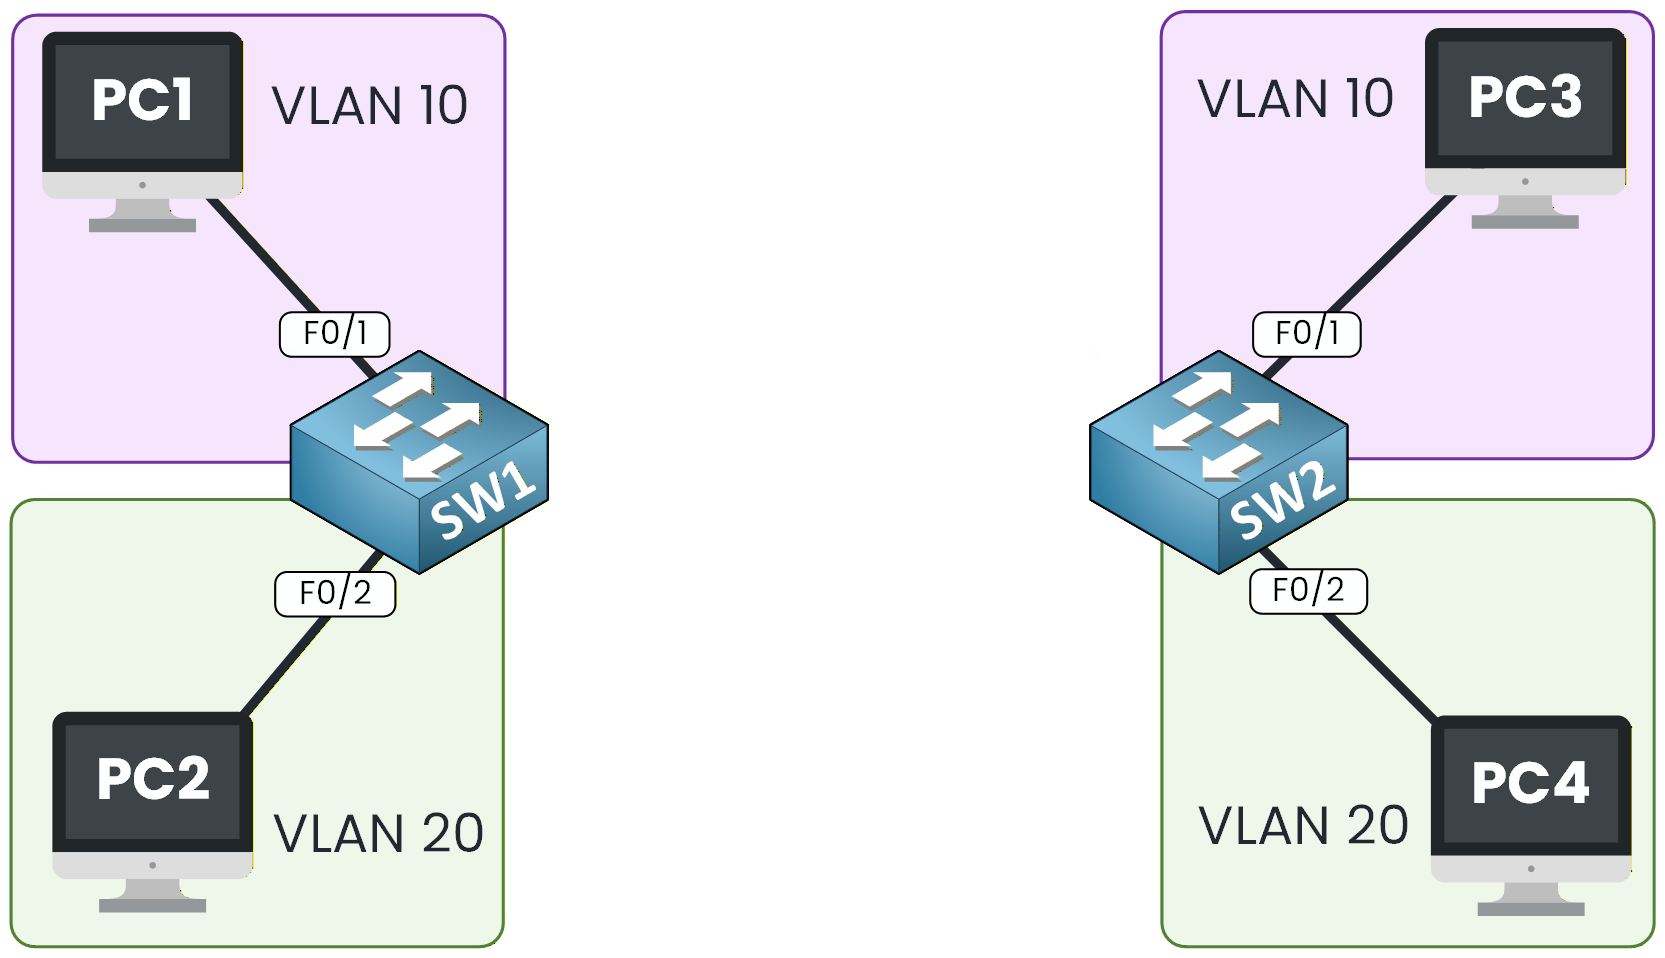
Figure 1 – VLAN 10 is stranded on each switch
So you run a cable between SW1 and SW2.
But that one cable has to carry VLAN 10 and VLAN 20 at the same time.
That is the job of a trunk: one link that carries every VLAN at once.
Figure 2 – A single trunk carries VLAN 10 and VLAN 20
In our example, let's say PC1 wants to communicate with PC3. They are in the same VLAN.
They will use the trunk link.Let's review how 802.1Q tagging works so you understand the process.
Answer the question below
How many links does a trunk need to carry every VLAN?
How the 802.1Q Tag Works
PC1 wants to send traffic to PC3.
When the frame lands on SW2, how does the switch know whether it belongs to VLAN 10 or VLAN 20?The answer is the 802.1Q tag.
A 4-byte tag is inserted right after the source MAC address when the frame enters the trunk.
Figure 3 – The 802.1Q tag lives inside the Ethernet frame
Inside that tag sits a 12-bit VLAN ID, enough to label VLANs 1 through 4094.
Answer the question below
How many bits in the 802.1Q tag carry the VLAN ID?
Follow the Frame
The trunk between SW1 and SW2 is up.
Follow one frame from PC1 to PC3.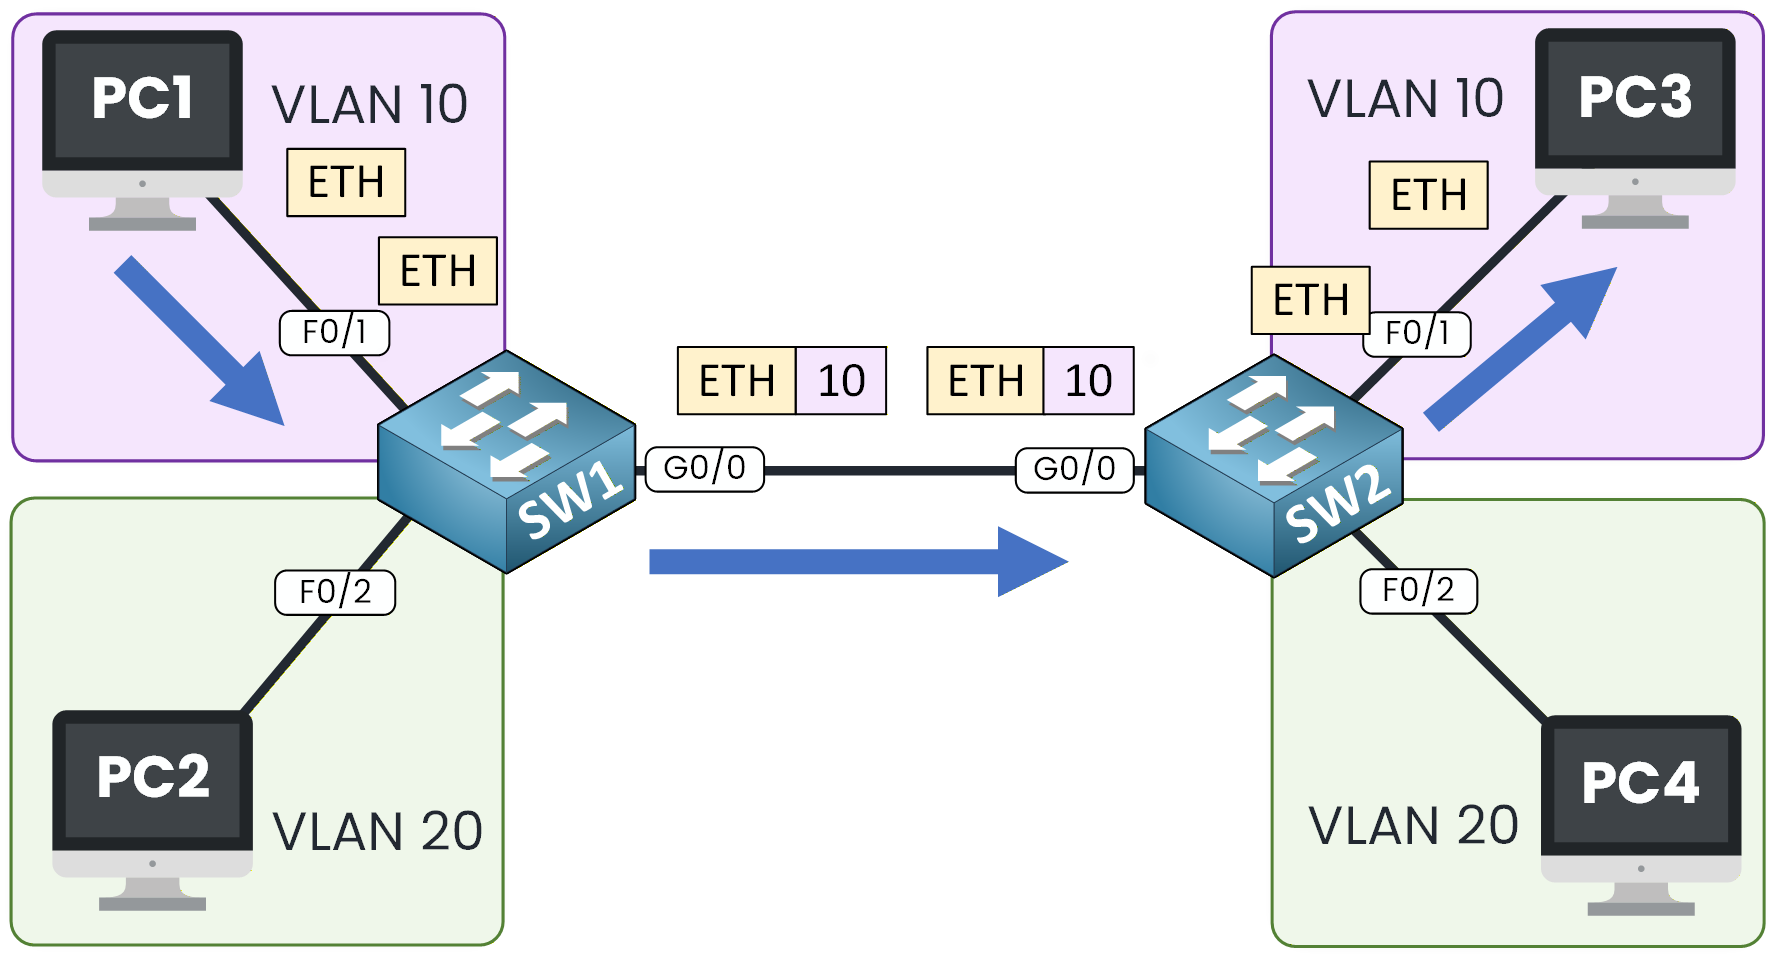
Figure 4 – The frame crosses the trunk tagged with VLAN 10
Ping PC3 (192.168.10.3) from PC1:
PC1> ping 192.168.10.3
Pinging 192.168.10.3 with 32 bytes of data:

Reply from 192.168.10.3: bytes=32 time<1ms TTL=128
Reply from 192.168.10.3: bytes=32 time<1ms TTL=128
Reply from 192.168.10.3: bytes=32 time<1ms TTL=128
Reply from 192.168.10.3: bytes=32 time<1ms TTL=128

Ping statistics for 192.168.10.3:
    Packets: Sent = 4, Received = 4, Lost = 0 (0% loss),
Approximate round trip times in milli-seconds:
    Minimum = 0ms, Maximum = 0ms, Average = 0ms
SW1 pushes the frame onto the trunk and marks it with VLAN ID 10.
SW2 reads the 10, strips the tag, and delivers a plain frame to PC3.
See the 10 marked on the frame as it crosses the link.
The tag lives only on the trunk: PC1 and PC3 never see it.Answer the question below
Which VLAN ID does SW1 stamp on the frame?
Time to build that trunk on our topology.
Both switches already hold VLAN 10 and VLAN 20, and every PC sits on its access port.Figure 5 – The trunk to build on G0/1
Turn G0/1 into a Trunk
Start on SW1:
SW1# configure terminal
Enter configuration commands, one per line.  End with CNTL/Z.
SW1(config)# interface g0/1
SW1(config-if)# switchport trunk encapsulation dot1q
SW1(config-if)# switchport mode trunk
SW1(config-if)# end
The encapsulation line pins the tagging standard to 802.1Q.
The command switchport mode trunk forces the port to trunk.
It is the mode you want on inter-switch links.
Answer the question below
Which switchport mode hardcodes the port as a trunk?
Now mirror the configuration on SW2:
SW2# configure terminal
Enter configuration commands, one per line.  End with CNTL/Z.
SW2(config)# interface g0/1
SW2(config-if)# switchport trunk encapsulation dot1q
SW2(config-if)# switchport mode trunk
SW2(config-if)# end
Answer the question below
Which command pins the tagging standard before mode trunk?
Verify the Trunk
Run
show interfaces trunkon SW1:40 % Complete: you’re making great progress
Ready to pass your CCNP exam?