In this lab, you will learn how to configure Static NAT (Network Address Translation) on a router to provide a permanent one-to-one mapping between private and public IP addresses.
Static NAT is an important CCNA topic because it ensures that internal devices can reach external networks using dedicated public IP addresses.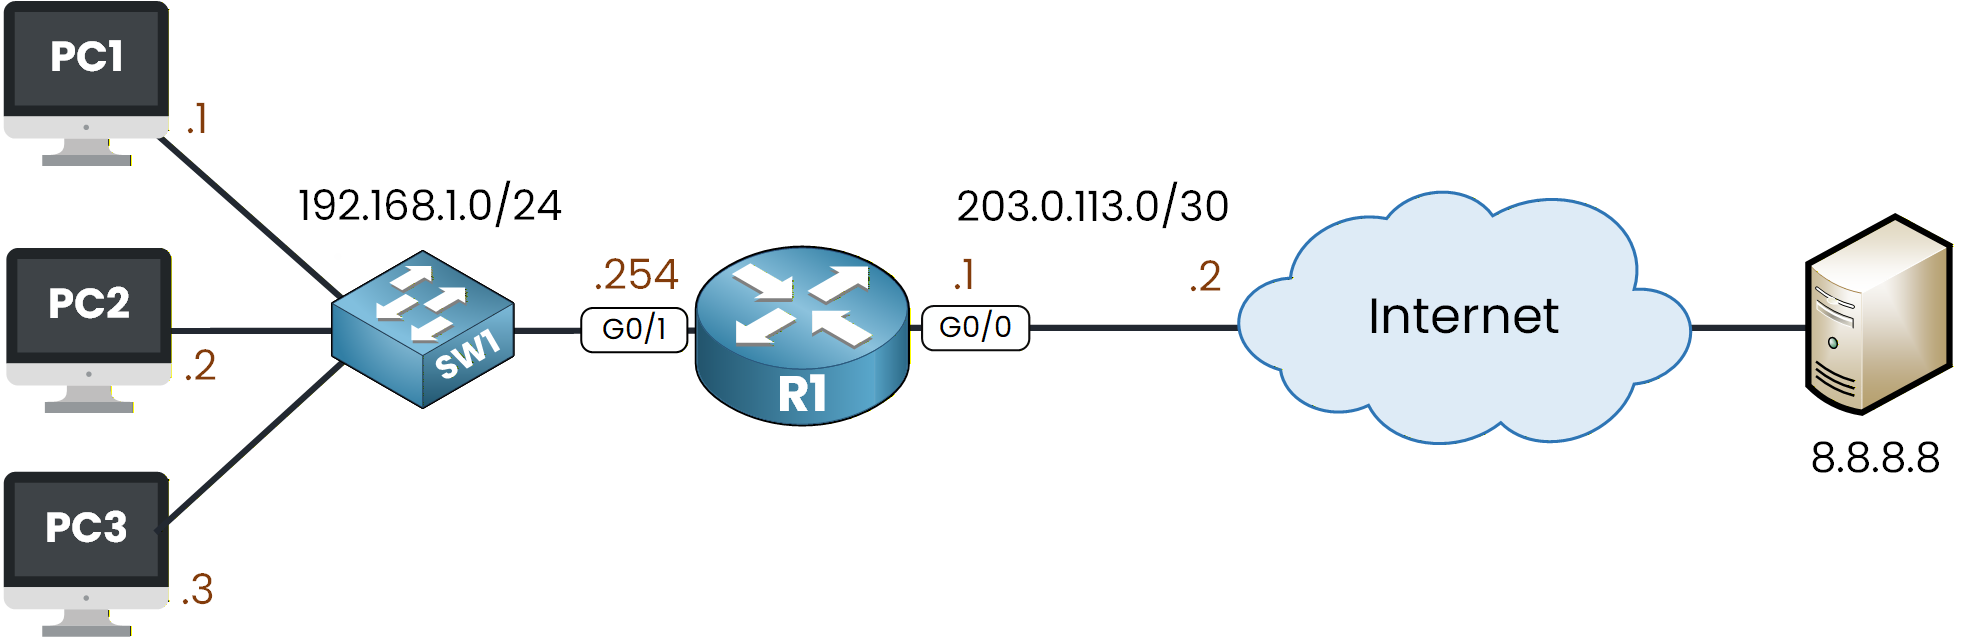
Figure 1 - Static NAT Configuration Topology
This lab will guide you through the configuration, verification, and testing of Static NAT so you understand exactly how the translation process works.
How to Begin
The topology above is already set up for you with all the necessary IP addressing in place.
You can focus entirely on the Static NAT configuration and run every command directly in the integrated CLI below.Lab Overview
Here’s the structure we will follow throughout this lab:
Step 1 – Configure Static NAT
Step 2 – Test Static NAT Behavior
Step 3 – Clear and Observe the Static NAT TableLet’s get started!
Answer the question below
Before we can begin configuring the Static NAT, we first need to determine the inside and outside NAT interfaces.
In your topology, interface G0/1 is connected to the inside network and G0/0 to the outside network.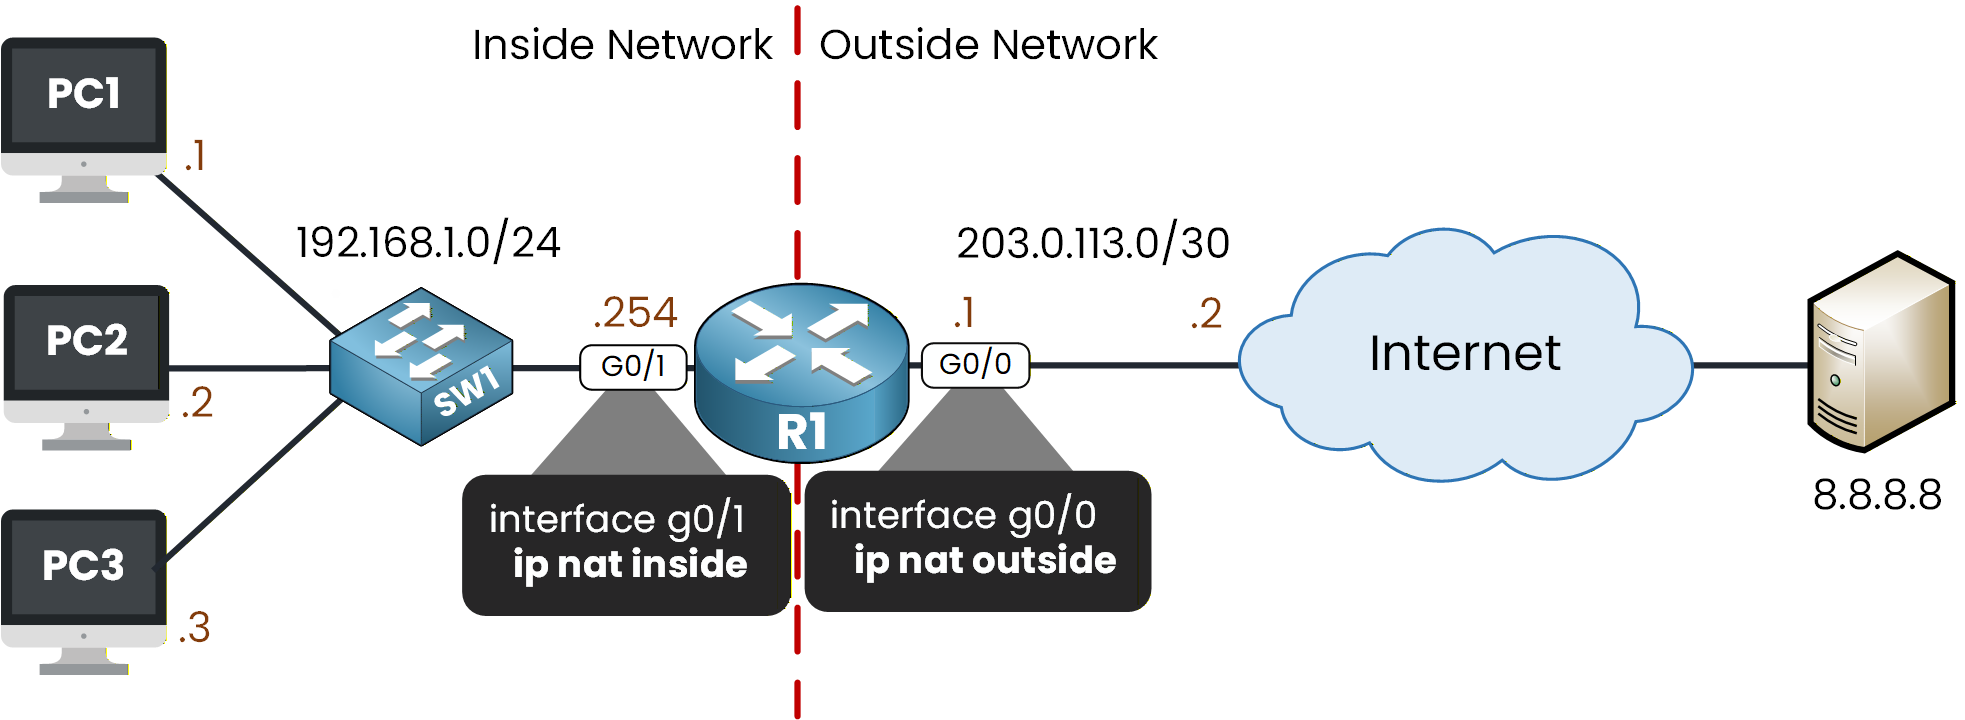
Figure 2 - IP NAT Inside and Outside Placement
Configure NAT Roles on the Interfaces
To define the NAT boundary on the router, apply
ip nat insideon G0/1 andip nat outsideon G0/0.R1# conf t Enter configuration commands, one per line. End with CNTL/Z. R1(config)# interface g0/1 R1(config-if)# ip nat inside R1(config-if)# exit R1(config)# interface g0/0 R1(config-if)# ip nat outside R1(config-if)# exitNow that the NAT roles are configured, we can set up a static NAT entry for each PC in the topology.
We have three inside hosts, so we will create three one-to-one mappings. Each translating a private IP address to a public IP address from the 50.0.0.0/24 range.Static NAT Mappings
Let’s walk through the first example together.
In the command below, the private address 192.168.1.1 is mapped to the public address 50.0.0.1 whenever traffic leaves toward the outside network:R1(config)# ip nat inside source static 192.168.1.1 50.0.0.1This ensures that PC1 always uses 50.0.0.1 as its public identity when accessing external destinations.
We then create the static translations for PC2 and PC3:R1(config)# ip nat inside source static 192.168.1.2 50.0.0.2 R1(config)# ip nat inside source static 192.168.1.3 50.0.0.3 R1(config)# exitVerifying the Static NAT Rules
With all three static mappings configured, let’s verify that the router has registered them correctly.
Use the commandshow ip nat translationsR1# show ip nat translations Pro Inside global Inside local Outside local Outside global --- 50.0.0.1 192.168.1.1 --- --- --- 50.0.0.2 192.168.1.2 --- --- --- 50.0.0.3 192.168.1.3 --- ---These entries confirm that each private IP address has a permanent one-to-one relationship with its public address.
They appear immediately, even before any traffic is sent, which is one of the key characteristics of Static NAT.To get additional information, you can also run
show ip nat statistics:R1# show ip nat statistics Total translations: 3 (3 static, 0 dynamic, 0 extended) Outside Interfaces: GigabitEthernet0/0 Inside Interfaces: GigabitEthernet0/1 Hits: 0 Misses: 0 Expired translations: 0 Dynamic mappings:This output confirms:
3 static NAT mappings are installed.
The inside and outside interfaces are correctly recognized.
Everything is now ready for testing.
40 % Complete: you’re making great progress
Unlock the rest of this lesson
If you’d like to continue your CCNA journey, simply create your free account.
Access all CCNA lessons
Practice with hands-on labs
Train with Practice exams and Quizzes
Progress tracking in your dashboard
Made by network engineers - CCNP certified
3056 learners globally