In this lab, you will learn how to configure HSRP (Hot Standby Router Protocol) on two routers to provide a redundant default gateway for your network.
HSRP is an important CCNA topic because it ensures that end devices stay connected even if one router becomes unavailable.
Figure 1 - HSRP Configuration Lab Topology
Your objective is to set up the HSRP group, verify the Active and Standby roles, update the PCs so they use the virtual gateway, test the failover process, and confirm that preemption restores the main router as Active when it comes back online.
We'll walk through everything step by step so you can understand both the configuration and how HSRP behaves in a real scenario.
Lab Overview
Here’s the structure we’ll follow throughout this lab:
Step 1 – Initial Connectivity
Step 2 – Configure HSRP on R1 and R2
Step 3 – Configure PCs with the virtual gateway
Step 4 – Test HSRP failover
Step 5 – Restore R1 and verify preemption
Let’s Get Started
Begin with Step 1 to verify the initial connectivity. Then follow each step carefully to configure, test, and fully understand how HSRP works.
Answer the question below
Let’s begin by looking at our topology.
We have the LAN network 192.168.10.0/24 connected to two routers.
In this step, we will use PC1 to check if it can reach the external destination 8.8.8.8.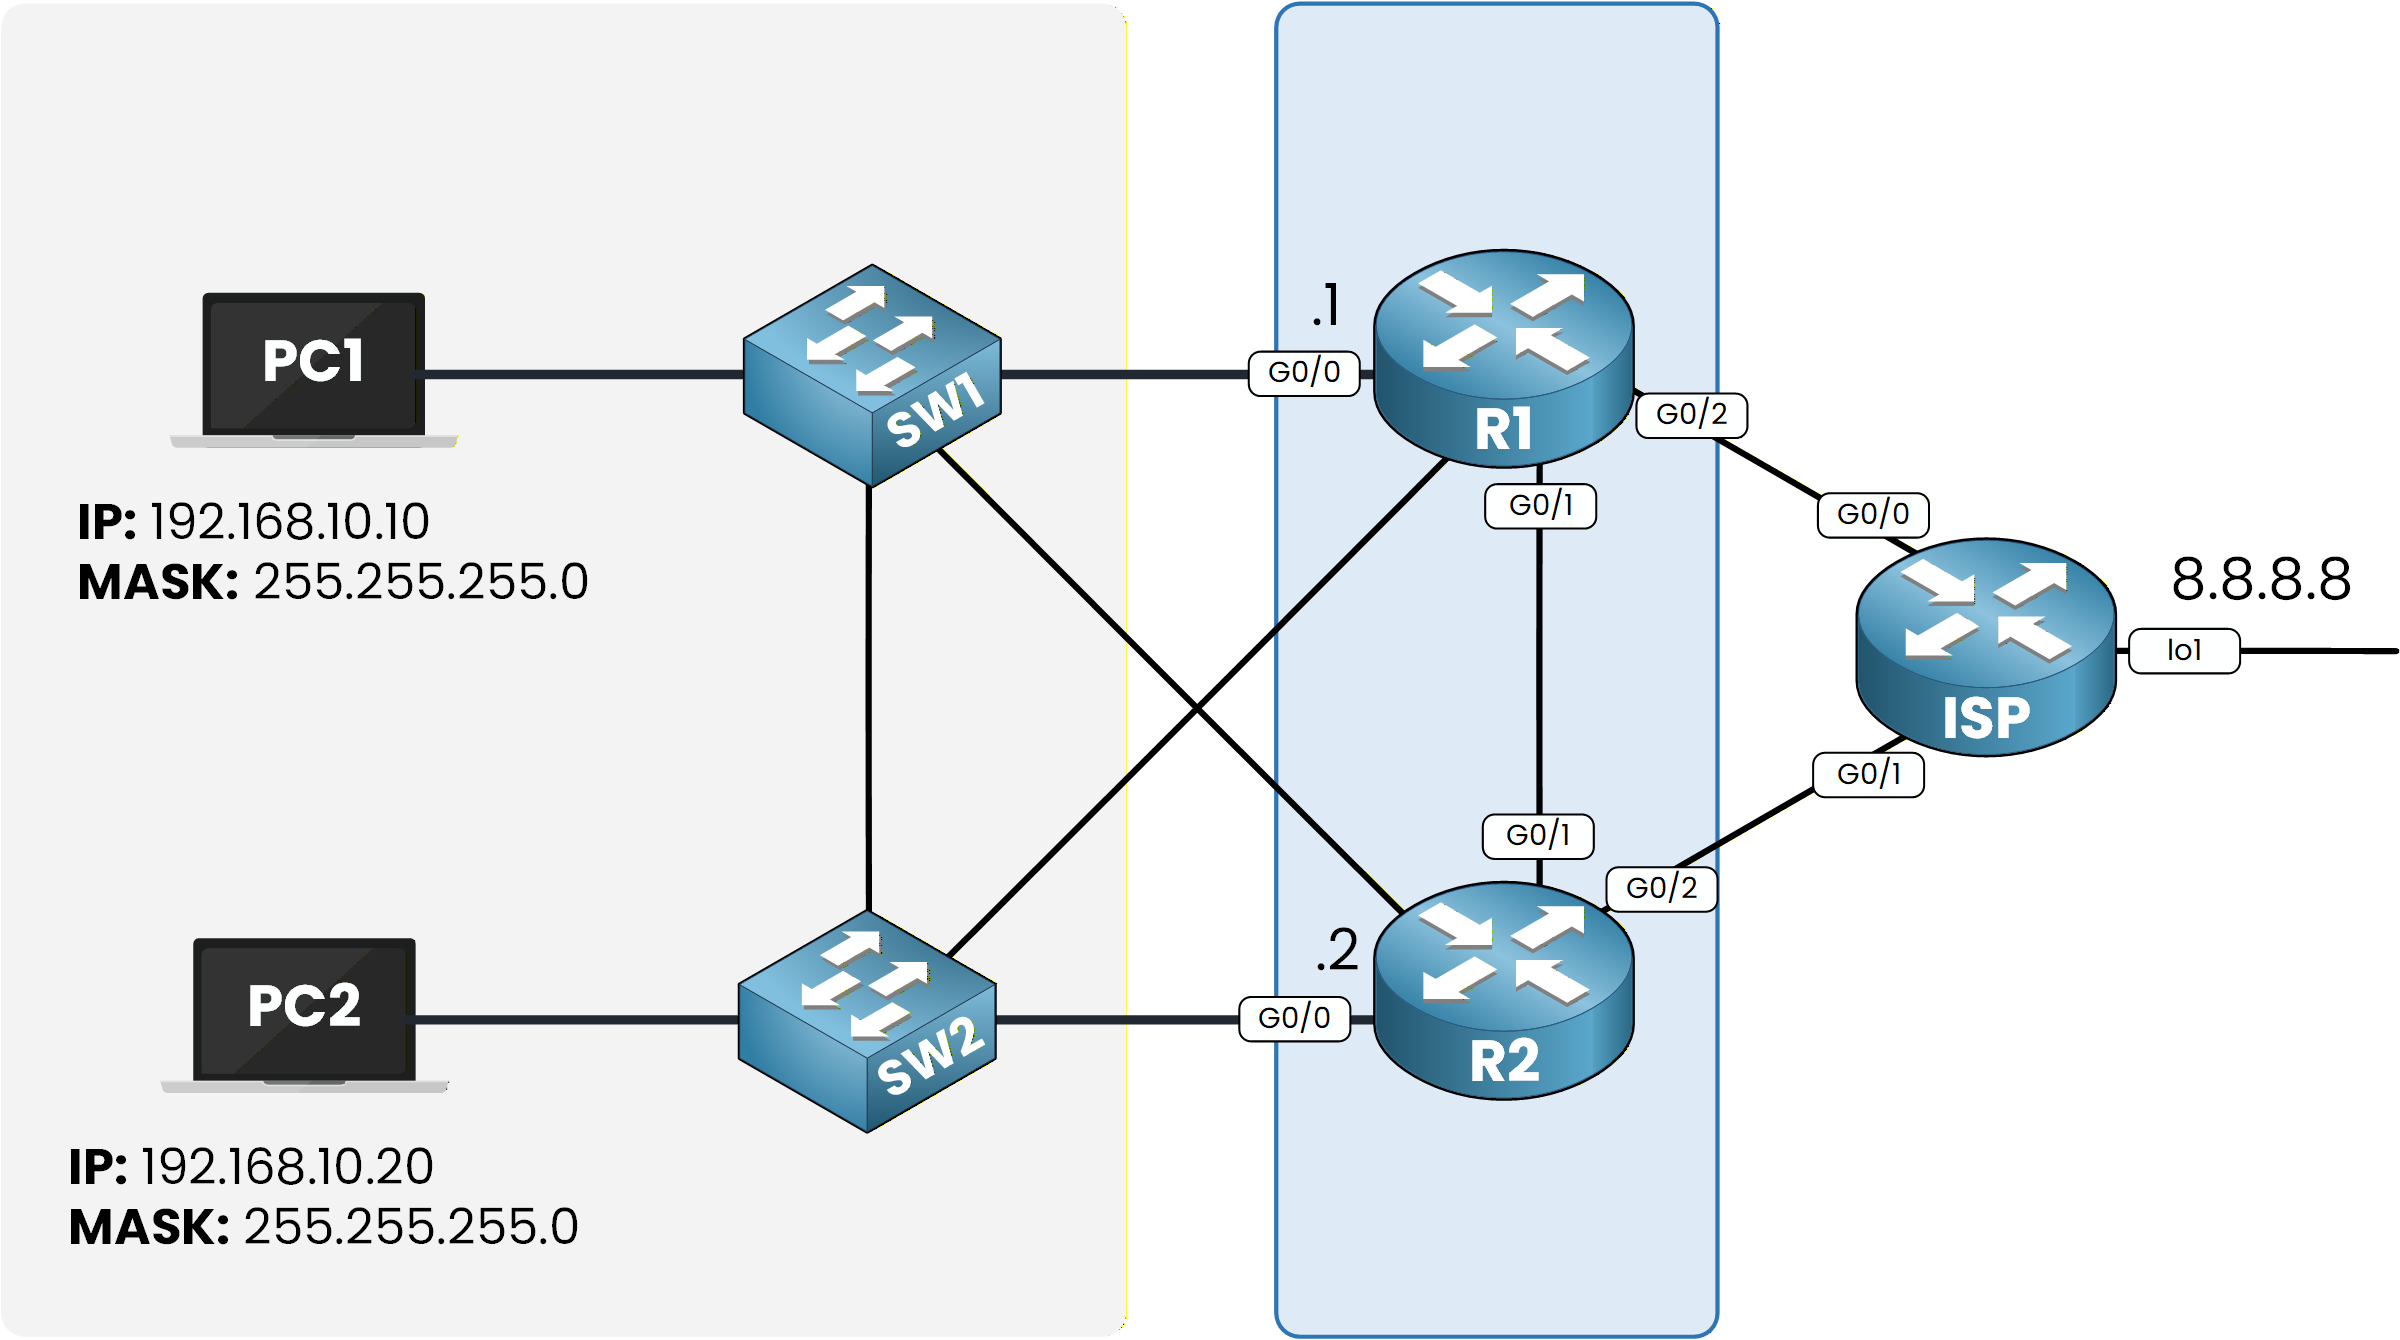
Figure 2 - HSRP Topology
This address is represented by a loopback address connected to the ISP router in the lab context.
First, open the command prompt on PC1.We can now test basic connectivity by sending a ping to 8.8.8.8:
C:\> ping 8.8.8.8

Pinging 8.8.8.8 with 32 bytes of data:

Reply from 8.8.8.8: bytes=32 time<1ms TTL=254
Reply from 8.8.8.8: bytes=32 time<1ms TTL=254
Reply from 8.8.8.8: bytes=32 time<1ms TTL=254
Reply from 8.8.8.8: bytes=32 time<1ms TTL=254

Ping statistics for 8.8.8.8:
    Packets: Sent = 4, Received = 4, Lost = 0 (0% loss),
Approximate round trip times in milli-seconds:
    Minimum = 0ms, Maximum = 0ms, Average = 0ms
The ping succeeds, which means PC1 can already reach the external network through its current gateway.
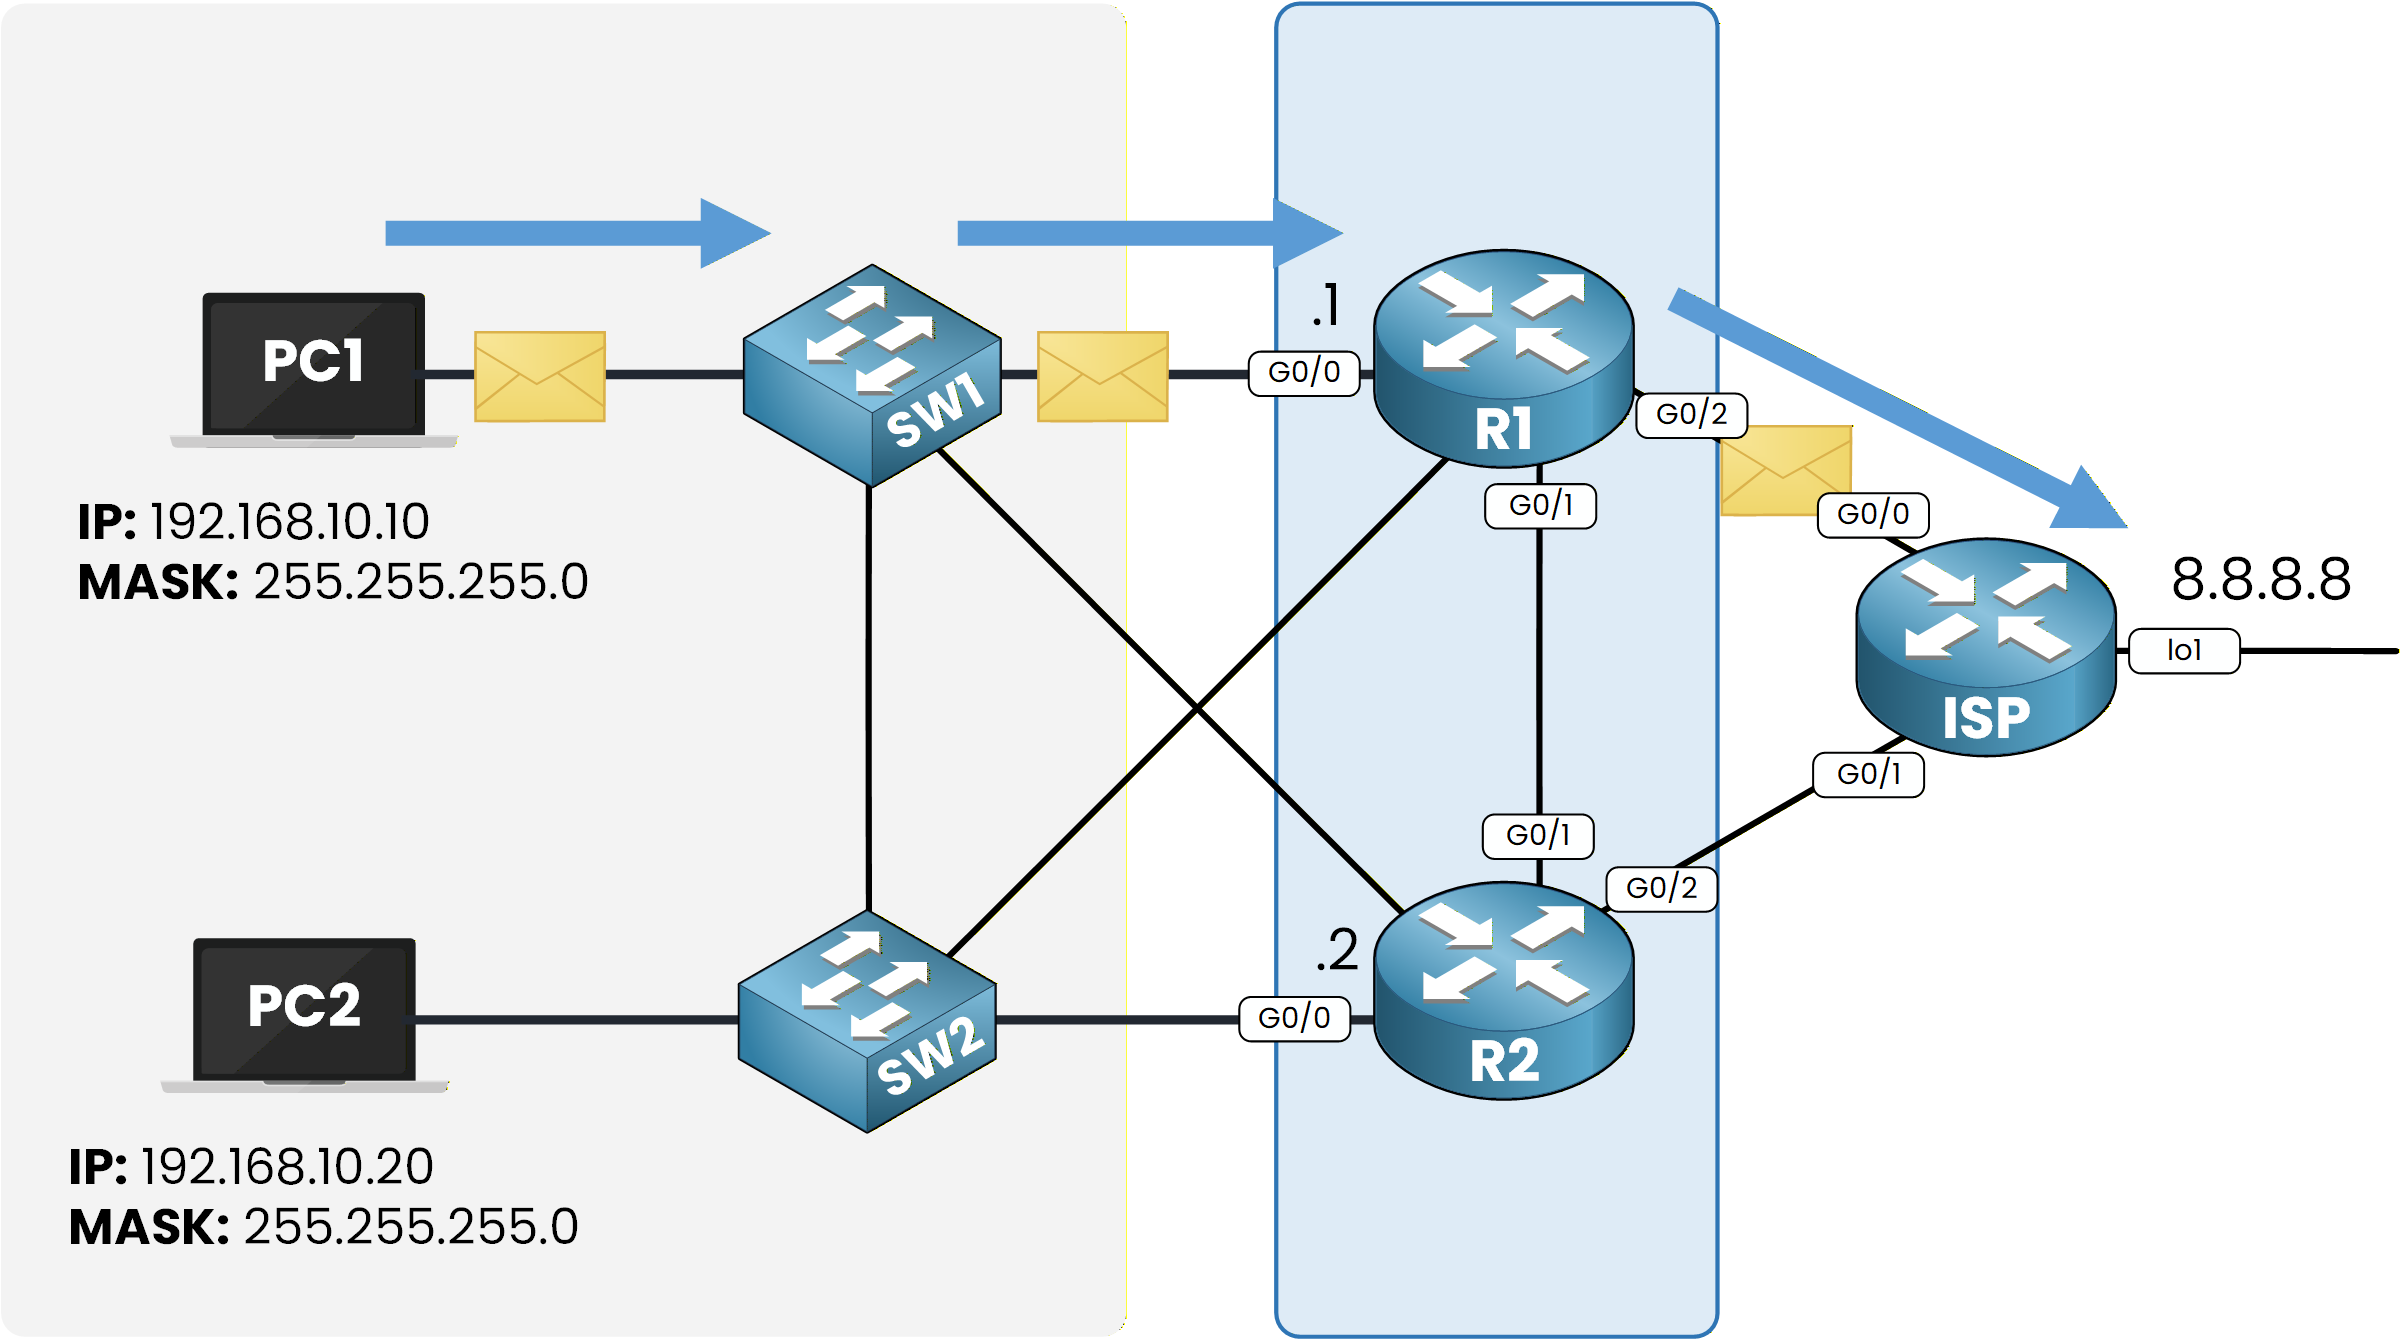
Figure 3 – Initial HSRP topology overview
Next, let’s check which gateway PC1 is using.
Run the following command:C:\> ipconfig FastEthernet0 Connection:(default port) Connection-specific DNS Suffix..: Link-local IPv6 Address.........: FE80::202:16FF:FE48:B8C9 IPv6 Address....................: :: IPv4 Address....................: 192.168.10.10 Subnet Mask.....................: 255.255.255.0 Default Gateway.................: :: 192.168.10.1We can see that the default gateway is 192.168.10.1, which belongs to R1.
To confirm the path taken by packets, use:
C:\> tracert 8.8.8.8

Tracing route to 8.8.8.8 over a maximum of 30 hops:

  1   0 ms      0 ms      0 ms      192.168.10.1
  2   0 ms      0 ms      0 ms      8.8.8.8

Trace complete.
The first hop is 192.168.10.1, confirming that R1 is currently acting as the gateway.
Everything looks good.
In the next step, we will configure HSRP on R1 and R2 to provide a redundant default gateway.Answer the question below
Which router is the current gateway?
In this step, we will configure HSRP on both routers so they can share a single virtual default gateway.
We’ll start with R1, then apply the same logic on R2.On R1, go to the interface facing the LAN, which is GigabitEthernet0/0.
We enable HSRP version 2 using thestandby version 2command.R1# conf t Enter configuration commands, one per line. End with CNTL/Z. R1(config)# int g0/0 R1(config-if)# standby version 2 R1(config-if)# standby ? <0-4095> group number ip Enable HSRP and set the virtual IP address ipv6 Enable HSRP IPv6 preempt Overthrow lower priority Active routers priority Priority level timers Hello and hold timers track Priority Tracking version HSRP versionHere, you can see all options available for the
standby ?command.
Now we configure the virtual IP address, set the priority to 110, and enable preemption so R1 becomes the Active router.R1(config-if)# standby 1 ip 192.168.10.3 R1(config-if)# standby 1 priority 110 R1(config-if)# standby 1 preempt %HSRP-6-STATECHANGE: GigabitEthernet0/0 Grp 1 state Init -> Init %HSRP-6-STATECHANGE: GigabitEthernet0/0 Grp 1 state Speak -> Standby %HSRP-6-STATECHANGE: GigabitEthernet0/0 Grp 1 state Standby -> Active R1(config-if)# end R1# write memoryAfter enabling preemption on R1, we now configure HSRP on R2.
The process is the same, but this time we set a lower priority (90) so R2 becomes the standby router.R2# conf t Enter configuration commands, one per line. End with CNTL/Z. R2(config)# int g0/0 R2(config-if)# standby version 2 R2(config-if)# standby 1 priority 90 R2(config-if)# standby 1 ip 192.168.10.3 R2(config-if)# standby 1 preempt R2(config-if)# end R2# write memoryAt this point, both routers are part of HSRP Group 1.
Let’s verify the configuration.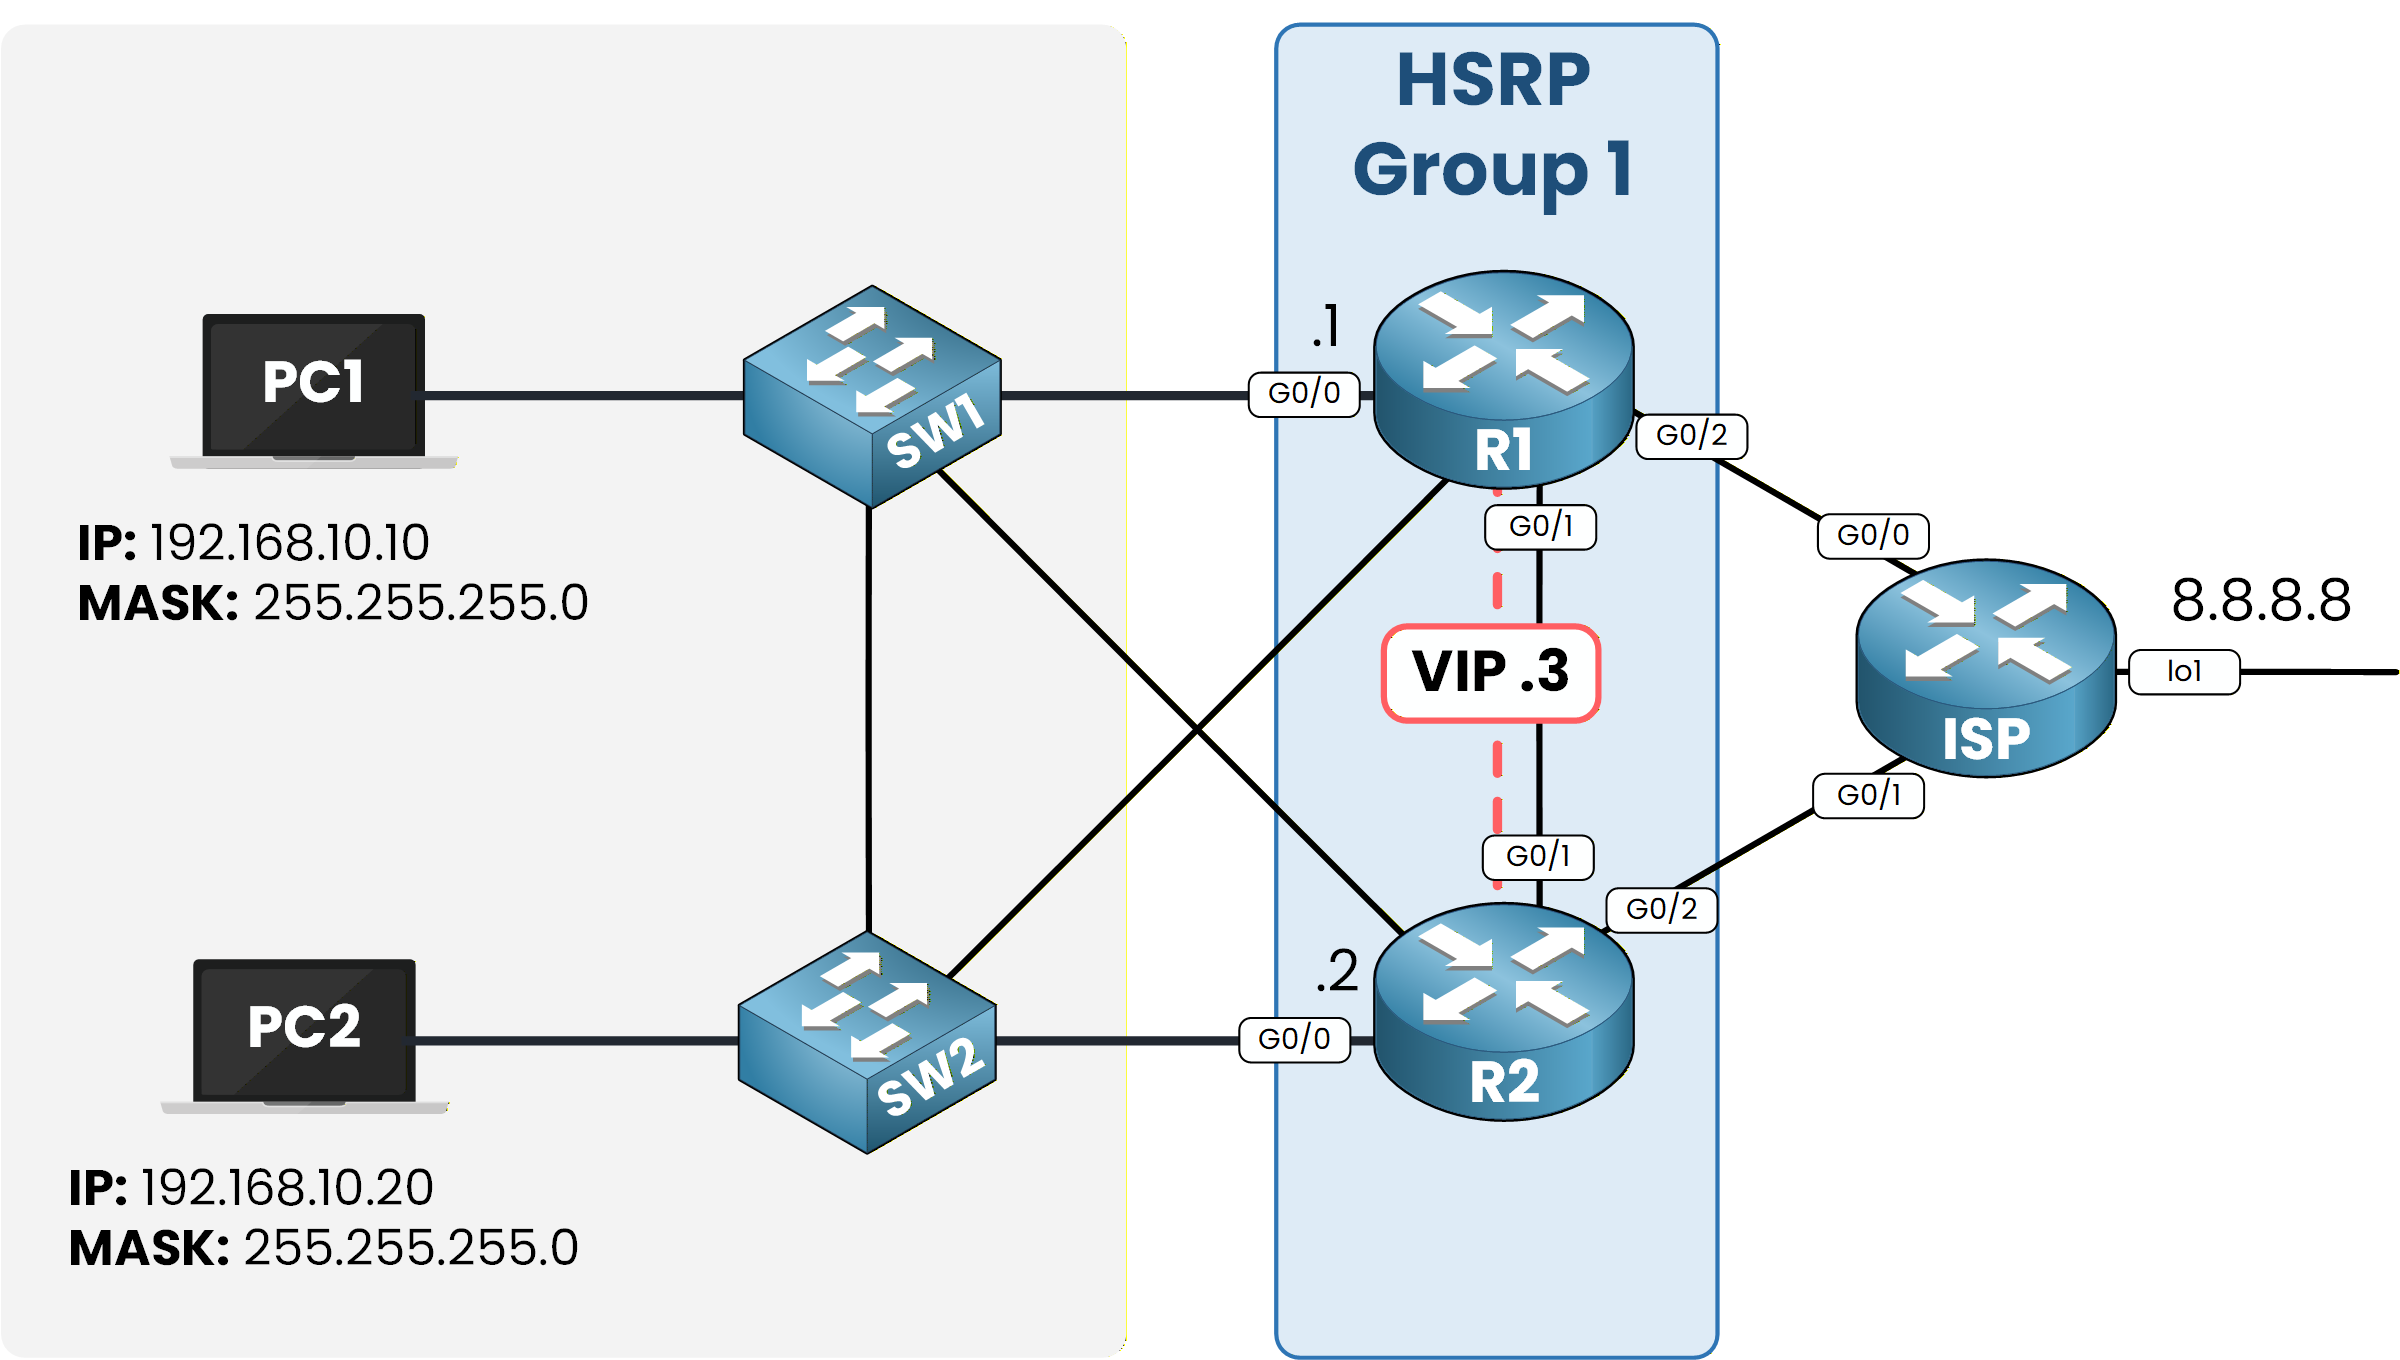
Figure 4 – HSRP Group 1 configuration overview
The
show standbycommand is very useful because it allows us to see the state of each HSRP group in detail.
Let’s check the configuration on R1:R1# show standby GigabitEthernet0/0 - Group 1 (version 2) State is Active 5 state changes, last state change 00:06:08 Virtual IP address is 192.168.10.3 Active virtual MAC address is 0000.0C9F.F001 Local virtual MAC address is 0000.0C9F.F001 (v2 default) Hello time 3 sec, hold time 10 sec Next hello sent in 1.979 secs Preemption enabled Active router is local Standby router is 192.168.10.2, priority 90 (expires in 6 sec) Priority 110 (configured 110) Group name is hsrp-Gig0/0-1 (default)Here, R1 clearly shows itself as the Active router, with R2 as the Standby router.
We can also see the configured priority value that determines the election result.40 % Complete: you’re making great progress
Unlock the rest of this lesson
If you’d like to continue your CCNA journey, simply create your free account.
Access all CCNA lessons
Practice with hands-on labs
Train with Practice exams and Quizzes
Progress tracking in your dashboard
Made by network engineers - CCNP certified
2928 learners globally