In this lab, you'll learn to set up Dynamic NAT (Network Address Translation) on a router. This allows internal devices to share a pool of public IP addresses when they connect to external networks.
Dynamic NAT is a crucial topic for CCNA. It enables several inside hosts to use a pool of public IPs. This setup avoids the need for a fixed one-to-one mapping.
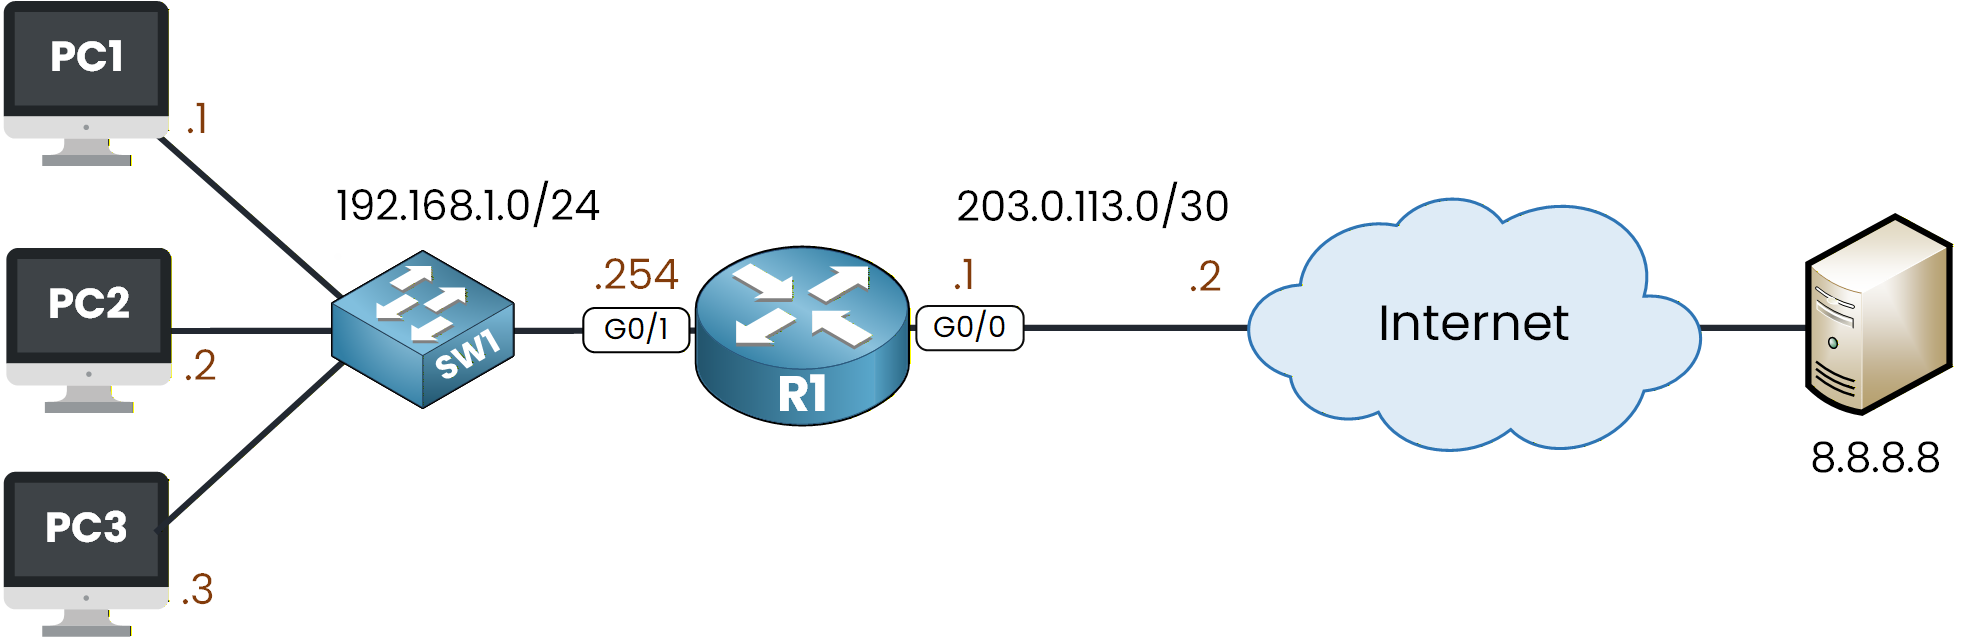
Figure 1 - Dynamic NAT Configuration Lab
This lab will help you configure, verify, and test Dynamic NAT. You'll gain a clear understanding of how the translation process works.
How to Begin
Before starting, download the lab file using the button at the top of the page.
All IP addressing is already configured in the topology, so you can focus entirely on the Dynamic NAT configuration.Lab Overview
Here’s the structure we will follow throughout this lab:
Step 1 – Configure Dynamic NAT
Step 2 – Test Dynamic NAT Behavior
Step 3 – Observe and Reset the NAT TranslationsLet’s get started!
Answer the question below
The first thing we need to do when configuring Dynamic NAT is to define the inside and outside interfaces.
In your network topology, this is very simple:Interface G0/1 is connected to the inside network.
Interface G0/0 is connected to the outside network.
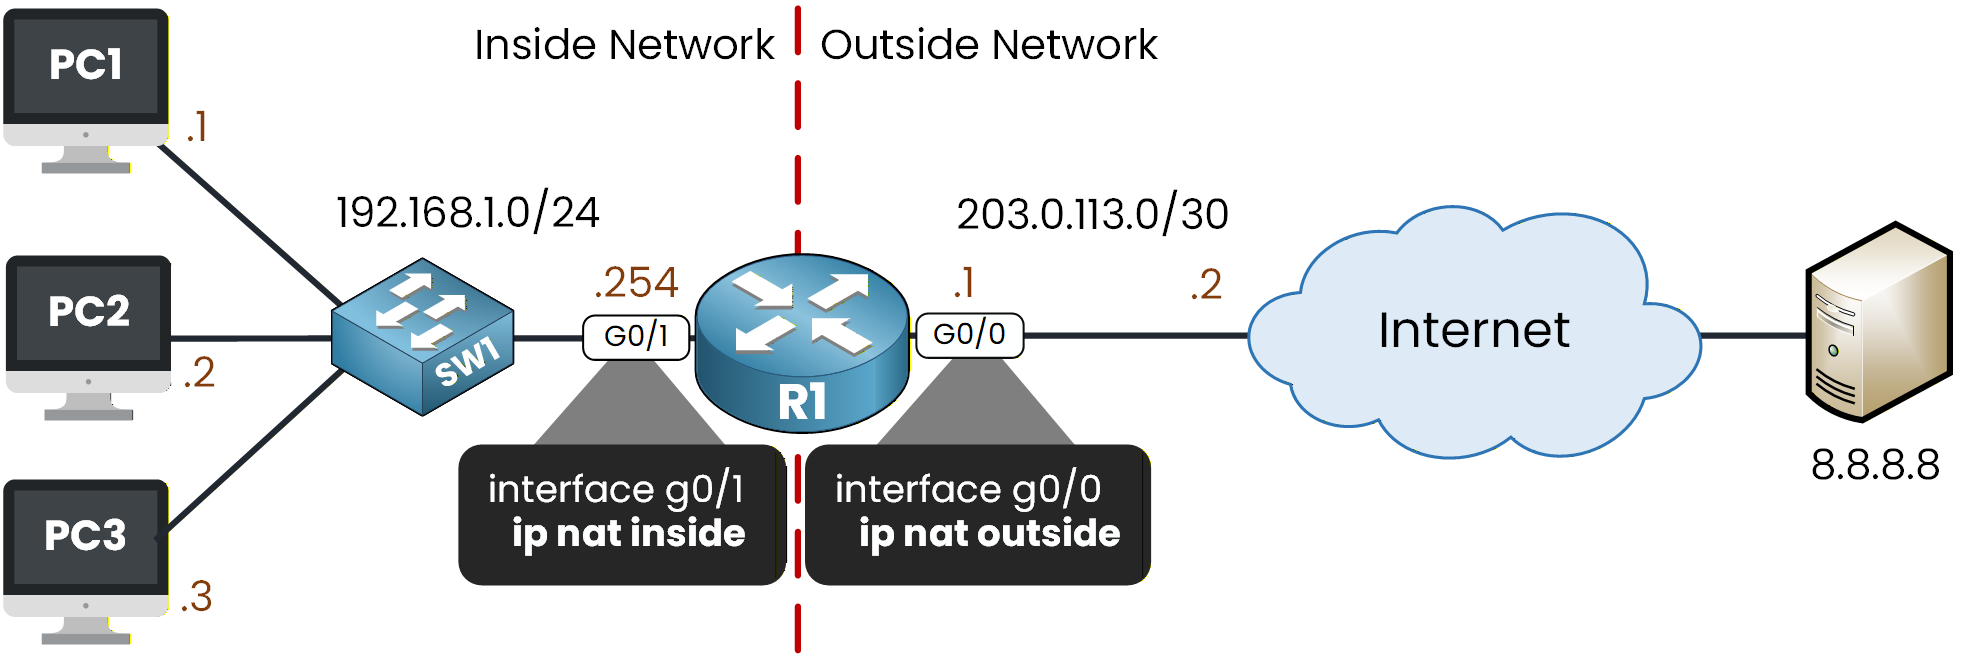
Figure 2 - NAT Inside and NAT Outside Commands
In Figure 2, we set ip nat inside and ip nat outside. This allows NAT to identify the boundary between the internal and external networks.
Configure NAT Roles on the Interfaces
From global configuration mode, apply the following commands:
R1# conf t
Enter configuration commands, one per line.  End with CNTL/Z.
R1(config)# interface g0/1
R1(config-if)# ip nat inside
R1(config-if)# exit

R1(config)# interface g0/0
R1(config-if)# ip nat outside
R1(config-if)# exit
Now that the NAT roles are configured, this is the moment to start the Dynamic NAT setup.
Dynamic NAT allows you to create a pool of public addresses that internal hosts can use when they need to reach external networks.
Before we create the pool, we must first identify which inside hosts are allowed to use it.To do that, we use a standard ACL. In our case, we want devices in the 192.168.1.0/24 network to be able to use the NAT pool.
Define the Inside Addresses Using an ACL
Let’s create a standard ACL named LOCAL_HOSTS:
R1(config)# ip access-list standard LOCAL_HOSTS
R1(config-std-nacl)# permit 192.168.1.0 0.0.0.255
R1(config-std-nacl)# exit
With the ACL created, we can now configure the NAT pool.
Create the Dynamic NAT Pool
The command used to create a NAT pool offers several options, so let’s walk through them together:
R1(config)# ip nat ?
  inside   Inside address translation
  outside  Outside address translation
  pool     Define pool of addresses

R1(config)# ip nat pool ?
  WORD  Pool name
First, we need to give a name to the NAT pool, in this example, we will use PUBLIC_POOL.
Then we must specify the first IP address of the pool, the last IP address, and finally the subnet mask.
In this lab, we will use a small range of public addresses from the 50.0.0.0/24 network.R1(config)# ip nat pool PUBLIC_POOL ? A.B.C.D Start IP address R1(config)# ip nat pool PUBLIC_POOL 50.0.0.1 ? A.B.C.D End IP address R1(config)# ip nat pool PUBLIC_POOL 50.0.0.1 50.0.0.3 ? netmask Specify the network mask R1(config)# ip nat pool PUBLIC_POOL 50.0.0.1 50.0.0.3 netmask ? A.B.C.D Network mask R1(config)# ip nat pool PUBLIC_POOL 50.0.0.1 50.0.0.3 netmask 255.255.255.0Now that the ACL shows which inside hosts can use Dynamic NAT, we need to connect it to the NAT pool.
This way, the router knows which devices can access the public addresses.Link the ACL to the Pool
To do this, we start by exploring the available options under the
ip nat inside sourcecommand:R1(config)# ip nat inside ? source Source address translation R1(config)# ip nat inside source ? list Specify access list describing local addresses static Specify static local->global mappingWe select a list to attach our ACL, specify LOCAL_HOSTS, and then choose a pool to reference our NAT pool.
R1(config)# ip nat inside source list ?
  <1-199>  Access list number for local addresses
  WORD     Access list name for local addresses

R1(config)# ip nat inside source list LOCAL_HOSTS ?
  interface  Specify interface for global address
  pool       Name pool of global addresses

R1(config)# ip nat inside source list LOCAL_HOSTS pool PUBLIC_POOL
R1(config)# exit
And with that, the Dynamic NAT configuration is complete.
40 % Complete: you’re making great progress
Unlock the rest of this lesson
If you’d like to continue your CCNA journey, simply create your free account.
Access all CCNA lessons
Practice with hands-on labs
Train with Practice exams and Quizzes
Progress tracking in your dashboard
Made by network engineers - CCNP certified
learners globally