In this lab, you will configure DNS settings on a small network to allow local hosts to access internet services (such as YouTube) using domain names instead of IP addresses.
For this exercise, we will only use IPv4, which is more than sufficient for CCNA-level training.
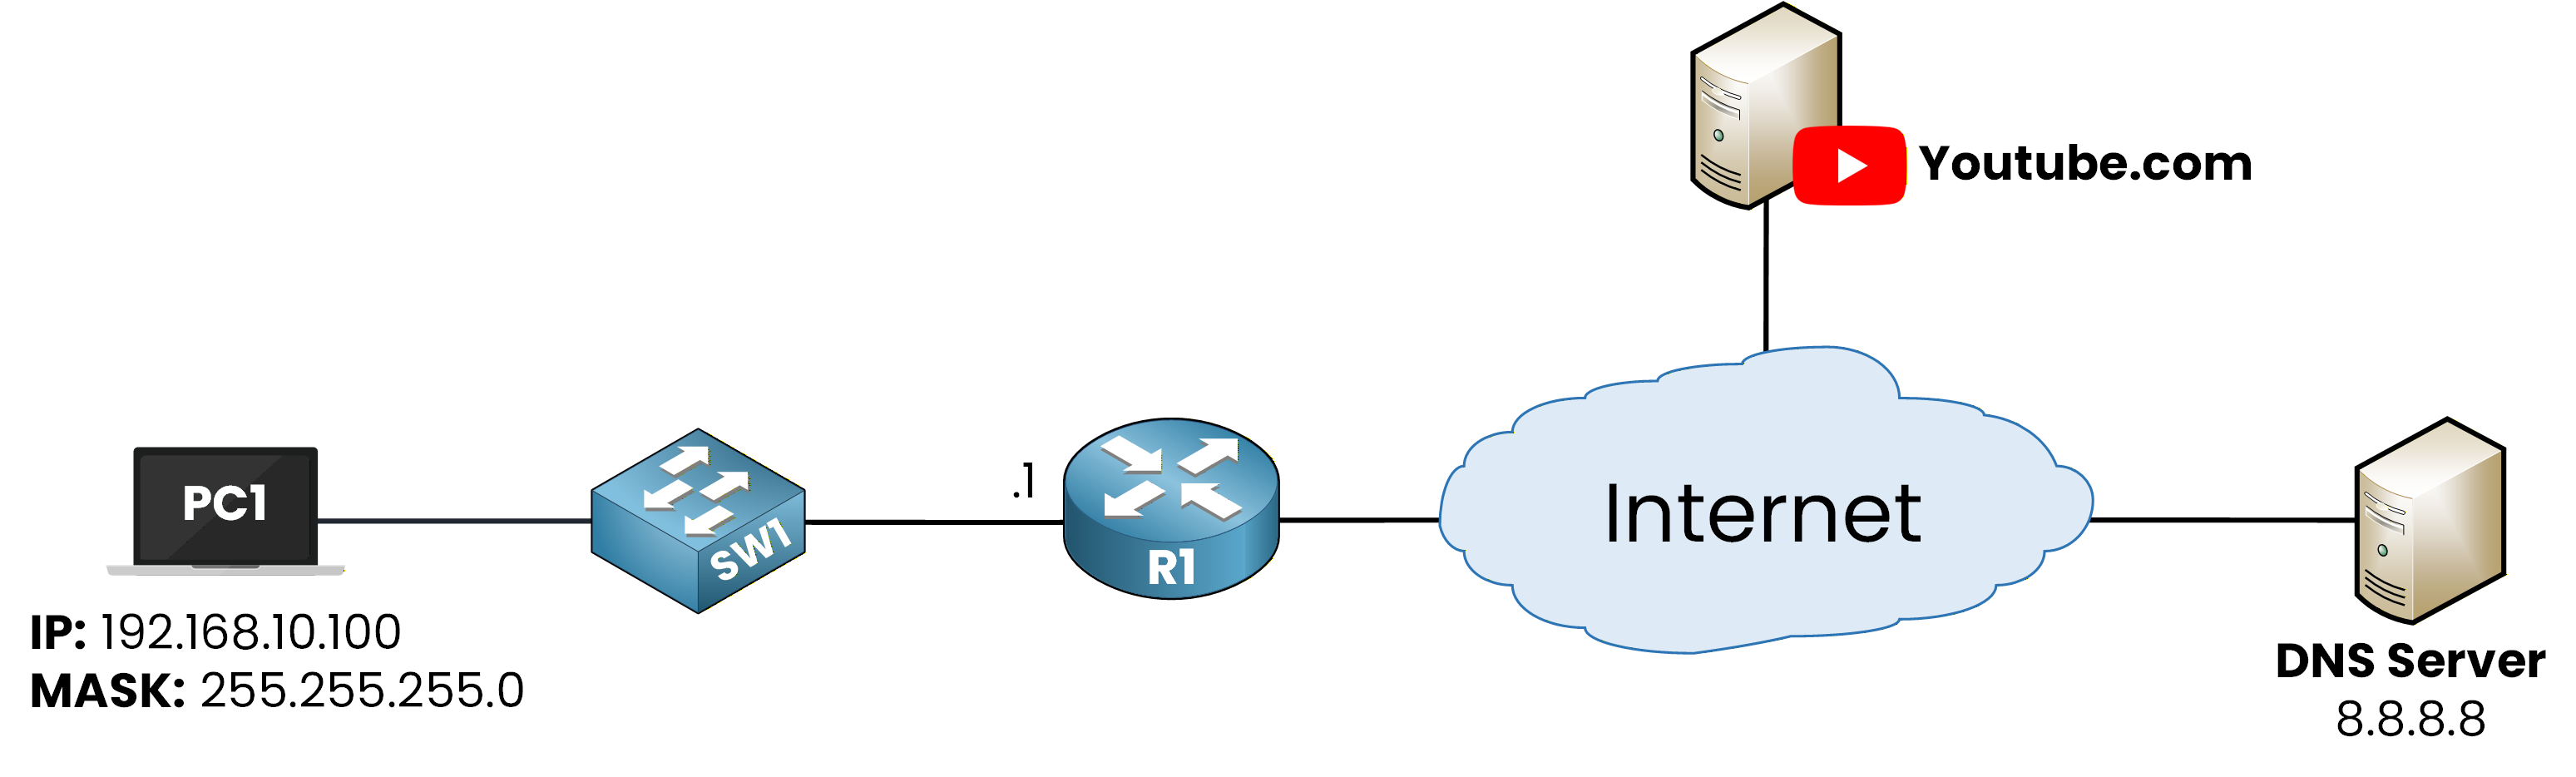
Figure 1 - DNS Configuration Lab Topology
How to Begin
Before starting, download the lab file using the button at the top of the page.
All interfaces and IP addresses in the topology are already configured, so you can focus entirely on the DNS tasks you need to master.Lab Overview
You will follow the steps below to configure and verify DNS connectivity:
Step 1 – Configure DNS Settings on PC1
Step 2 – Verify DNS Configuration Using ipconfig /all
Step 3 – Configure the Default Route on R1
Step 4 – Test DNS Resolution with a Ping to youtube.com
Step 5 – Perform a DNS Lookup Using nslookup
Step 6 – Configure DNS Settings on Router R1
Let’s get started!
Answer the question below
The first step of this lab is to access PC1 and configure its DNS server to use 8.8.8.8.
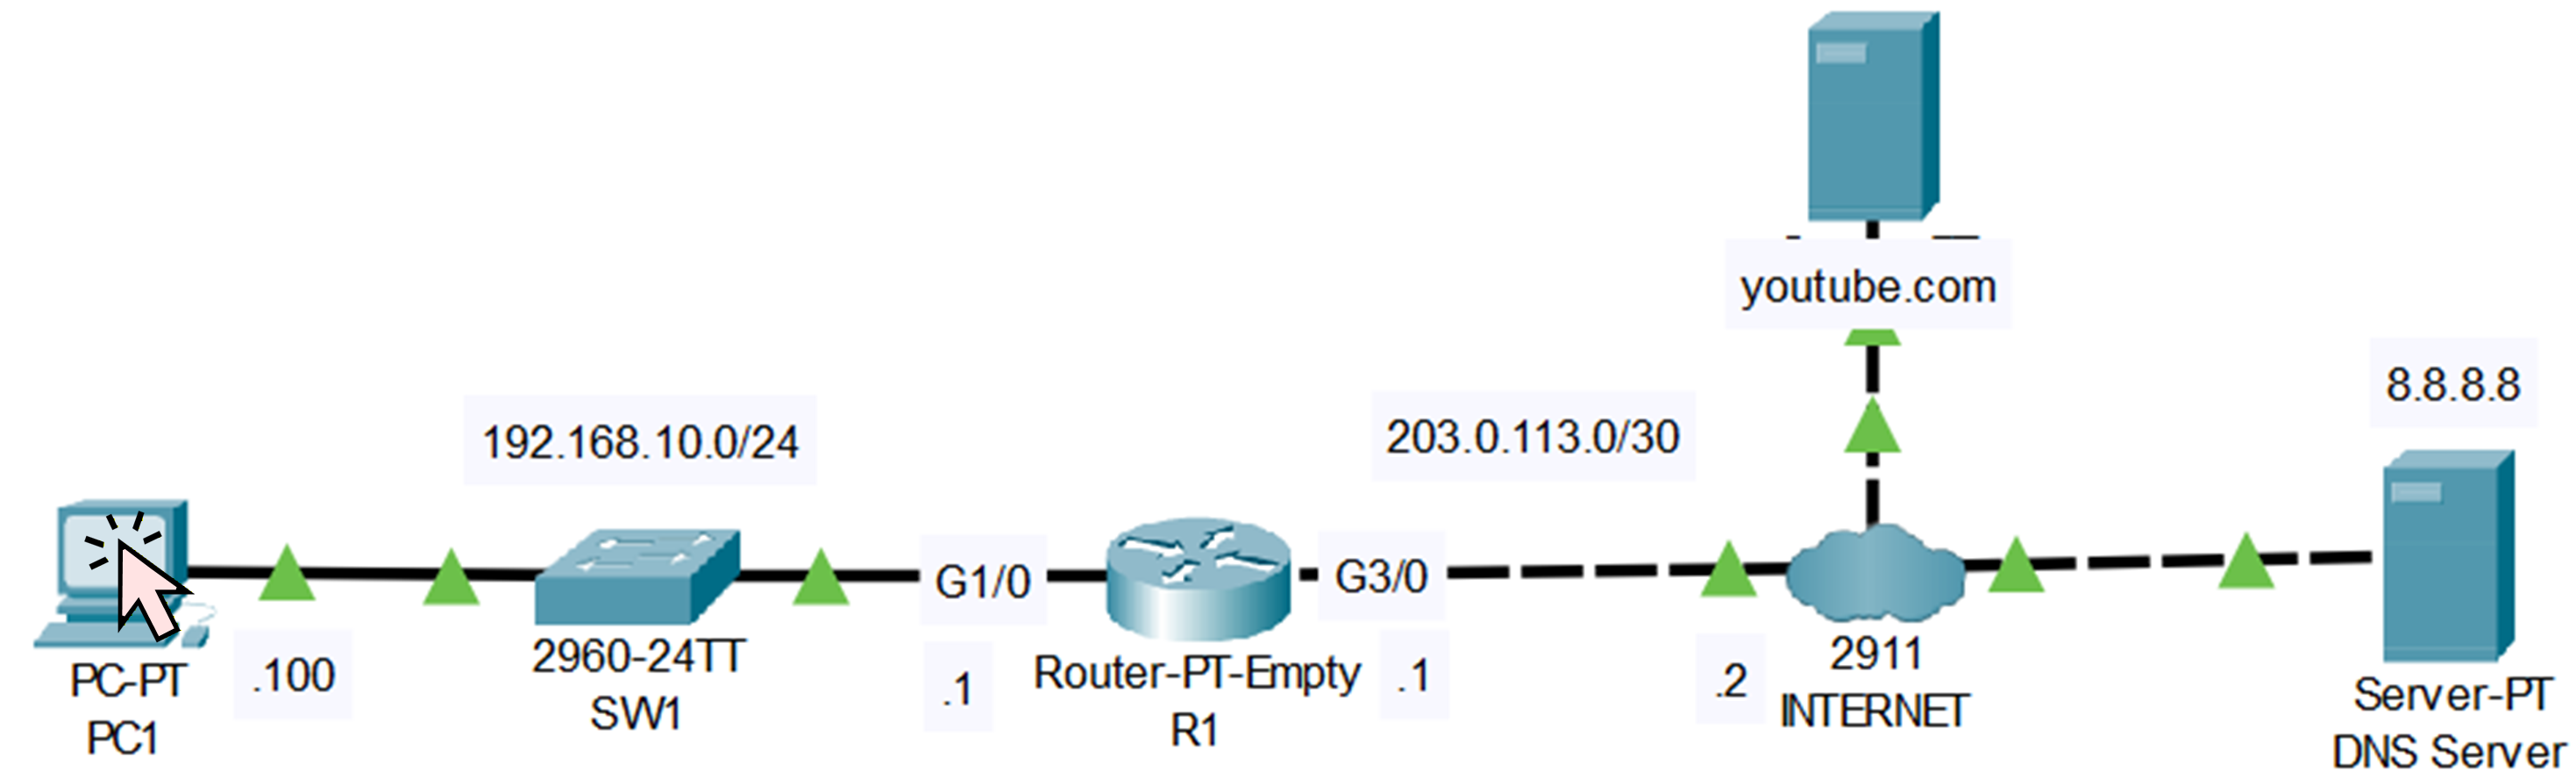
Figure 2 - Click on the PC1
Click on the PC1 icon in the topology. Once the window opens, go to the Desktop tab and select IP Configuration, highlighted in orange.

Figure 3 - Open IP Configuration Menu
In the IP Configuration window, you will see a field labeled DNS Server.
Enter the DNS server address we want to use: 8.8.8.8.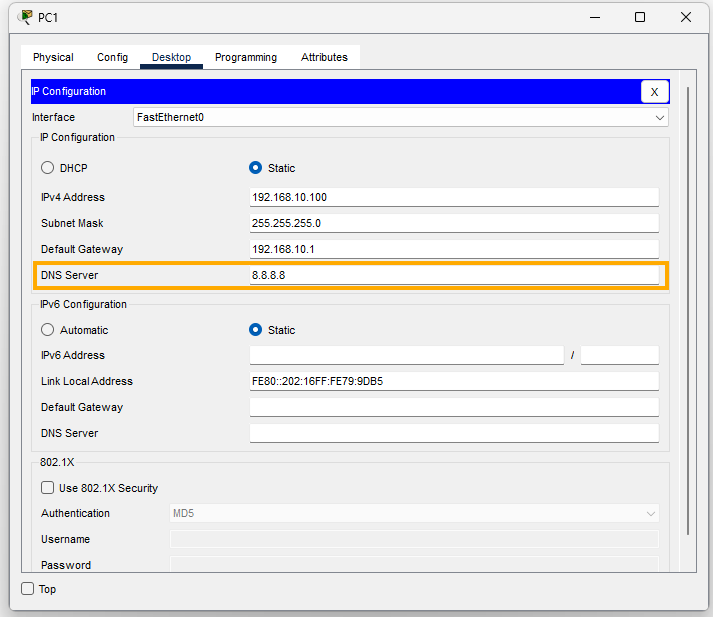
Figure 4 - Configure the DNS Server
Once this is done, the DNS configuration on PC1 is complete.
In the next step, we will verify that the DNS server has been correctly applied.Answer the question below
What DNS server address must you configure on PC1?
Now that the DNS server has been configured on PC1, we will verify that the settings were correctly applied.
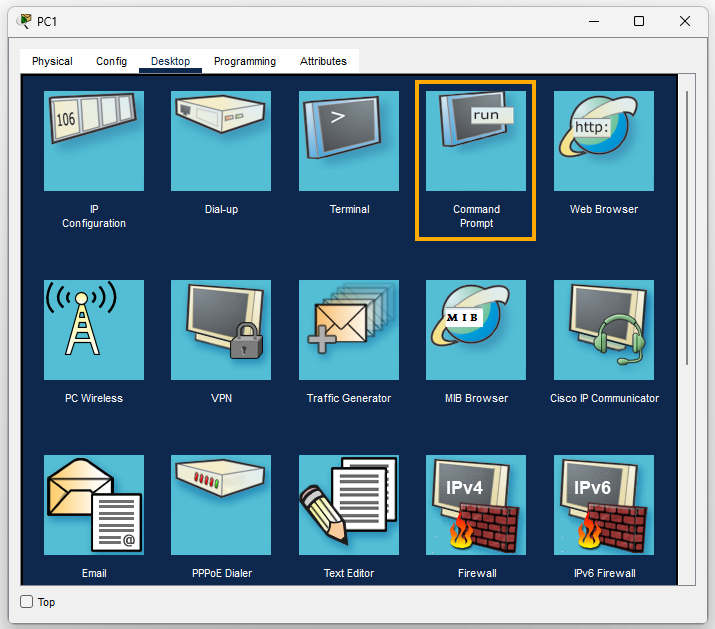
Figure 5 - Open the Command Prompt
Go back to the Desktop menu on PC1 and open the Command Prompt (highlighted in orange).
This will allow us to check the network configuration of the device.Once the command prompt is open, use the following command to display all network details:
C:\> ipconfig /all

FastEthernet0 Connection:(default port)

   Connection-specific DNS Suffix..:
   Physical Address................: 0002.1679.9DB5
   Link-local IPv6 Address.........: FE80::202:16FF:FE79:9DB5
   IPv6 Address....................: ::
   IPv4 Address....................: 192.168.10.100
   Subnet Mask.....................: 255.255.255.0
   Default Gateway.................: ::
                                     192.168.10.1
   DHCP Servers....................: 0.0.0.0
   DHCPv6 IAID.....................:
   DHCPv6 Client DUID..............: 00-01-00-01-5E-0D-13-E2-00-02-16-79-9D-B5
   DNS Servers.....................: ::
                                     8.8.8.8
At the bottom of the output, you can see the DNS Servers field.
The address 8.8.8.8 confirms that the DNS configuration was applied correctly.Everything looks good, we can continue with the lab.
Answer the question below
Which command allows you to verify the DNS server configured on PC1?
Before we can verify whether PC1 is able to use the DNS server, we must ensure that the router (R1) can reach the internet.
If you look at the topology, you can see that R1 is connected to an external network.40 % Complete: you’re making great progress
Unlock the rest of this lesson
If you’d like to continue your CCNA journey, simply create your free account.
Access all CCNA lessons
Practice with hands-on labs
Train with Practice exams and Quizzes
Progress tracking in your dashboard
Made by network engineers - CCNP certified
learners globally