In this lab, you learn how to navigate the Cisco IOS command-line interface and use it efficiently.
You will work directly inside Packet Tracer, interacting with a Cisco switch step by step.
Figure 1 – Network Topology
This is the topology used for the lab: a simple setup with one switch and one PC to keep the focus on the CLI itself.
How to Begin
Download the Packet Tracer file at the top of the page and open it.
The topology is already prepared, your goal is to explore the Cisco CLI and configure the device step by step.Lab Overview
Here is the structure we will follow:
Step 1 – Access the CLI
Step 2 – Explore the CLI Help System
Step 3 – Configure the Switch Hostname
Step 4 – Configure an Interface
Step 5 – Save the Configuration
Step 6 – Verify Your Work and fix incorrect settings
I will guide you through each step and help you practise, so...
Let's begin!
Answer the question below
To begin the lab, click on the switch in Packet Tracer to open the device window.
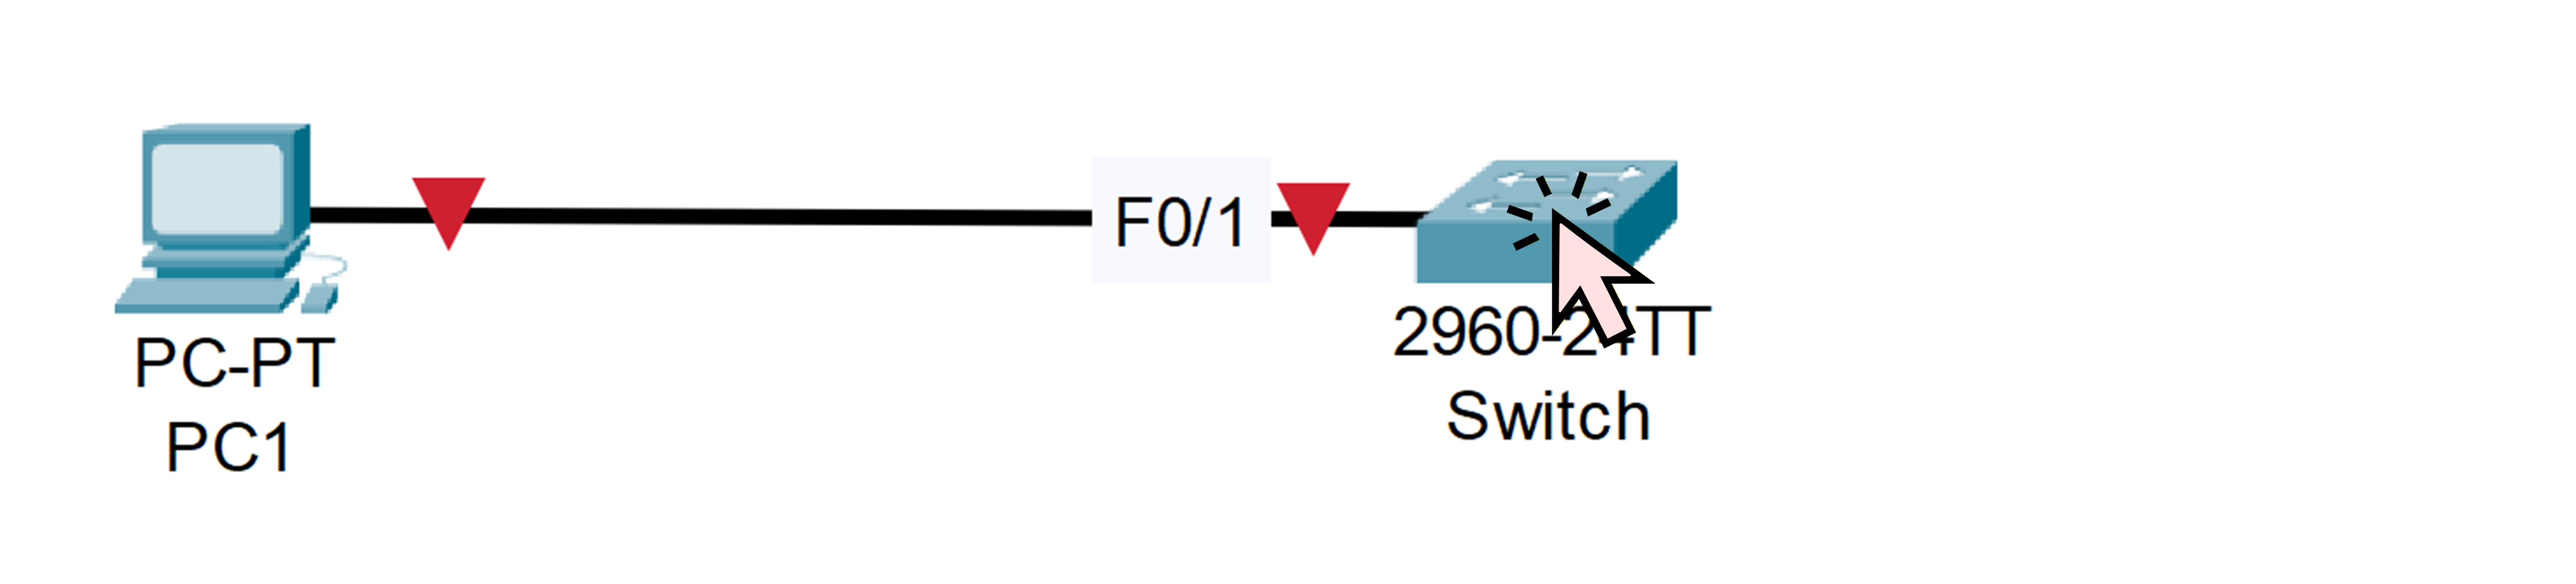
Figure 2 - Click on the Cisco Switch
Once the device window is open, you can access the CLI by selecting the CLI tab.
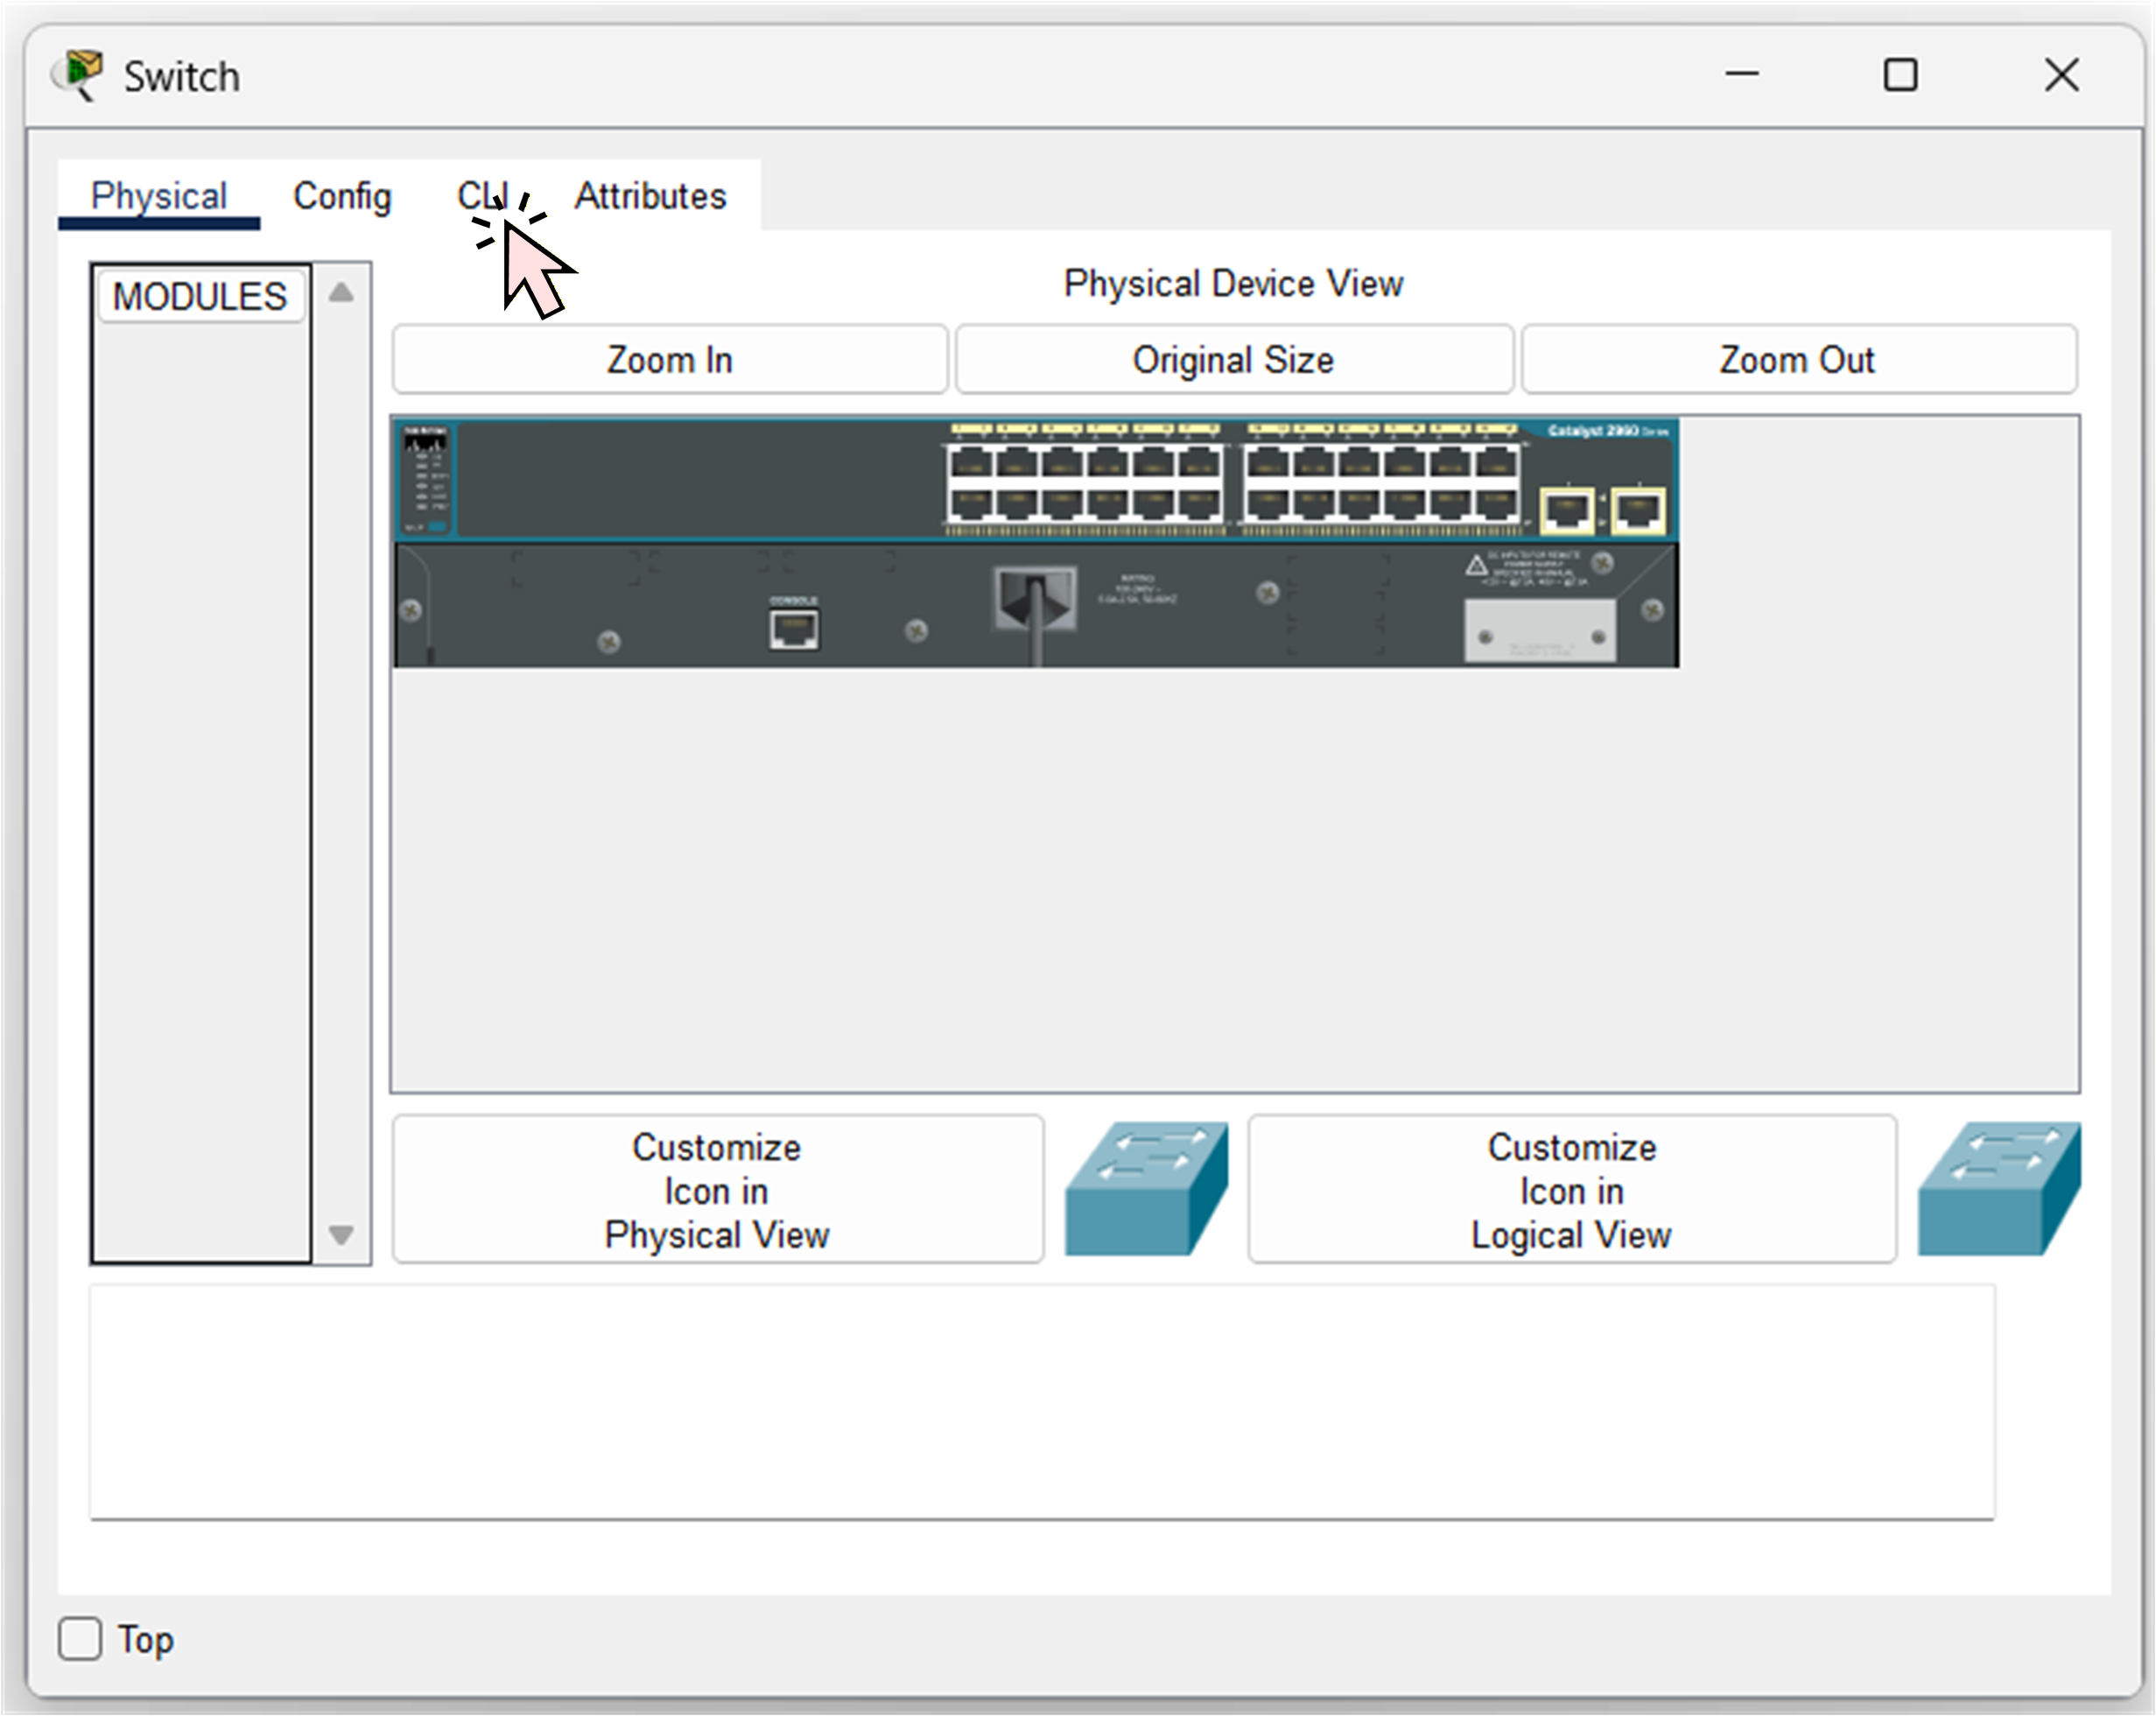
Figure 3 - Click on the CLI
You will now see the Cisco IOS prompt:
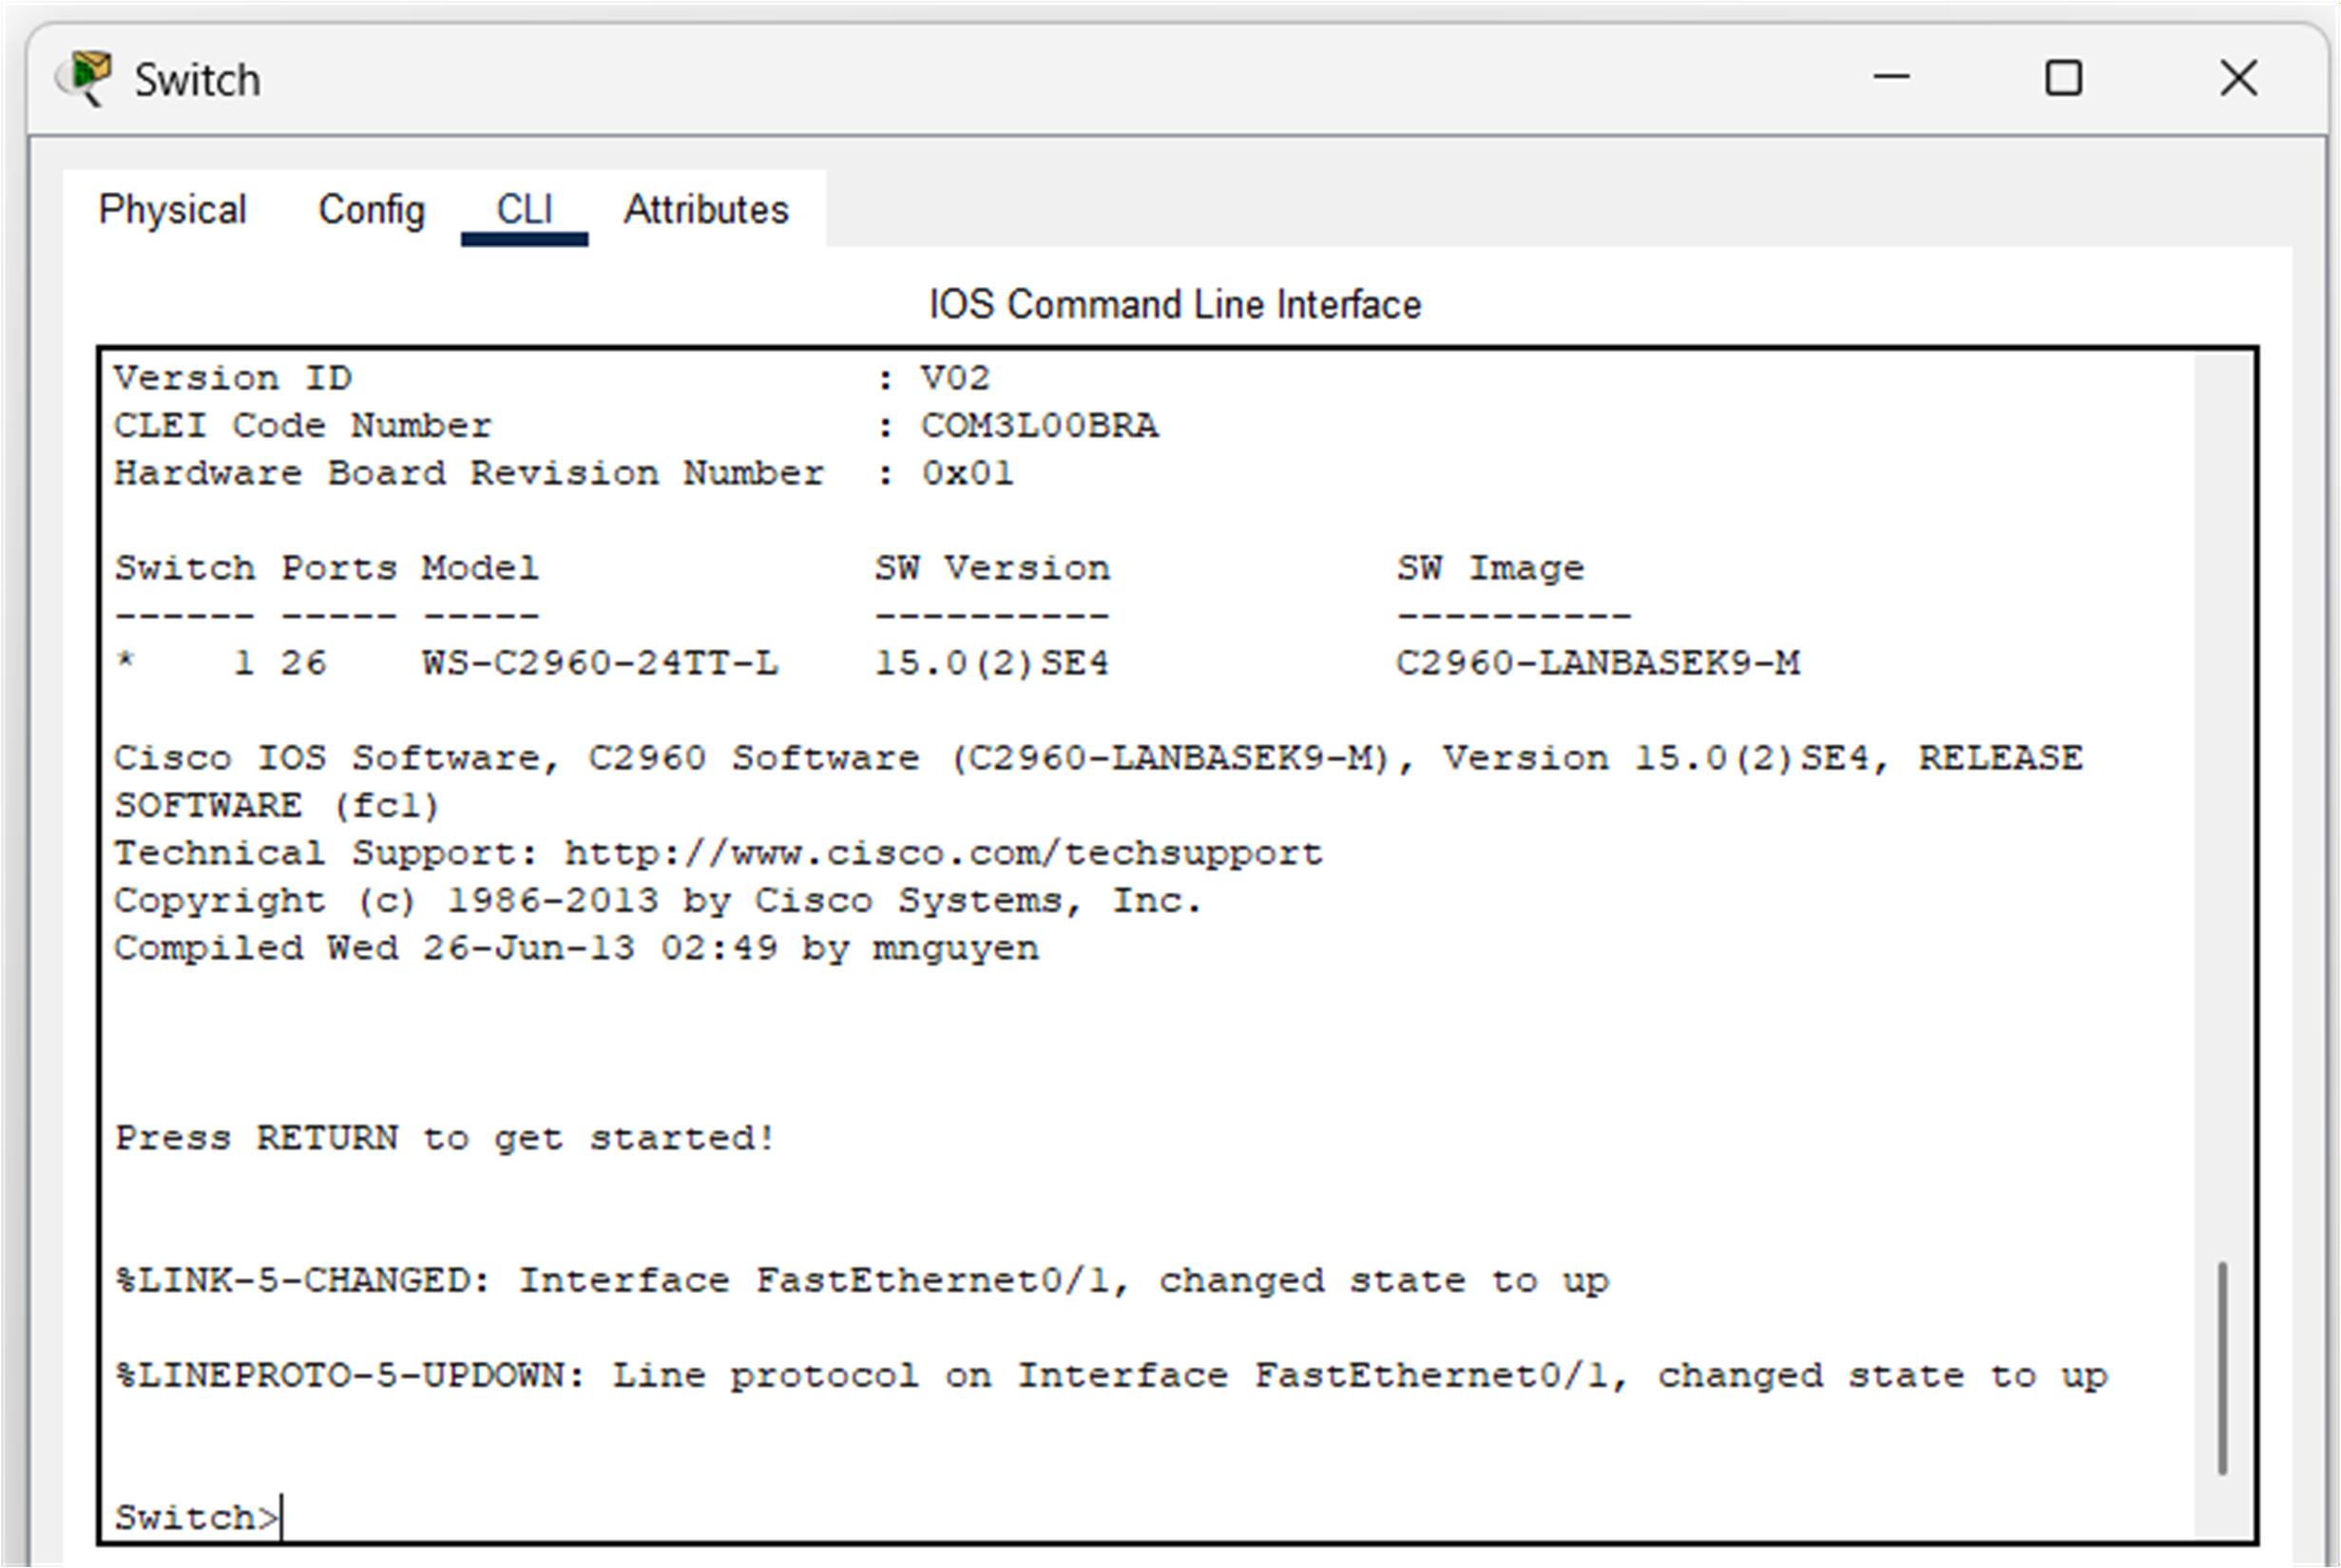
Figure 4 - Cisco CLI
Now we can explore the different CLI modes together.
User EXEC Mode
By default, you start in User EXEC mode.
Switch>In this mode, you can only run basic monitoring commands.
No configuration is allowed here.Let’s move on to the next mode.
Privileged EXEC Mode
You can enter Privileged EXEC mode by using the
enablecommand:Switch> enable Password:As you may have notice a password is needed to pass.
This switch already has an enabled password configured. You must enter the password: cisco.If the password is correct, the prompt changes to:
Switch#You can recognize the Privileged EXEC Mode by the
#symbol.
Here, you can run powerful informational commands such asshow ip interface brief,show vlan, orshow running-config.Next, let’s see how to start configuring the device.
To do this, we need to enter Global Configuration mode.Global Configuration Mode
Use the
configure terminalcommand to access configuration mode:Switch# configure terminal Enter configuration commands, one per line. End with CNTL/Z. Switch(config)#You can recognize this mode by the
(config)#prompt.
This mode allows you to configure the device, which is where it gets interesting.mais avant de tous configurer! Il faut que tu pratiques les aides du cli ça t'aidera grandement quand tu vas configurer.
Exit the Global Configuration Mode
Pour qu'on regarde les cli help system on va quitter le global config mode et revenir au privilege exec mode
Switch(config)# exit
Switch#
Parfait allons au prochain step maintenant
Answer the question below
Cisco IOS provides several built-in helpers that guide you while typing commands.
The Question Mark (?)
The
?keyword shows you a list of the available commands in the current mode.Switch# ? Exec commands: clear Reset functions clock Manage the system clock configure Enter configuration mode connect Open a terminal connection copy Copy from one file to another debug Debugging functions (see also 'undebug') delete Delete a file dir List files on a filesystem disable Turn off privileged commands disconnect Disconnect an existing network connection enable Turn on privileged commands erase Erase a filesystem exit Exit from the EXEC // OUTPUT OMITTED FOR BREVETYTry exploring deeper levels. If we take the command
showand add the keyword?, we can see the commands after the show command.Switch# show ? aaa Show AAA values access-lists List access lists arp Arp table boot show boot attributes cdp CDP information clock Display the system clock crypto Encryption module dhcp Dynamic Host Configuration Protocol status dtp DTP information etherchannel EtherChannel information // OUTPUT OMITTED FOR BREVETYIOS always tells you what the next possible keyword is.
Switch# show ip ?
  access-lists  List access lists
  arp           IP ARP table
  dhcp          Show items in the DHCP database
  interface     IP interface status and configuration
  ssh           Information on SSH
You will use this constantly when you’re unsure about a command.
Switch# show ip interface ?
  Vlan   Catalyst Vlans
  brief  Brief summary of IP status and configuration
  |      Output Modifiers
TAB Completion
Pressing the
Tabkey automatically completes a command when iOS can guess what you want to type.For example, you can write
confand then press Tab to complete the command. The CLI will then fill in the whole word, giving youconfigureSwitch# conf Switch# configureIf you type
configure terand press theTabkey, the command will be completed for you.Switch# configure ter Switch# configure terminal Enter configuration commands, one per line. End with CNTL/Z. Switch(config)#This saves time and prevents typing errors.
Command History (↑ / ↓)
To show you the history commands, we will return to the privileged exec mode.
Switch(config)# exit
Switch#
The CLI remembers the commands you typed earlier in the same mode.
↑ recalls recalls the previous command.
↓ moves forward in your history.
Try it and you will see commands that you have already typed before.
This is useful when verifying configurations or repeating similar commands.
Now that you know how to use these tools, let's continue configuring the switch.Answer the question below
Now that you know how to access configuration mode, you can apply your first real changes to the device.
Enter Global Configuration mode
We will begin by renaming the switch.
First, go into Global Configuration Mode.Switch# conf t Enter configuration commands, one per line. End with CNTL/Z. Switch(config)#You can use the
conf tcommand, which is a shortcut forconfiguration terminal.
This command is very well-known and will allow you to access configuration mode more quickly.Configure Hostname
Use the
hostnamecommand followed by the name you want the device to use.
In our case, we will name it SW1:Switch(config)# hostname SW1 SW1(config)#As soon as you press ENTER, the prompt will update to confirm that the hostname has been applied successfully.
Answer the question below
Our switch is connected to PC1 via FastEthernet0/1 (F0/1).
It is good practice to add a description to the interface, so that anyone reading the configuration can immediately understand what the port is used for.Enter interface configuration mode:
SW1(config)# interface f0/1
SW1(config-if)# description Connection to PC1
Great, the interface now has a clear and meaningful description!
Enable the Interface
We now need to enable the interface.
We can activate the port using theno shutdowncommand:SW1(config-if)# no shutdown SW1(config-if)# end SW1#You should immediately see messages indicating that the interface is now active.
%LINK-5-CHANGED: Interface FastEthernet0/1, changed state to up
%LINEPROTO-5-UPDOWN: Line protocol on Interface FastEthernet0/1, changed state to up
After a short while, the small icon next to the interface will turn green to confirm that the link is operational.
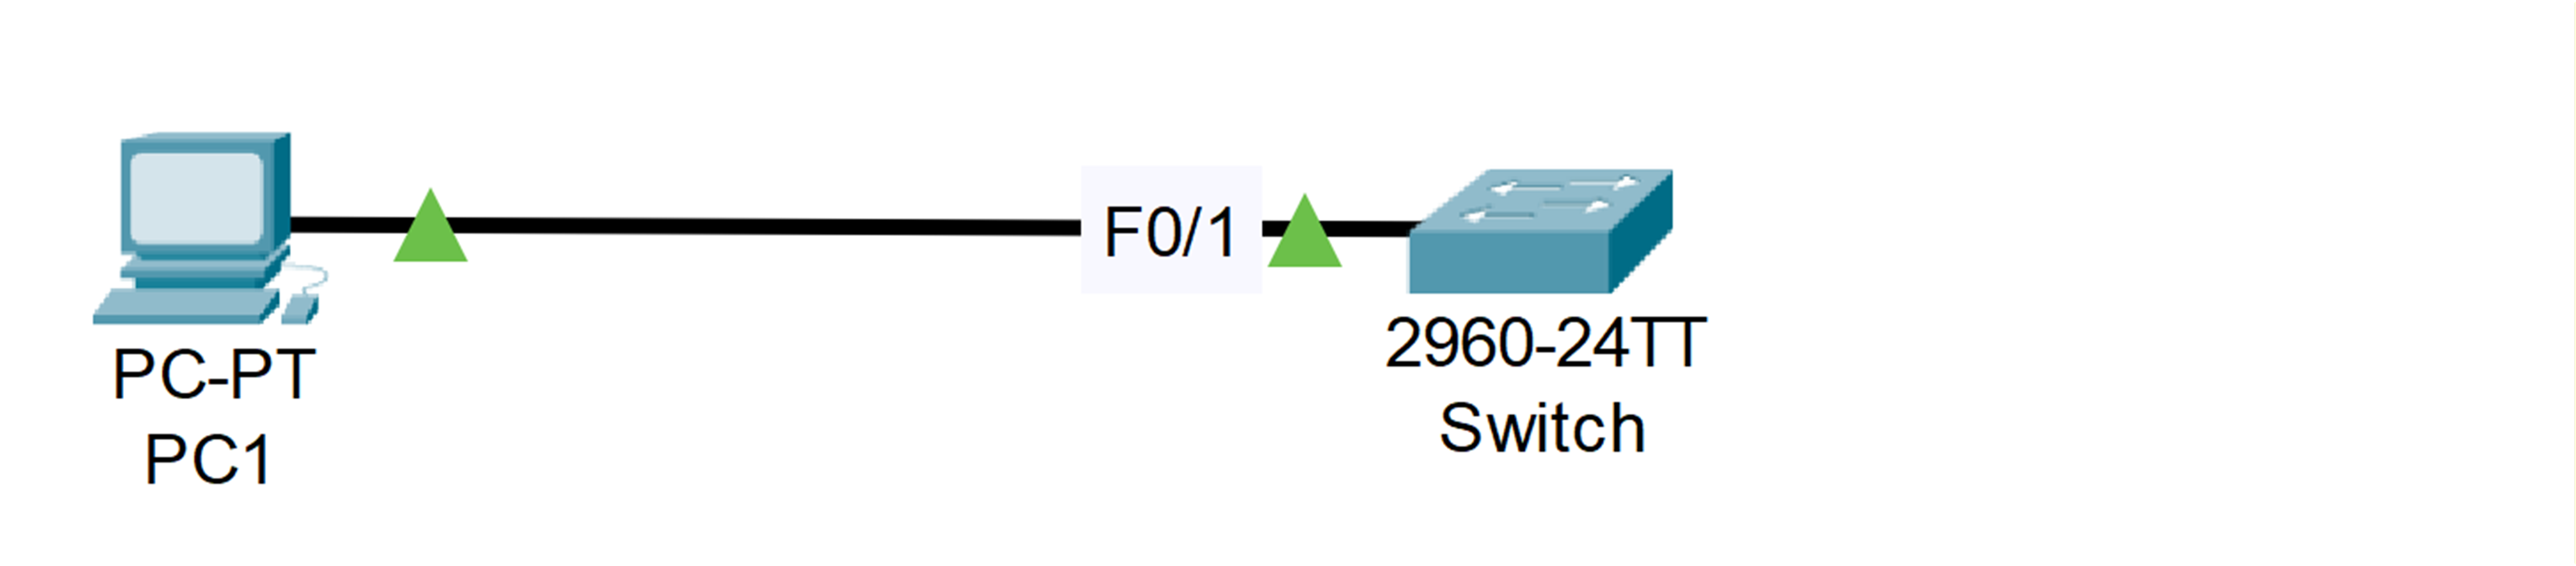
Figure 5 - Interface is UP (Green)
Now that you have practised entering your first configuration commands, I will show you how to save the configuration in the next step.
Answer the question below
Your switch is now correctly configured with a hostname and an active interface.
However, Cisco devices do not save the configuration automatically.
All of your work so far is stored in the running configuration, which will be lost if the device reloads.To make your work permanent, you must save it manually.
Use one of the commands below:
SW1# write memory
Building configuration...
[OK]
or:
SW1# copy running-config startup-config
Destination filename [startup-config]?
Building configuration...
[OK]
Your changes have now been safely stored in NVRAM and will be retained after a reboot.
Answer the question below
Let’s take a look at the running configuration.
As you already know, Cisco IOS doesn’t require you to type full commands. As long as your input is unambiguous, the device understands it.To display the running configuration, you could type the full command
show running-configuration.
But we’ll use the very common shortcutshow run, which does exactly the same thing.SW1# show run Building configuration... Current configuration : 1132 bytes ! version 15.0 no service timestamps log datetime msec no service timestamps debug datetime msec no service password-encryption ! hostname SW1 ! enable password cisco ! ! ! ! ! ! spanning-tree mode pvst spanning-tree extend system-id ! interface FastEthernet0/1 --More--Understanding the --More-- Prompt
You can now see a portion of the running configuration.
At the bottom, the--More--message indicates that the output is not finished yet.To continue displaying the configuration, you have two options.
Scrolling Line by Line (Enter)
If you press Enter, IOS shows one additional line:
interface FastEthernet0/1
 description Connection to PC1
 --More--
This moves slowly through the output, one line at a time.
Scrolling One Page at a Time (Space Bar)
To go faster, you can press the Space bar, which displays a full page at once:
interface FastEthernet0/1
 description Connection to PC1
!
interface FastEthernet0/2
!
interface FastEthernet0/3
!
interface FastEthernet0/4
!
interface FastEthernet0/5
!
interface FastEthernet0/6
!
interface FastEthernet0/7
!
interface FastEthernet0/8
!
interface FastEthernet0/9
!
interface FastEthernet0/10
!
interface FastEthernet0/11
!
interface FastEthernet0/12
 --More--
This allows you to scroll through the entire running configuration much more quickly.
Keep pressing the Space bar until you reach the end of the output, marked by the lineend.Reviewing the Running Configuration
SW1# show run
Building configuration...

Current configuration : 1132 bytes
!
version 15.0
no service timestamps log datetime msec
no service timestamps debug datetime msec
no service password-encryption
!
hostname SW1
!
enable password cisco
!
!
!
!
!
!
spanning-tree mode pvst
spanning-tree extend system-id
!
interface FastEthernet0/1
 description Connection to PC1
!
interface FastEthernet0/2
!
interface FastEthernet0/3
!
interface FastEthernet0/4
!
interface FastEthernet0/5
!
interface FastEthernet0/6
!
interface FastEthernet0/7
!
interface FastEthernet0/8
!
interface FastEthernet0/9
!
interface FastEthernet0/10
!
interface FastEthernet0/11
!
interface FastEthernet0/12
!
interface FastEthernet0/13
!
interface FastEthernet0/14
!
interface FastEthernet0/15
!
interface FastEthernet0/16
!
interface FastEthernet0/17
!
interface FastEthernet0/18
!
interface FastEthernet0/19
!
interface FastEthernet0/20
!
interface FastEthernet0/21
!
interface FastEthernet0/22
!
interface FastEthernet0/23
!
interface FastEthernet0/24
!
interface GigabitEthernet0/1
!
interface GigabitEthernet0/2
!
interface Vlan1
 no ip address
 shutdown
!
!
!
!
line con 0
!
line vty 0 4
 login
line vty 5 15
 login
!
!
!
!
end
As you can see, the running configuration now includes everything we configured earlier.
The hostname and the description on interface FastEthernet0/1 appear correctly.
However, one line stands out and should not be there:enable password ciscoUsing
enable passwordis not secure.
Because the password is stored in clear text, anyone who views the running configuration can read it directly. This is something we absolutely want to avoid.To fix this, we will remove the insecure password.
Removing the Insecure Password
Return to global configuration mode with
conf tand delete it:SW1# conf t Enter configuration commands, one per line. End with CNTL/Z. SW1(config)# no enable passwordNow we can configure a secure password that will not appear in plain text in the running configuration:
SW1(config)# enable secret PingMyNetwork-CCNA
SW1(config)# end
SW1#
%SYS-5-CONFIG_I: Configured from console by console
Verifying the New Encrypted Password
Let’s verify the result:
SW1# show run
Building configuration...

Current configuration : 1157 bytes
!
version 15.0
no service timestamps log datetime msec
no service timestamps debug datetime msec
no service password-encryption
!
hostname SW1
!
enable secret 5 $1$mERr$3scxFNdBMuOzwvk6yHQMA.
!
!
!
!
!
!
spanning-tree mode pvst
spanning-tree extend system-id
!
interface FastEthernet0/1
 --More--
Perfect, the password is no longer displayed in clear text.
Cisco IOS automatically encrypts the value ofenable secret, so the original password cannot be read from the configuration.You can press
Qto exit the output immediately without scrolling through the rest of the configuration.Finally, save your running configuration now that all changes have been applied:
SW1# write memory
Building configuration...
[OK]
Great job!
Answer the question below
Congratulations on completing the IOS Basics Lab!
You now know how to:navigate between IOS modes
use help, history, and shortcuts
configure basic switch settings
verify and save your work
remove incorrect configurations
These skills form the foundation for all upcoming CCNA labs, including VLANs, trunking, STP, DHCP, and routing.
Answer the question below