In this lab, you will configure DNS settings on a small network to allow local hosts to access internet services (such as YouTube) using domain names instead of IP addresses.
For this exercise, we will only use IPv4, which is more than sufficient for CCNA-level training.
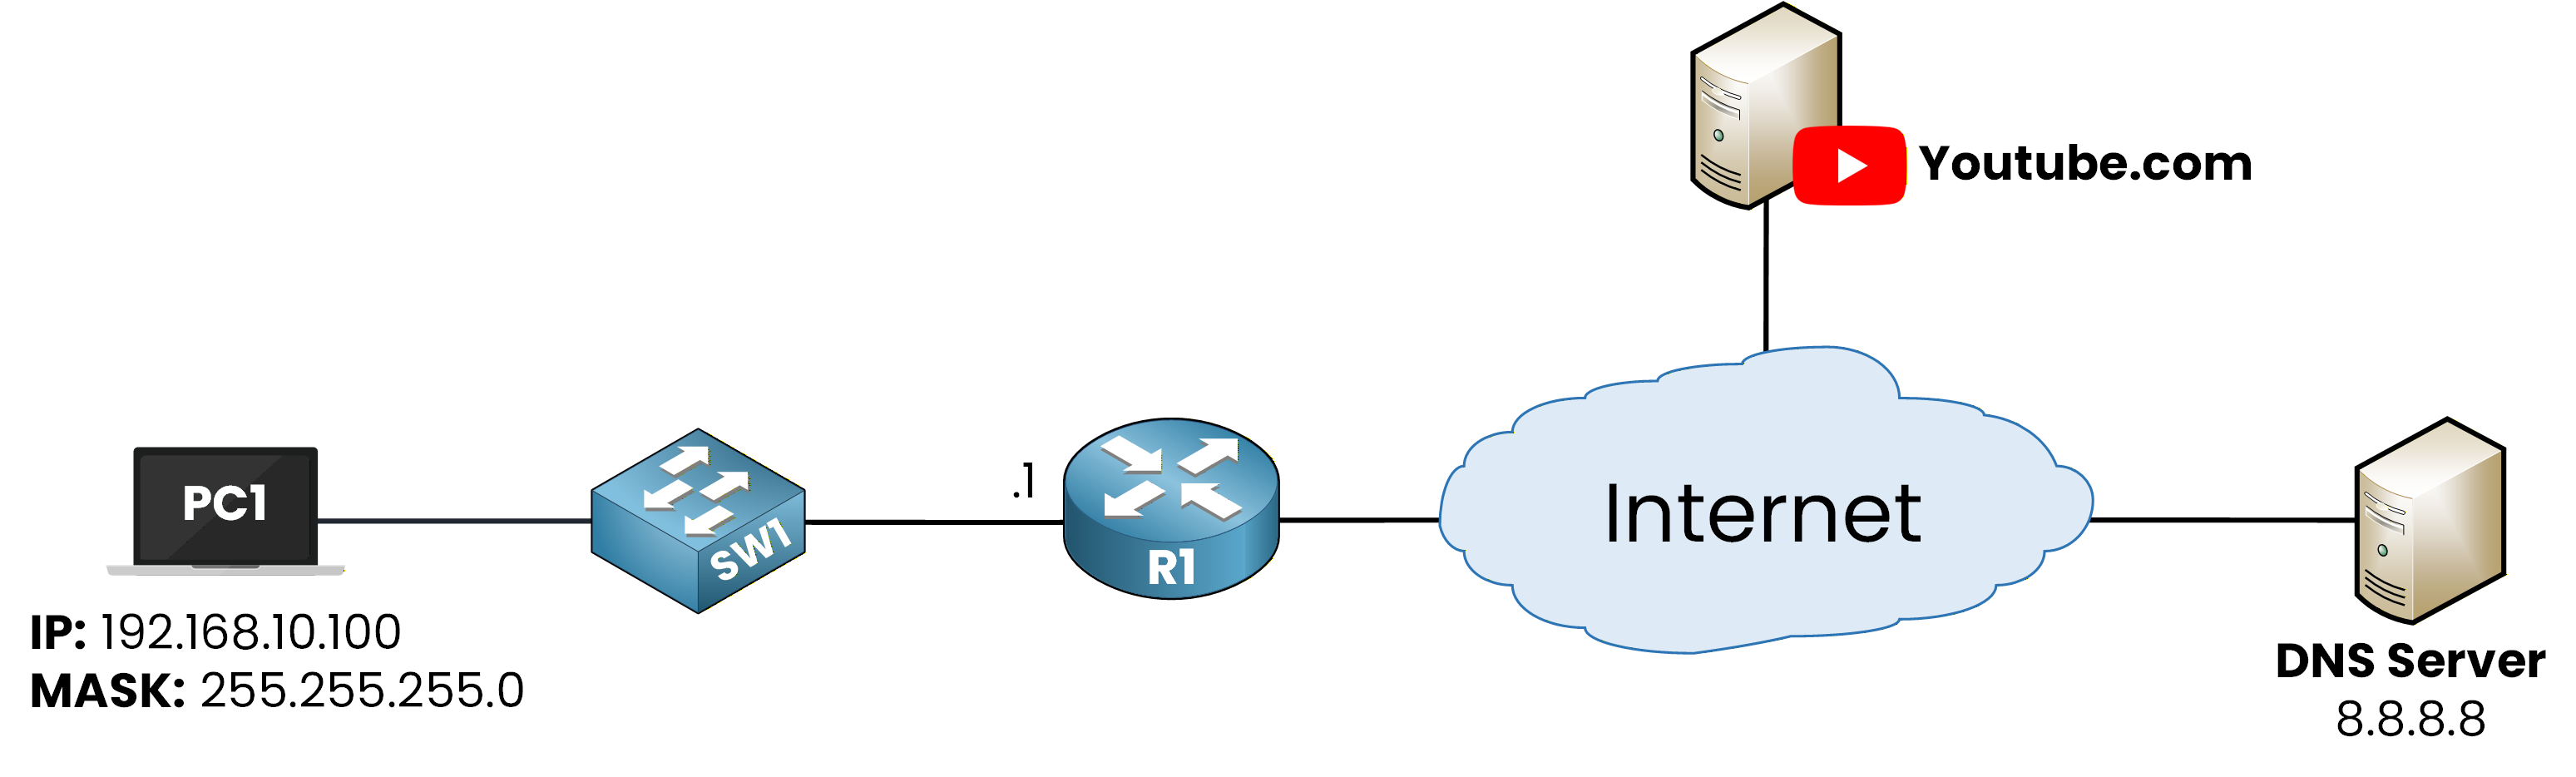
Figure 1 - DNS Configuration Lab Topology
How to Begin
The topology above is already set up for you, with all interfaces and IP addresses configured.
You can focus entirely on the DNS tasks and run every command directly in the integrated CLI below.Lab Overview
You will follow the steps below to configure and verify DNS connectivity:
Step 1 – Verify the DNS Configuration on PC1
Step 2 – Configure the Default Route on R1
Step 3 – Test DNS Resolution with a Ping to youtube.com
Step 4 – Perform a DNS Lookup Using nslookup
Step 5 – Configure DNS Settings on Router R1
Let’s get started!
Answer the question below
For this lab, we assume that PC1 has already been pre-configured to use the public DNS server 8.8.8.8 (Google’s public DNS).
Our first task is to verify that this DNS setting is indeed applied on PC1.From PC1’s command prompt, use the following command to display all network details:
C:\> ipconfig /all

FastEthernet0 Connection:(default port)

   Connection-specific DNS Suffix..:
   Physical Address................: 0002.1679.9DB5
   Link-local IPv6 Address.........: FE80::202:16FF:FE79:9DB5
   IPv6 Address....................: ::
   IPv4 Address....................: 192.168.10.100
   Subnet Mask.....................: 255.255.255.0
   Default Gateway.................: ::
                                     192.168.10.1
   DHCP Servers....................: 0.0.0.0
   DHCPv6 IAID.....................:
   DHCPv6 Client DUID..............: 00-01-00-01-5E-0D-13-E2-00-02-16-79-9D-B5
   DNS Servers.....................: ::
                                     8.8.8.8
At the bottom of the output, you can see the DNS Servers field.
The address 8.8.8.8 confirms that the DNS configuration is correctly applied on PC1.Everything looks good, we can continue with the lab.
Answer the question below
What DNS server address is configured on PC1?
Before we can verify whether PC1 is able to use the DNS server, we must ensure that the router (R1) can reach the internet.
If you look at the topology, you can see that R1 is connected to an external network.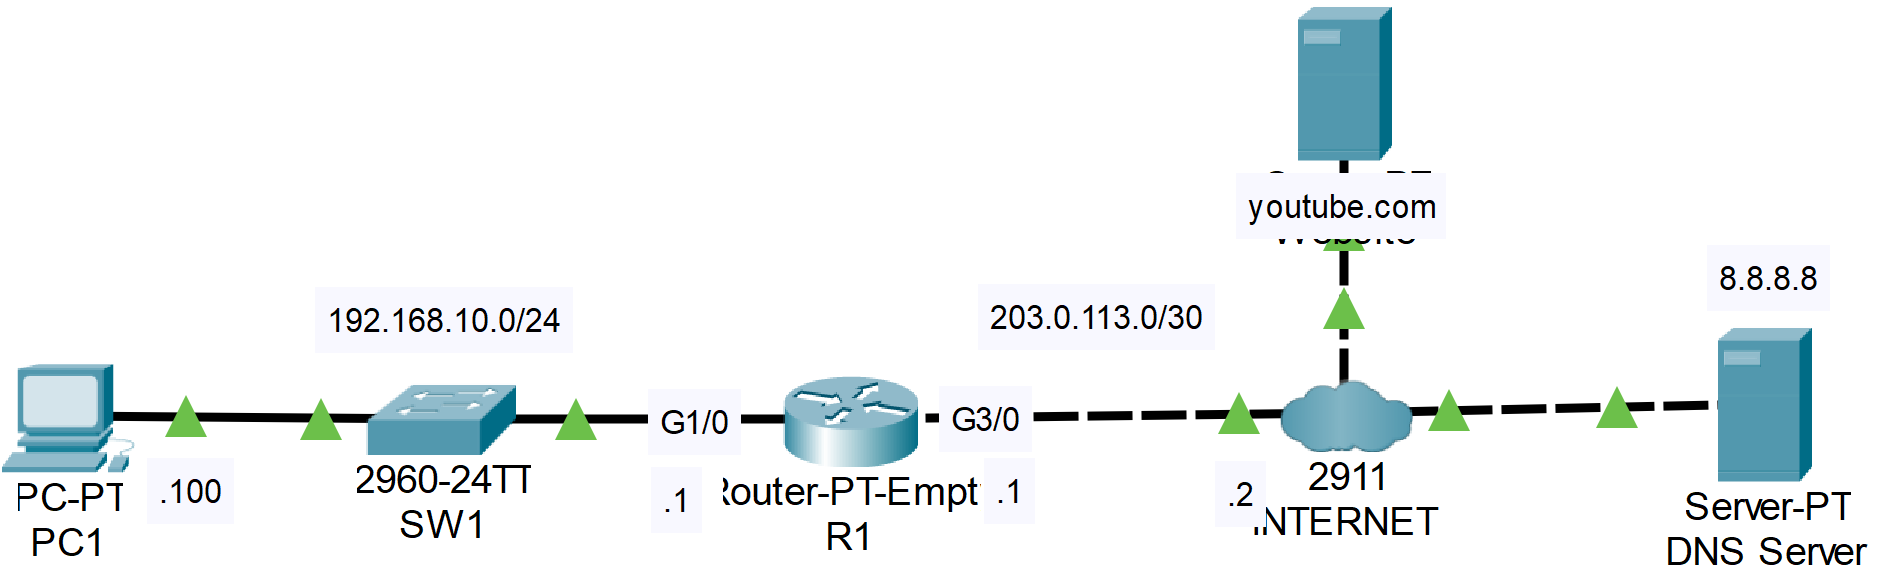
Figure 2 - Network Topology
All interfaces and IP addresses are already configured for this lab, but the default route is missing.
Without it, R1 cannot forward packets toward the internet.Configure the Default Route
Open the CLI of router R1 and configure a default route pointing to the next-hop address toward the internet:
R1> en
R1# conf t
Enter configuration commands, one per line.  End with CNTL/Z.
R1(config)# ip route 0.0.0.0 0.0.0.0 203.0.113.2
R1(config)# end
This command tells R1 to send all traffic destined for unknown networks to 203.0.113.2.
40 % Complete: you’re making great progress
Ready to pass your CCNA exam?