This lesson continues from the multi-area topology built in OSPFv3 Configuration: R1 and R2 in Area 0, R2 and R3 in Area 1, all adjacencies FULL.
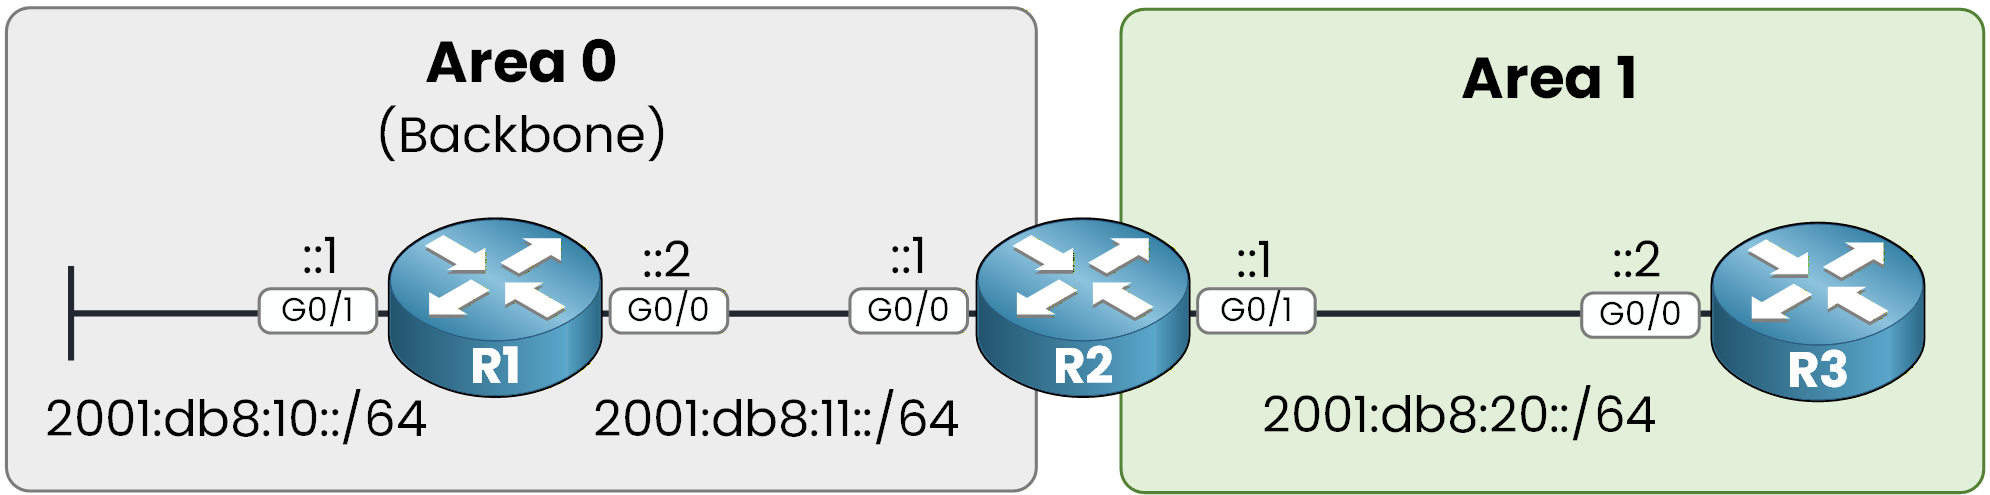
Figure 1 - OSPFv3 multi-area topology
The last feature you need to understand is IPv6 route summarization in OSPFv3.
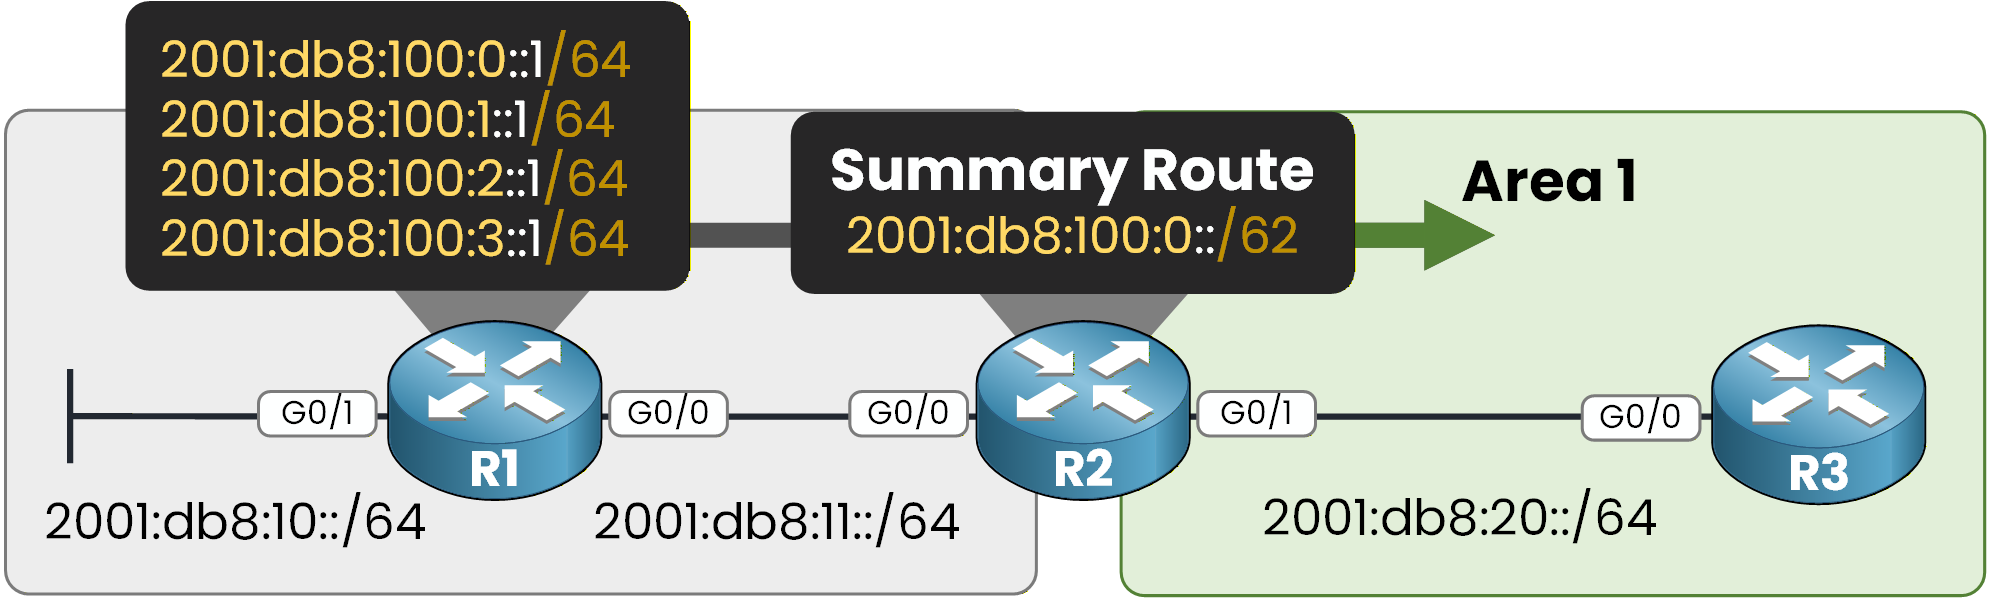
Figure 2 - OSPFv3 IPv6 Summarization
In this example, you will summarize four networks into a single summary route using the ABR.
Step 1 – Create Loopback Prefixes
First, create four loopback interfaces on R1.
Each loopback represents a different IPv6 network inside Area 0.On R1:
R1# conf t
Enter configuration commands, one per line.  End with CNTL/Z.
R1(config)# int lo0
R1(config-if)# ipv6 address 2001:db8:100:0::1/64
R1(config-if)# ospfv3 1 ipv6 area 0
R1(config-if)# exit

R1(config)# int lo1
R1(config-if)# ipv6 address 2001:db8:100:1::1/64
R1(config-if)# ospfv3 1 ipv6 area 0
R1(config-if)# exit

R1(config)# int lo2
R1(config-if)# ipv6 address 2001:db8:100:2::1/64
R1(config-if)# ospfv3 1 ipv6 area 0
R1(config-if)# exit

R1(config)# int lo3
R1(config-if)# ipv6 address 2001:db8:100:3::1/64
R1(config-if)# ospfv3 1 ipv6 area 0
R1(config-if)# end
You now have four distinct /64 networks in Area 0:
40 % Complete: you’re making great progress
Ready to pass your CCNP exam?