So far, your OSPF routers have trusted every Hello packet they received.
In this lesson, you will see why that is a security risk, and how to protect your neighbor relationships with a shared key.The Rogue Router
OSPF authentication secures your neighbor relationships.
It prevents an unknown router from joining your network and declaring itself a neighbor.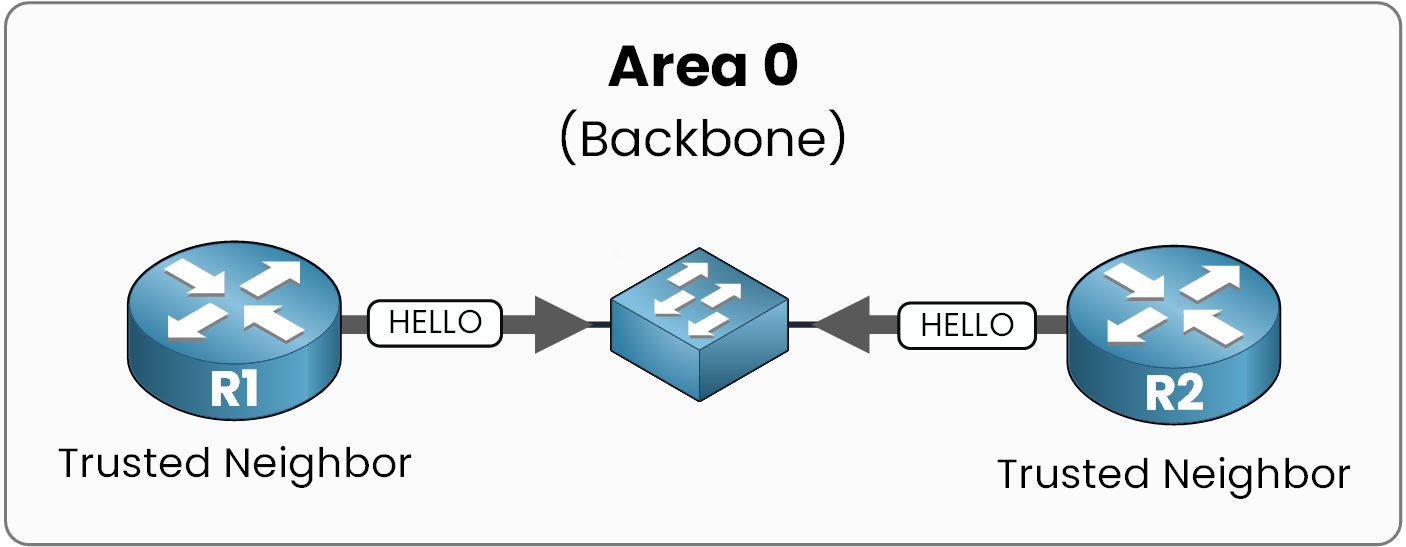
Figure 1 - Two trusted neighbors exchange Hellos
By default, nothing stops an untrusted device.
Any router connected to the segment that receives your Hellos can become an OSPF neighbor and start advertising networks.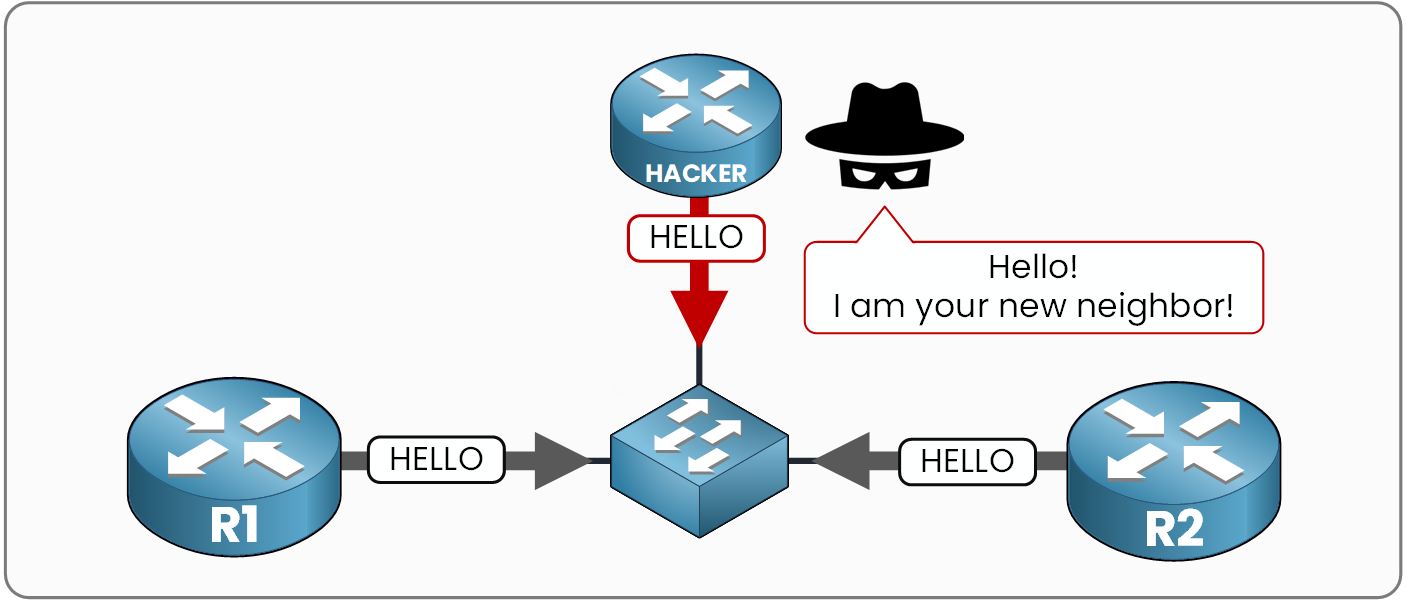
Figure 2 - A rogue router joins the OSPF domain
Someone plugs a router into your switch.
It hears your Hellos, replies with its own, and moments later forms aFULLadjacency with your core routers.Answer the question below
In which state does the rogue router end up with your routers?
What an Attacker Can Do
Once inside your OSPF domain, a rogue router can launch several attacks:
Route Injection: Advertises fake routes with a better cost, causing your traffic to be misrouted.
Man-In-The-Middle (MITM): Declares itself as the optimal path, causing corporate traffic to flow through it to be captured.
Denial of Service (DoS): Floods the area with LSAs, overwhelming every router in the network.
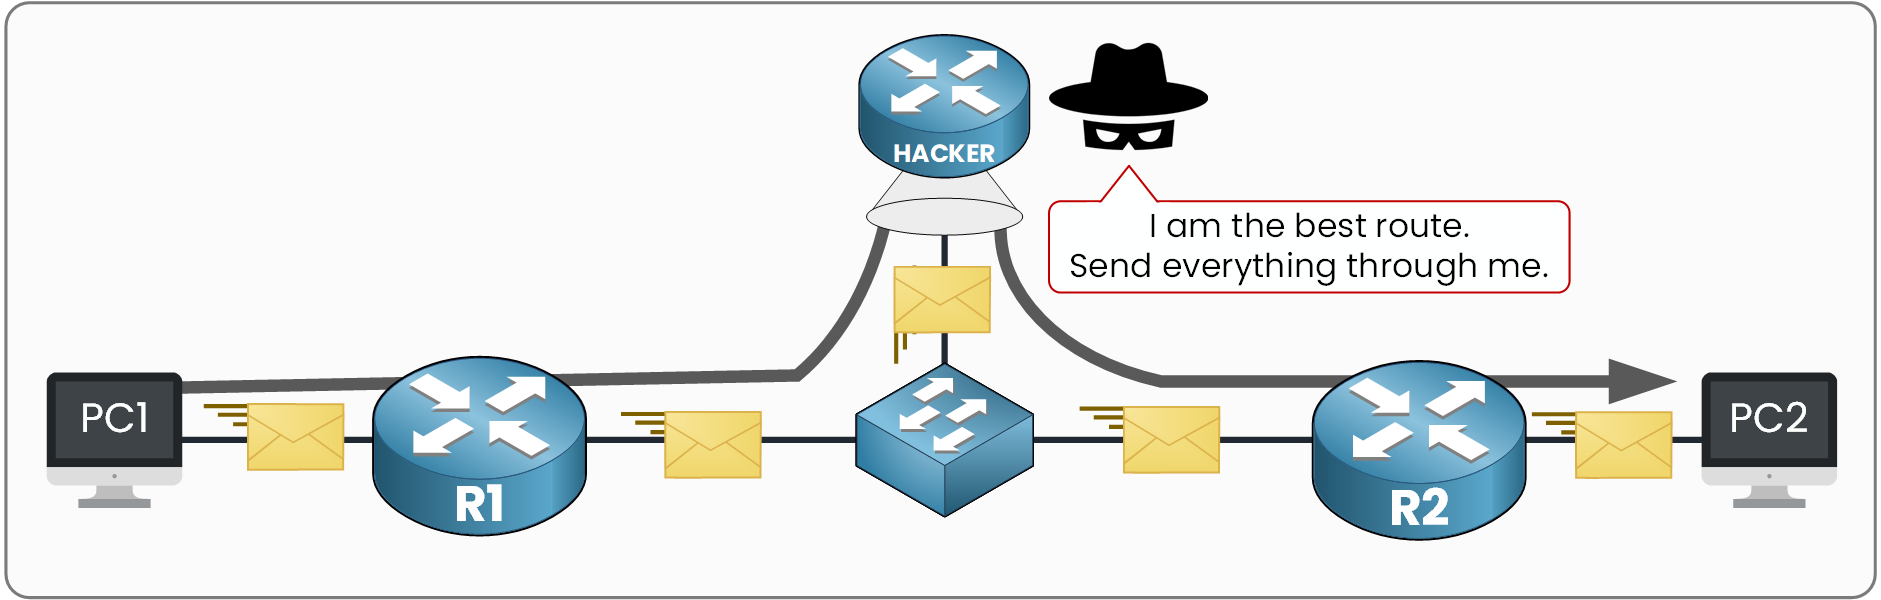
Figure 3 - Man-in-the-middle attack
Answer the question below
Which attack forces your traffic to flow through the rogue router?
What Authentication Protects
With authentication enabled, only routers that know the shared key can become neighbors.
Rogue routers without the key have their packets ignored.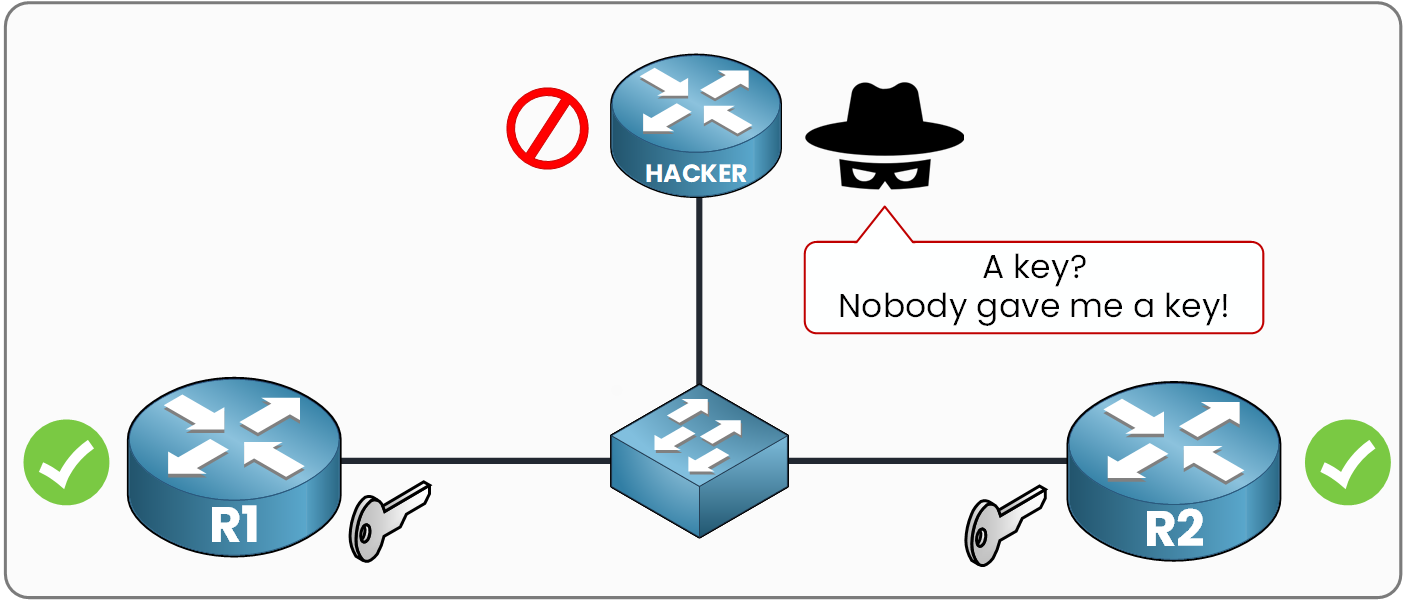
Figure 4 - The rogue router does not have the key
Security Note: OSPF authentication protects control-plane routing exchanges, not data-plane user traffic.
The actual user data crossing your network is not encrypted by OSPF authentication.Answer the question below
Does OSPF authentication protect the routing exchange or the user traffic?
How does OSPF authentication actually work?
The mechanism is simple, and it lives inside every single OSPF packet.The Auth Type Field
Every OSPF packet carries an Auth Type field in its header. This value tells the receiver which authentication method the packet uses:
Type 0 (None): No authentication at all (the default behavior).
Type 1 (Plaintext): Simple password. The key travels inside the packet, readable by anyone.
Type 2 (Cryptographic): MD5 or HMAC hash. A hash travels instead of the key itself.
Look at the image below: every router embeds an Auth Type in the Hello packets it sends, announcing its authentication level.
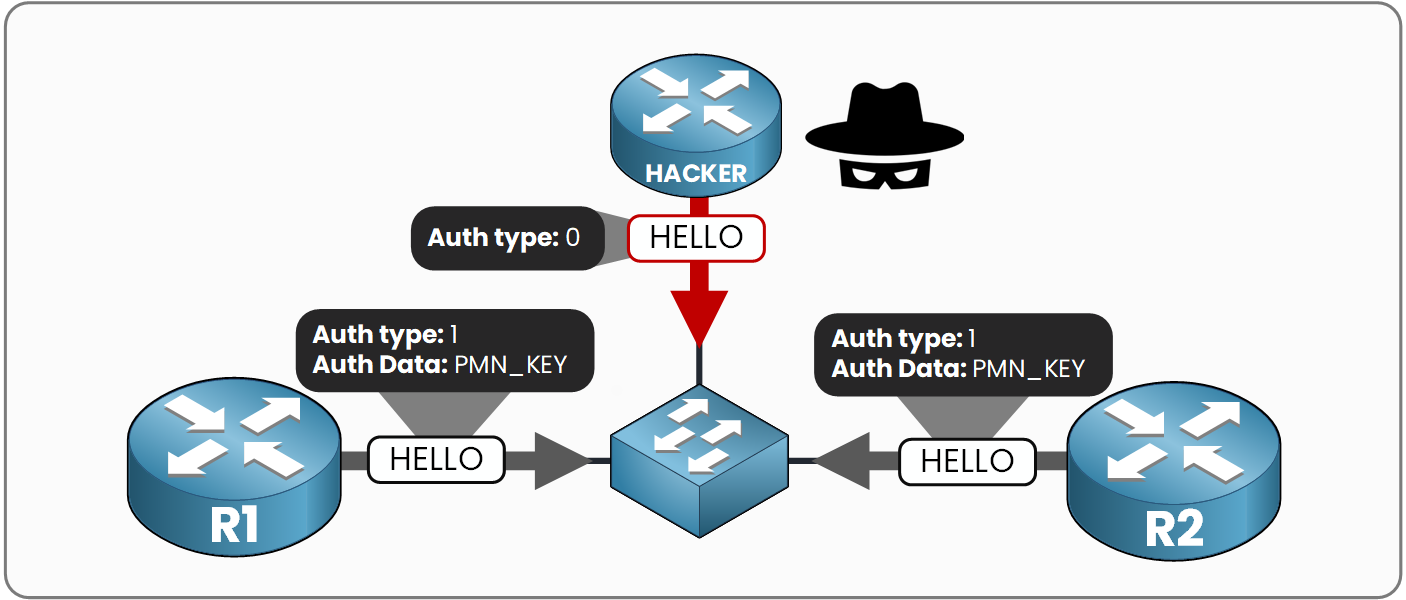
Figure 5 - Auth Type 1 in action, the type 0 Hello is ignored
R1 and R2 send Auth Type 1. The hacker sends Auth Type 0 (no authentication at all). Looking inside the Auth Data field, the key itself travels directly inside the Hello packet.
Answer the question below
Which Auth Type value means plaintext authentication?
The Matching Rule
For two routers to become neighbors, both sides of the link must share the exact same authentication type and key.
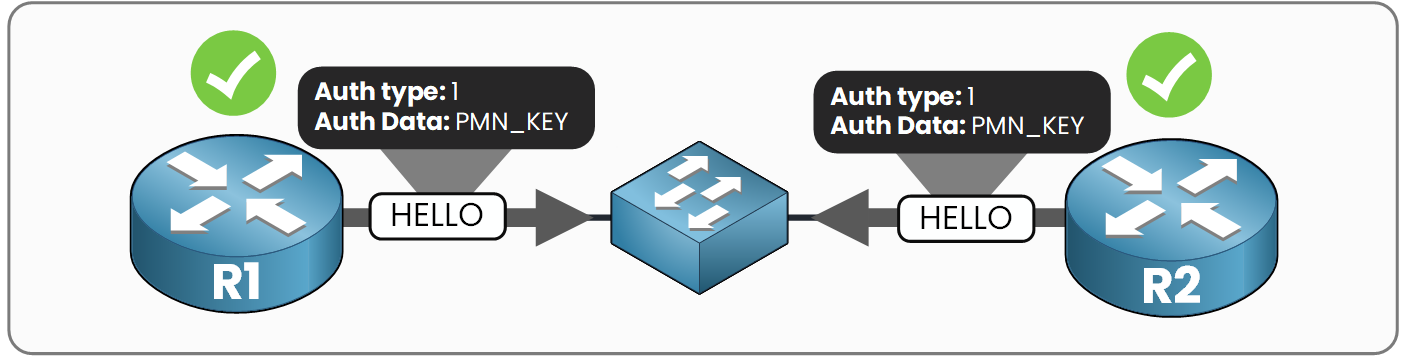
Figure 6 - Same type and same key on both sides
The check happens on every Hello packet received:
If either the type or the key does not match, the packet is simply ignored.
The very first non-matching Hello is dropped upon reception.
The adjacency never leaves the
DOWNstate, and the neighbor never appears in the OSPF neighbor table.
Answer the question below
In which state does the adjacency stay when the keys do not match?
Plaintext is the first and simplest method: as its name says, the key travels in clear text inside every OSPF packet.
Here is the topology: R1 and R2 already run OSPF in Area 0 over the
10.0.12.0/30link.
Let's lock this link with a shared key.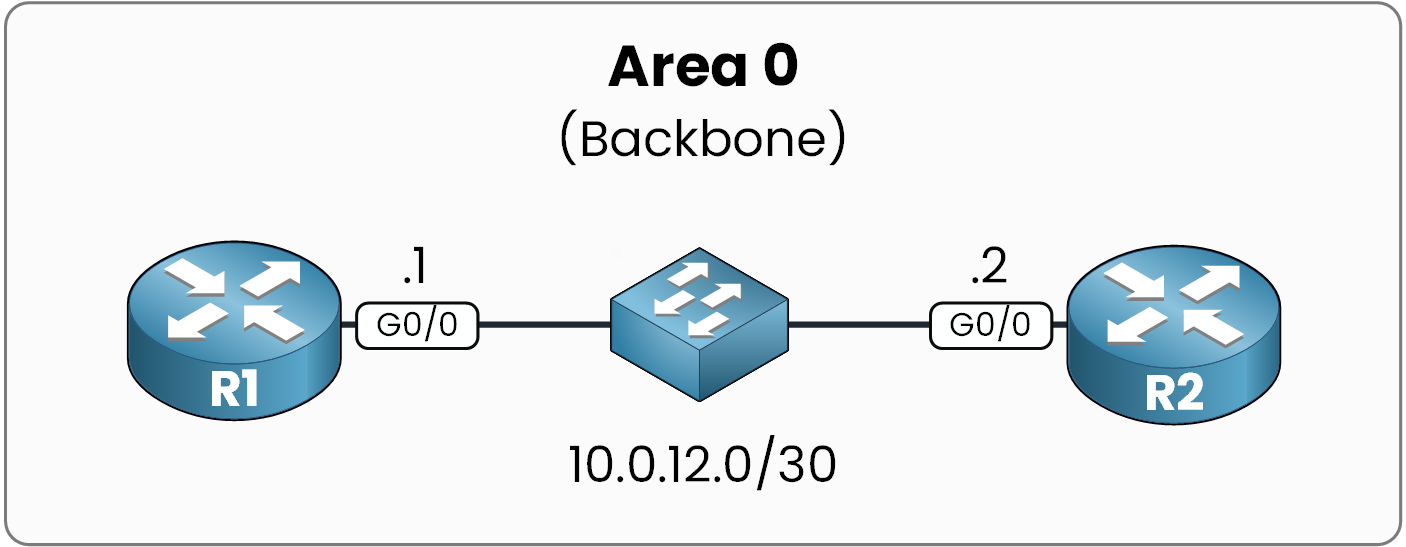
Figure 7 - Lab topology
Applying the Configuration
Two commands on the interface: one to enable authentication, one to set the key.
Start with R1:R1# configure terminal R1(config)# interface g0/0 R1(config-if)# ip ospf authentication R1(config-if)# ip ospf authentication-key PMN_KEY R1(config-if)# endTimer Behavior: The adjacency does not drop the moment you type the command. R1 simply starts ignoring the unauthenticated Hellos from R2, so the Dead timer is no longer refreshed.
Forty seconds later, the neighbor falls:
%OSPF-5-ADJCHG: Process 1, Nbr 2.2.2.2 on GigabitEthernet0/0 from FULL to DOWN, Neighbor Down: Dead timer expiredR1 now demands authentication on this link, but R2 has nothing configured yet.
Watch what happens on R2 the moment you type the key:R2# configure terminal R2(config)# interface g0/0 R2(config-if)# ip ospf authentication R2(config-if)# ip ospf authentication-key PMN_KEY %OSPF-5-ADJCHG: Process 1, Nbr 1.1.1.1 on GigabitEthernet0/0 from LOADING to FULL, Loading Done R2(config-if)# endThe adjacency comes back up the moment both sides share the same type and the same key.
Key Length Limit: A plaintext key is limited to 8 characters because the field in the packet is only 64 bits long. Type more, and IOS warns you and keeps only the first 8:
% OSPF: Warning: The password/key will be truncated to 8 charactersR1(config-if)# ip ospf authentication-key PMN_SUPER_LONG_KEY % OSPF: Warning: The password/key will be truncated to 8 charactersAnswer the question below
Above how many characters is a plaintext key truncated?
Verifying the Configuration
First check: the OSPF interface itself.
R1# show ip ospf interface g0/0

GigabitEthernet0/0 is up, line protocol is up
  Internet Address 10.0.12.1/30, Area 0
  Process ID 1, Router ID 1.1.1.1, Network Type BROADCAST, Cost: 1
  Transmit Delay is 1 sec, State BDR, Priority 1
  Designated Router (ID) 2.2.2.2, Interface address 10.0.12.2
  Backup Designated router (ID) 1.1.1.1, Interface address 10.0.12.1
  Timer intervals configured, Hello 10, Dead 40, Wait 40, Retransmit 5
    oob-resync timeout 40
    Hello due in 00:00:05
  Supports Link-local Signaling (LLS)
  Index 1/1, flood queue length 0
  Next 0x0(0)/0x0(0)
  Last flood scan length is 1, maximum is 1
  Last flood scan time is 0 msec, maximum is 0 msec
  Neighbor Count is 1, Adjacent neighbor count is 1
    Adjacent with neighbor 2.2.2.2  (Designated Router)
  Suppress hello for 0 neighbor(s)
  Simple password authentication enabled
The last line confirms it:
Simple password authentication enabled.Second check, in real time: a debug on the packets themselves.
R1# debug ip ospf packet OSPF packet debugging is on OSPF: rcv. v:2 t:1 l:48 rid:2.2.2.2 aid:0.0.0.0 chk:B9F0 aut:1 auk: from GigabitEthernet0/0 R1# undebug all All possible debugging has been turned offaut:1means the received packets use plaintext authentication.Notice the
auk:field: it is empty. IOS never displays the key in this debug output.
On the router itself, only one command reveals the configured key: the running configuration.
Remember this one when you troubleshoot key mismatches:R1# show running-config interface g0/0 Building configuration... Current configuration : 154 bytes ! interface GigabitEthernet0/0 ip address 10.0.12.1 255.255.255.252 ip ospf authentication ip ospf authentication-key PMN_KEY endSeeing the key in cleartext within the configuration file may bother you.
You can encrypt it locally withservice password-encryption:R1# configure terminal R1(config)# service password-encryption R1(config)# end R1# show running-config interface g0/0 Building configuration... Current configuration : 165 bytes ! interface GigabitEthernet0/0 ip address 10.0.12.1 255.255.255.252 ip ospf authentication ip ospf authentication-key 7 14273F25332F0F12 endThe configuration file is masked. However, the packets on the wire did not change: they still carry the key in clear text.
Sniffing the Key in Wireshark
Time to look at the wire the way an attacker does.
Anyone sniffing this link reads the key directly out of the packet headers.
Plaintext protects you against local configuration mistakes, not against an active network attacker.Answer the question below
Which command shows the configured authentication key in clear text?
Answer the question below
Enter the Flag
Imagine a router with five interfaces in the same area. Instead of enabling authentication on each interface individually, you can enable it globally for the entire area under the OSPF process:
R1# configure terminal
R1(config)# router ospf 1
R1(config-router)# area 0 authentication
R1(config-router)# exit
This command sets the Authentication Type for the entire area. However, it only sets the type, the authentication key itself must still be defined on the interfaces.
Using an interface range command allows you to configure the key across all five interfaces at once:
R1(config)# interface range g0/0 - 4
R1(config-if-range)# ip ospf authentication-key PMN_KEY
R1(config-if-range)# end
You can verify area-wide authentication settings using
show ip ospf:R1# show ip ospf Routing Process "ospf 1" with ID 1.1.1.1 Start time: 00:00:02.892, Time elapsed: 01:05:52.046 Supports only single TOS(TOS0) routes Supports opaque LSA Supports Link-local Signaling (LLS) Supports area transit capability Supports NSSA (compatible with RFC 3101) Maximum number of non self-generated LSA allowed 50000 Current number of non self-generated LSA 2 Threshold for warning message 75% Initial SPF schedule delay 50 msecs Minimum hold time between two consecutive SPFs 200 msecs Maximum wait time between two consecutive SPFs 5000 msecs Reference bandwidth unit is 100 mbps Area BACKBONE(0) Number of interfaces in this area is 1 Area has simple password authentication SPF algorithm last executed 00:01:13.031 ago SPF algorithm executed 8 times Area ranges are Number of LSA 3. Checksum Sum 0x02794C Flood list length 0Authentication Precedence Rule
When authentication parameters are configured at both the interface and area levels, OSPF evaluates configuration hierarchy using the following order of precedence:
Interface Config > Area Config > Type 0 (Default)
An explicit interface-level setting always overrides an area-wide configuration.
Now that you understand Plaintext authentication, the next step is securing OSPF using MD5 authentication.Answer the question below
With per-area authentication, where is the key still configured?