In the previous lesson, MD5 kept your secret key off the wire by sending a hash instead of cleartext. While this stops simple packet sniffing, it leaves a major security gap. MD5 is computationally fast, making captured hashes vulnerable to offline cracking.
The Risk: Offline Brute-Force Attacks
Once an attacker captures an MD5 hash from an OSPF Hello packet, they no longer need access to your network devices.
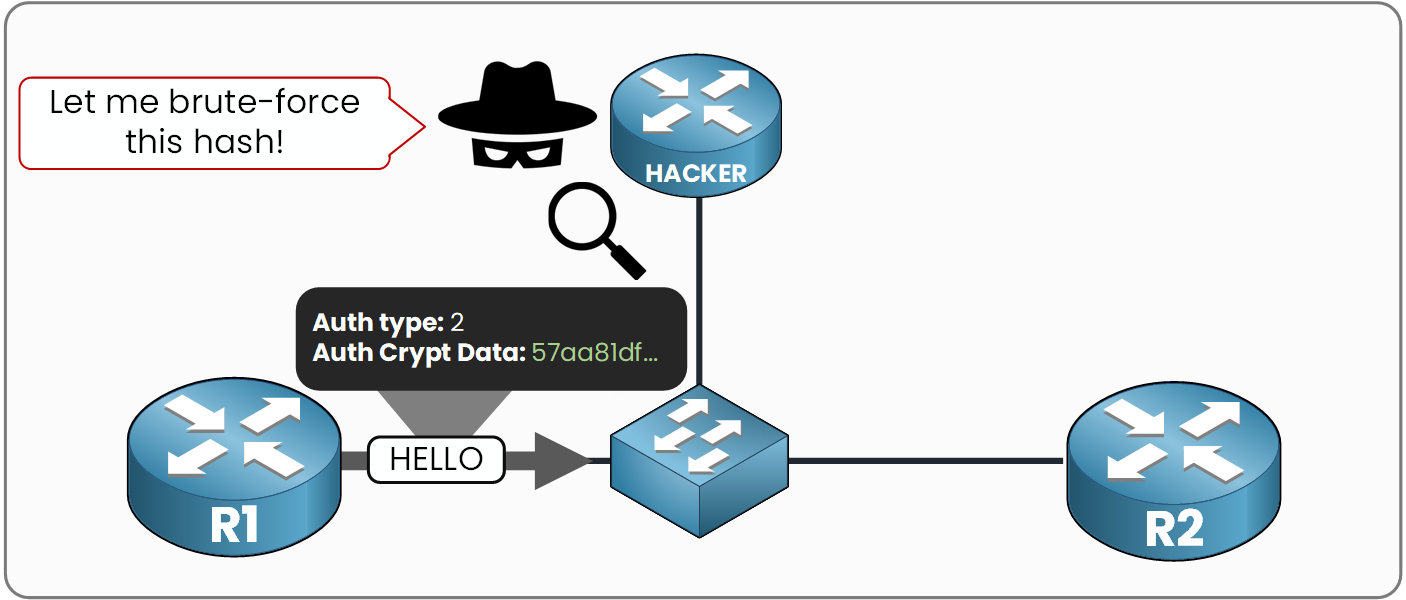
Figure 1 - The attacker captures the MD5 hash off the wire
They can extract the hash, take it offline, and test billions of key combinations per second using GPU-accelerated cracking tools like Hashcat.
Launch the scenario above to step into the shoes of a hacker trying to crack a password using MD5 versus HMAC-SHA.
Answer the question below
Enter the flag
The Solution: HMAC-SHA Cryptography
To eliminate this vulnerability, modern enterprise networks use HMAC-SHA.
It operates on the same core principle as MD5, your key never leaves the router but uses the far more resilient SHA-2 algorithm family.
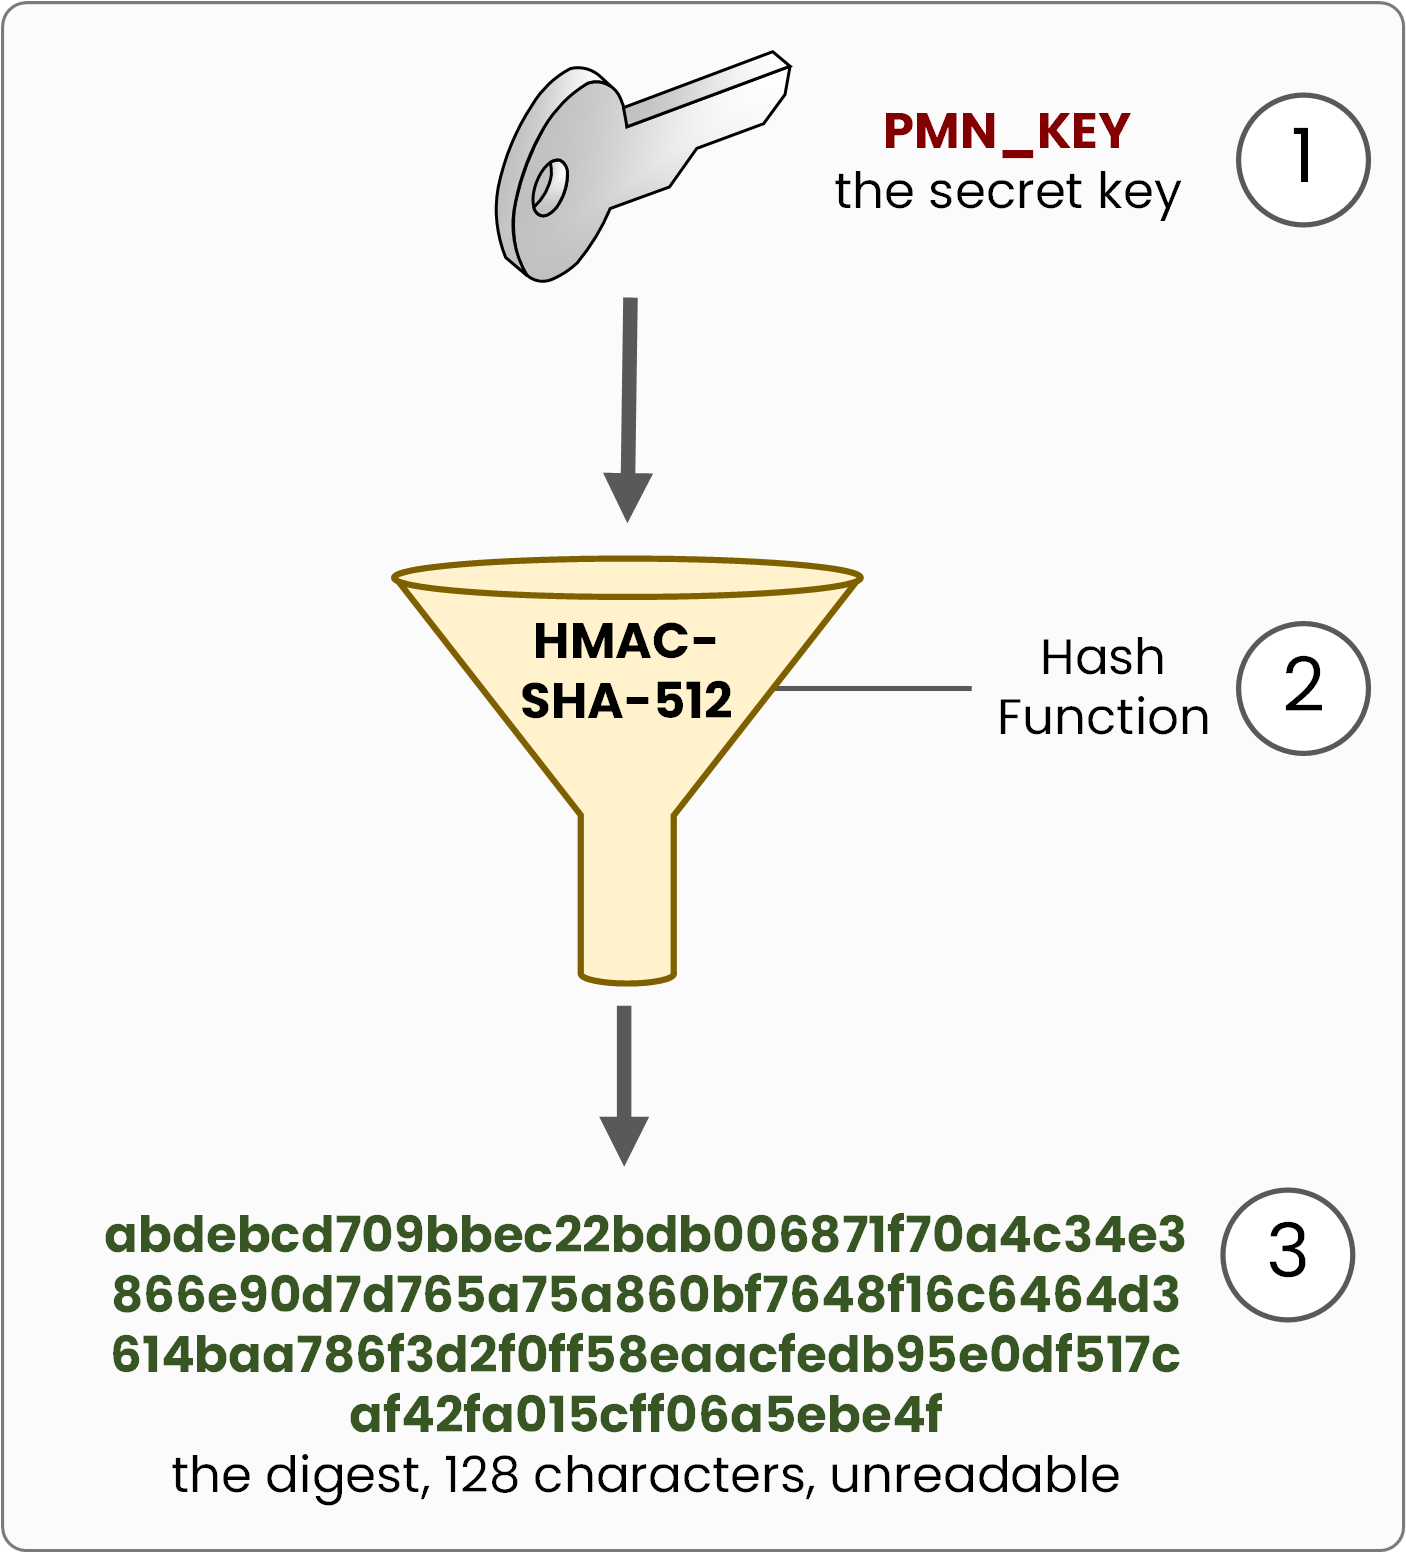
Figure 2 - The key goes in, a 128-character digest comes out
Simplified view: HMAC-SHA-512 hashes the key together with the Hello packet, not the key alone, so the digest is different in every packet.
HMAC-SHA provides three upgrades over MD5:
Slower to crack: SHA-512 is computationally heavy, making each attempt far more expensive for an attacker and rendering brute-force attacks impractical.
Longer passwords: Supports key strings up to 80 characters (compared to a 16-character cap for MD5).
Collision-resistant: MD5 suffers from known mathematical collision flaws. The SHA-2 family has no known collision vulnerabilities.
Now, let's jump into the CLI and see how to configure it on your routers.
Answer the question below
HMAC-SHA still uses which OSPF Auth Type value?
We reuse the same topology: R1 and R2 in Area 0 over the
10.0.12.0/30link.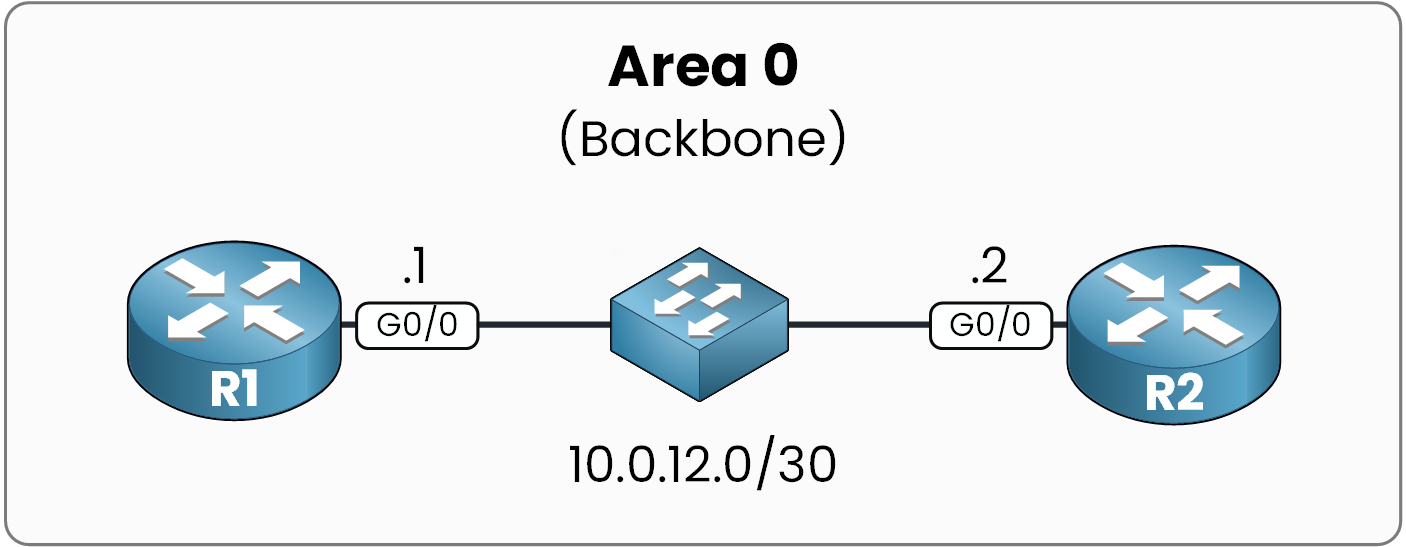
Figure 3 - Lab topology
Configuring HMAC-SHA requires a different approach than MD5: instead of applying a single command directly to the interface, you build a key chain and attach it to the interface.
Step 1: Configure R1 with a Key Chain
First, define the key chain. Notice that the key chain name (
PMN_CHAIN) is locally significant: it only lives on R1 and does not need to match R2.Inside the key chain, define Key ID
1, selecthmac-sha-512, and set the secret key string:R1# configure terminal R1(config)# key chain PMN_CHAIN R1(config-keychain)# key 1 R1(config-keychain-key)# cryptographic-algorithm hmac-sha-512 R1(config-keychain-key)# key-string PMN_KEY R1(config-keychain-key)# endNext, attach the key chain to interface GigabitEthernet0/0.
Note: Unlike MD5, HMAC-SHA authentication in OSPFv2 is strictly per-interface. There is no area-wide command available under the OSPF process.
R1# configure terminal
R1(config)# interface g0/0
R1(config-if)# ip ospf authentication key-chain PMN_CHAIN
R1(config-if)# end
As soon as HMAC-SHA is active on R1, it stops accepting unauthenticated Hellos from R2.
The Dead timer expires 40 seconds later, and the adjacency drops:%OSPF-5-ADJCHG: Process 1, Nbr 2.2.2.2 on GigabitEthernet0/0 from FULL to DOWN, Neighbor Down: Dead timer expiredStep 2: Configure R2 & Restore Adjacency
Now configure R2. We intentionally name its key chain
R2_CHAINto prove it is local to the router.
However, three specific parameters must match on both routers for the hashes to line up:The Key ID (
1)The Cryptographic Algorithm (
hmac-sha-512)The Key String (
PMN_KEY)
R2# configure terminal
R2(config)# key chain R2_CHAIN
R2(config-keychain)# key 1
R2(config-keychain-key)# cryptographic-algorithm hmac-sha-512
R2(config-keychain-key)# key-string PMN_KEY
R2(config-keychain-key)# exit
R2(config-keychain)# exit

R2(config)# interface g0/0
R2(config-if)# ip ospf authentication key-chain R2_CHAIN
%OSPF-5-ADJCHG: Process 1, Nbr 1.1.1.1 on GigabitEthernet0/0 from LOADING to FULL, Loading Done
R2(config-if)# end
As soon as you apply the matching key chain on R2, both routers successfully calculate and verify the HMAC-SHA-512 hashes. The OSPF Hello exchange succeeds, and the neighbor relationship immediately recovers to FULL.
Step 3: Verification
Check that HMAC-SHA is running on the interface:
R1# show ip ospf interface g0/0 | begin auth
  Cryptographic authentication enabled
    Sending SA: Key 1, Algorithm HMAC-SHA-512 - key chain PMN_CHAIN
Verify the key chain status and validity lifetimes:
R1# show key chain PMN_CHAIN
Key-chain PMN_CHAIN:
    key 1 -- text "PMN_KEY"
        accept lifetime (always valid) - (always valid) [valid now]
        send lifetime (always valid) - (always valid) [valid now]
Confirm that the adjacency state is back to
FULL:R1# show ip ospf neighbor Neighbor ID Pri State Dead Time Address Interface 2.2.2.2 1 FULL/DR 00:00:31 10.0.12.2 GigabitEthernet0/0Production Tip: Selecting the Right Algorithm
When defining the key under the key chain, Cisco IOS offers five options:
R1(config-keychain-key)# cryptographic-algorithm ?
  hmac-sha-1    HMAC-SHA-1 authentication algorithm
  hmac-sha-256  HMAC-SHA-256 authentication algorithm
  hmac-sha-384  HMAC-SHA-384 authentication algorithm
  hmac-sha-512  HMAC-SHA-512 authentication algorithm
  md5           MD5 authentication algorithm
All four SHA options are available alongside MD5 for backward compatibility. The number represents the digest length in bits: SHA-512 produces the longest hash, making it the most resilient against brute-force attacks.
Answer the question below
Which command applies a key chain to an interface for OSPF?