We’ve seen that DHCP automatically assigns IP settings to devices.
But how does it actually work behind the scenes?
Let’s break it down together.
DHCP Ports
The DHCP protocol uses specific ports to communicate:
UDP port 68 — used by the DHCP client
UDP port 67 — used by the DHCP server
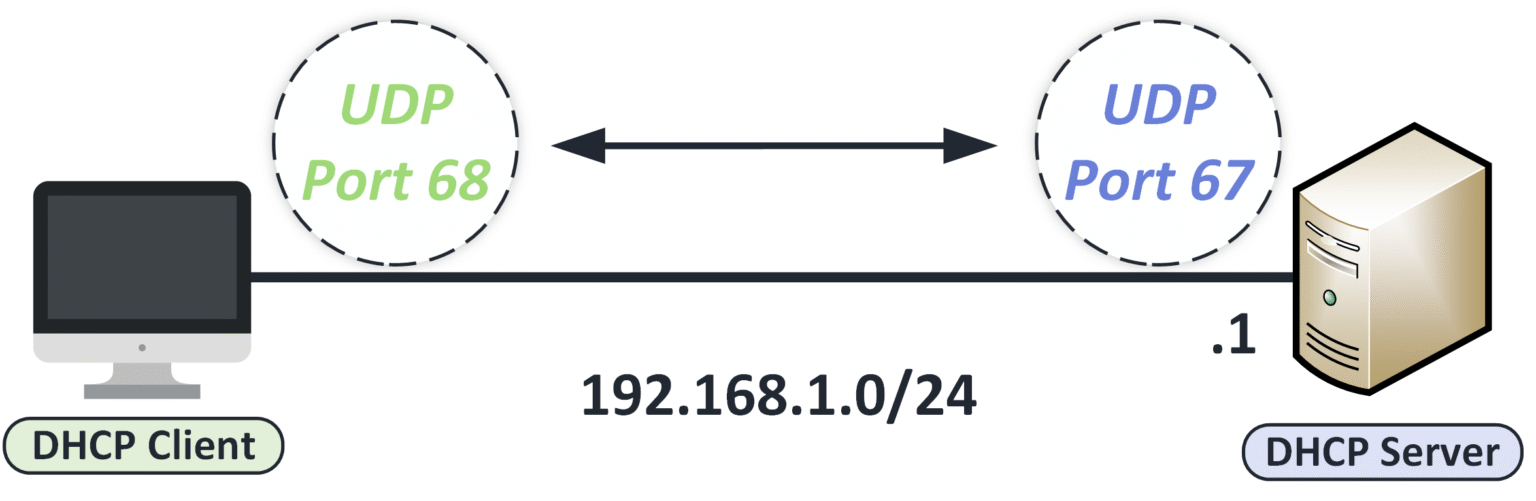
Figure 1 – DHCP communication using UDP port 68 for the client and UDP port 67 for the server.
These ports are used throughout the DHCP process.
Make sure to remember them for your CCNA exam.
The DHCP Process (Step by Step)
When a device connects to a network without an IP address, it uses DHCP to automatically obtain its network configuration.
This happens through a 4-step process often referred to as DORA:
Discover, Offer, Request, Acknowledge
Let’s go through each step.
Answer the question below
Which UDP port does the DHCP client use?
The first two messages are a search: the client looks for a server, and a server answers.
Step 1 — DHCP Discover
When a device joins a network for the first time, it has no IP address and doesn’t know where the DHCP server is.
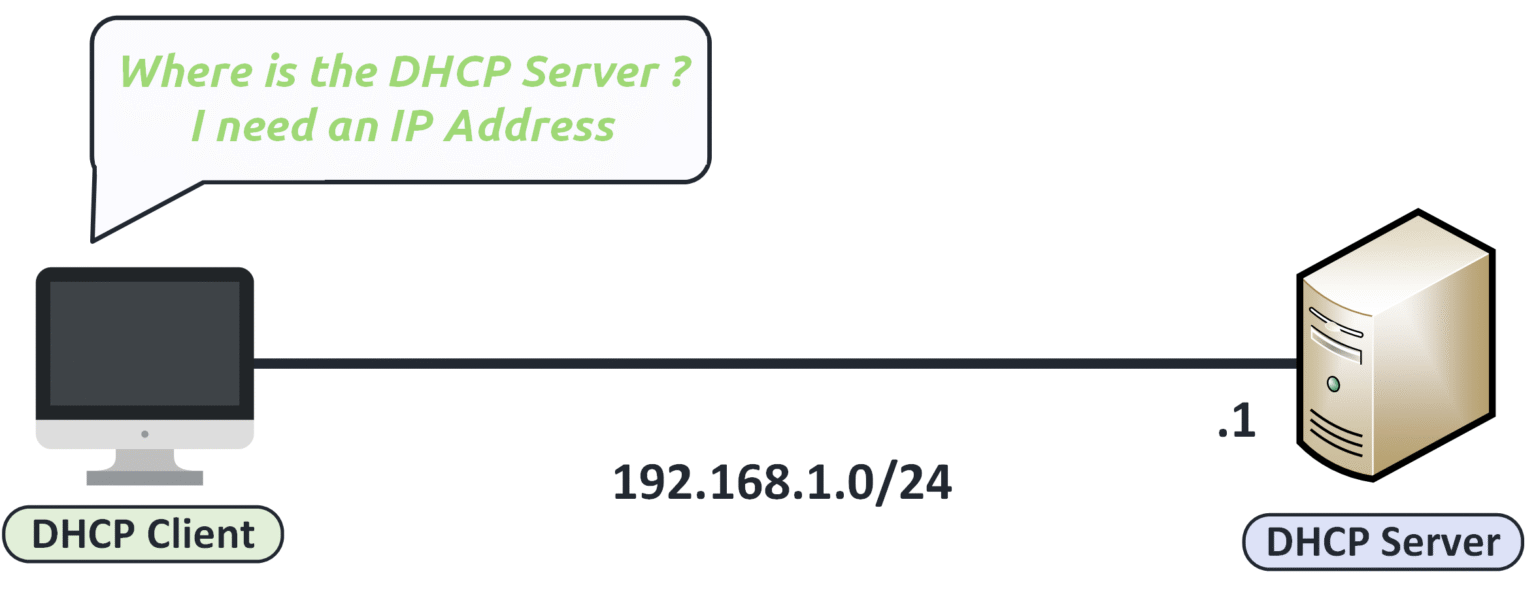
Figure 2 – DHCP client wondering where the DHCP server is to request an IP address.
To find one, it sends a DHCP Discover message as a broadcast on the network.
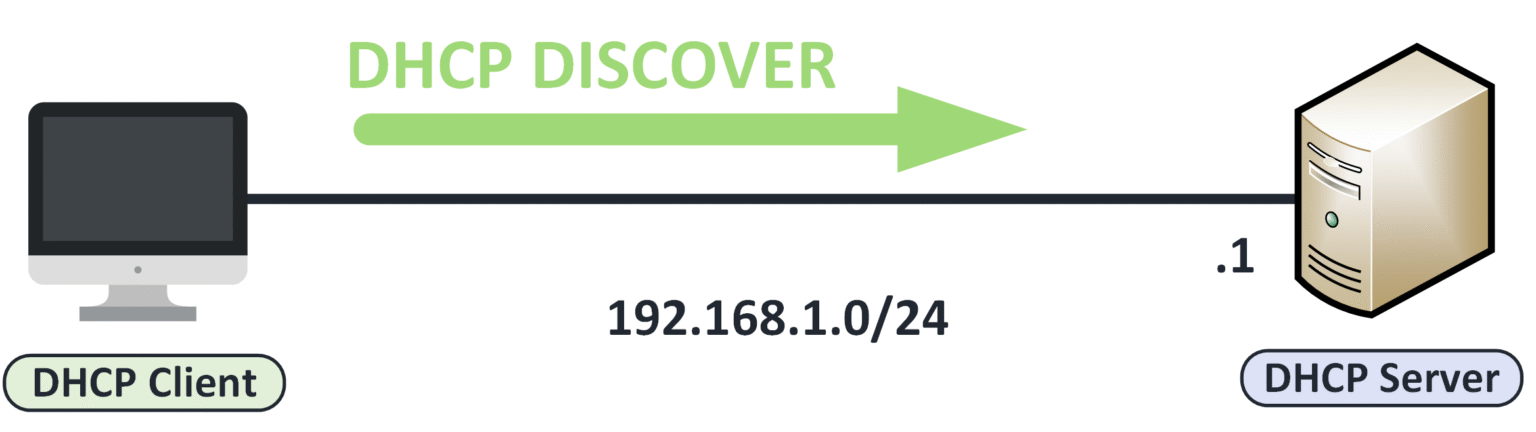
Figure 3 – DHCP client sending a Discover message to locate available DHCP servers.
This way, any DHCP server listening can respond with an offer.
In this capture, we can observe: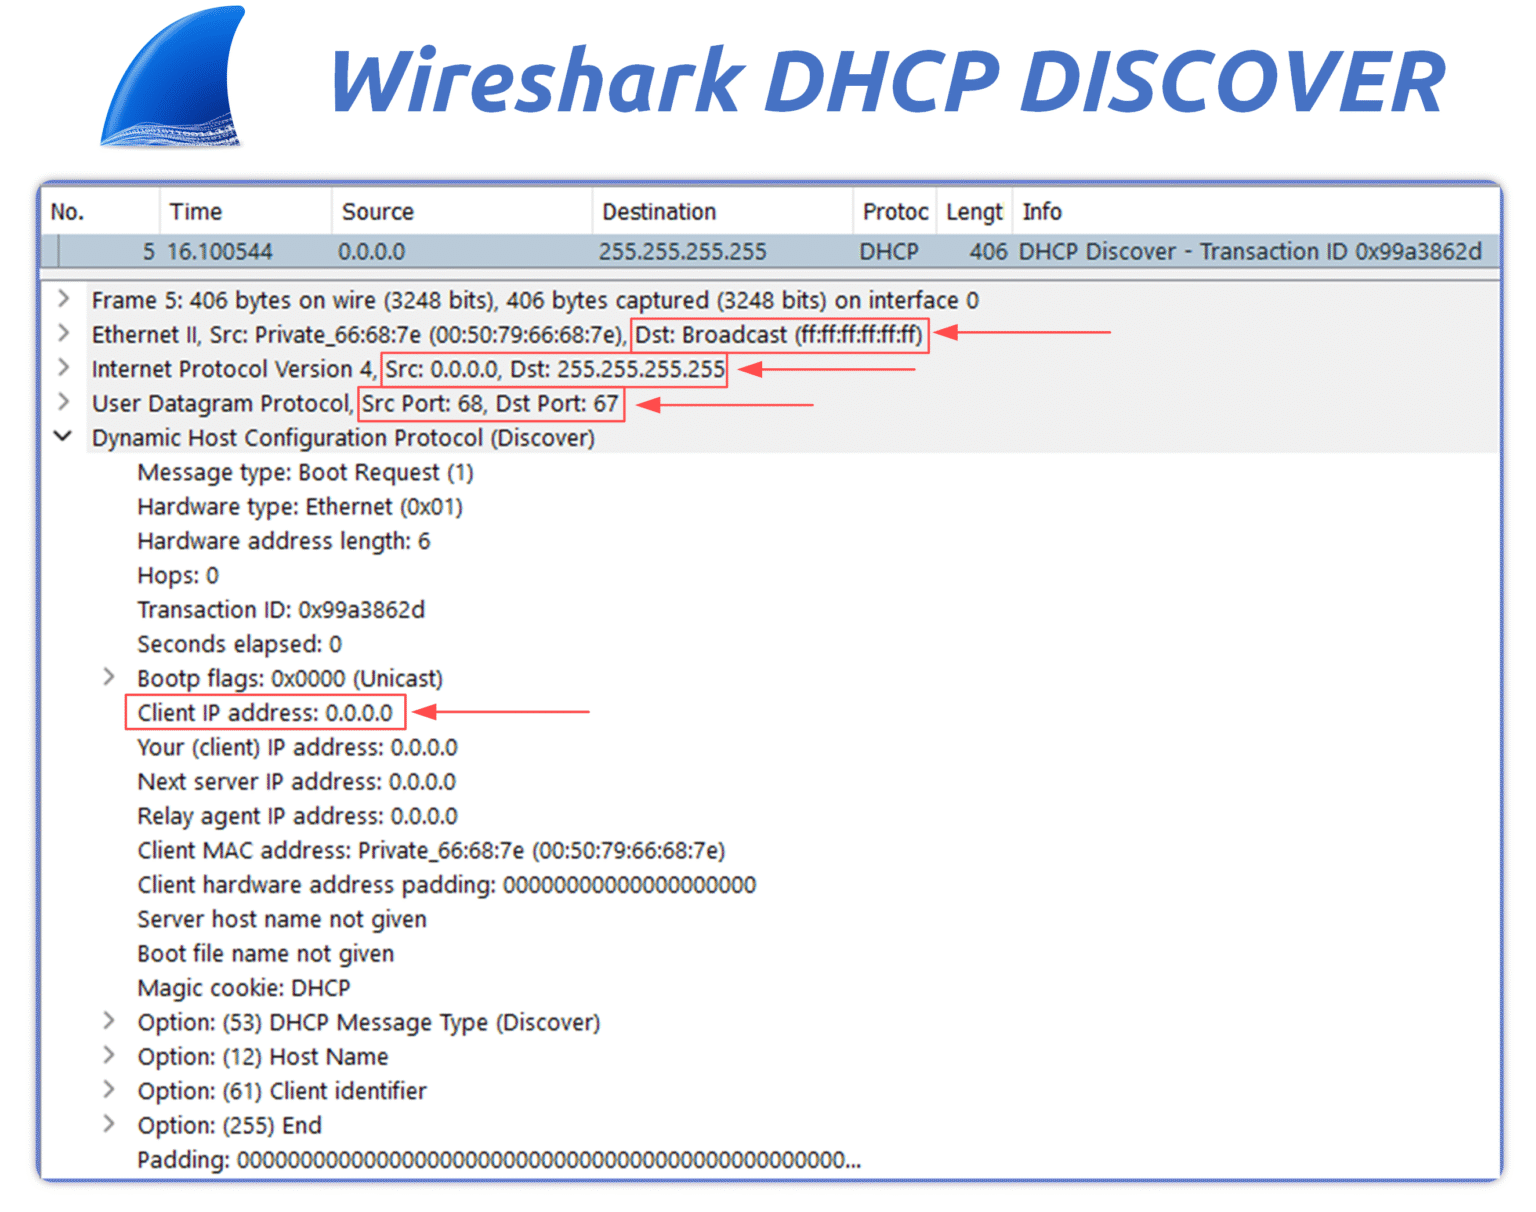
Figure 4 – Wireshark capture of a DHCP Discover broadcast using UDP ports 68 and 67.
Destination MAC: FF:FF:FF:FF:FF:FF (unknown server MAC, so broadcast).
Source IP: 0.0.0.0 (the client doesn't have an IP address yet).
Destination IP: 255.255.255.255 (broadcast to the entire subnet).
UDP Ports: source port 68 (client), destination port 67 (server).
This broadcast is essential because the client has no prior information about the server’s address.
Answer the question below
What message does the client send first?
Step 2 — DHCP Offer
When a DHCP server receives the Discover message, it replies with a DHCP Offer, proposing an IP address and configuration settings to the client.
This message is usually sent as a unicast directly to the client’s MAC address.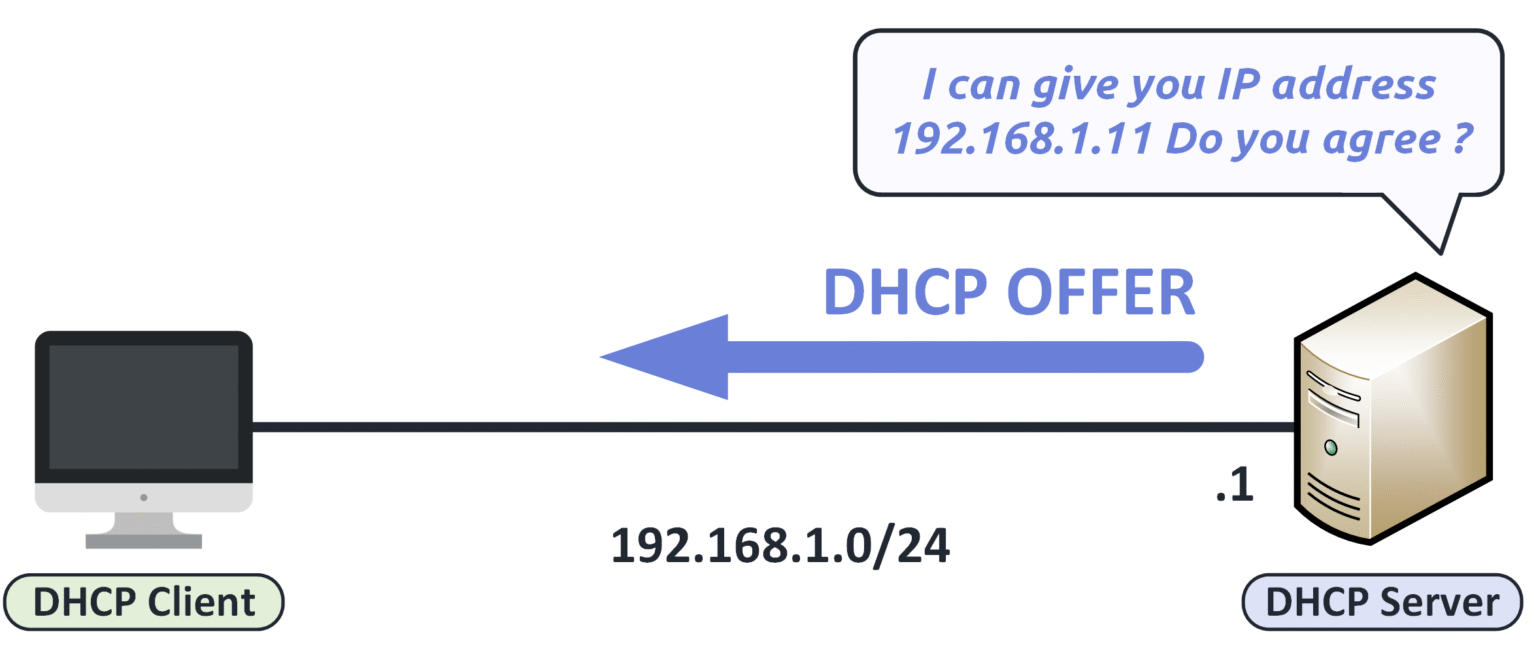
Figure 5 – DHCP server sending an Offer with an IP address to the client.
In this capture, we can observe:
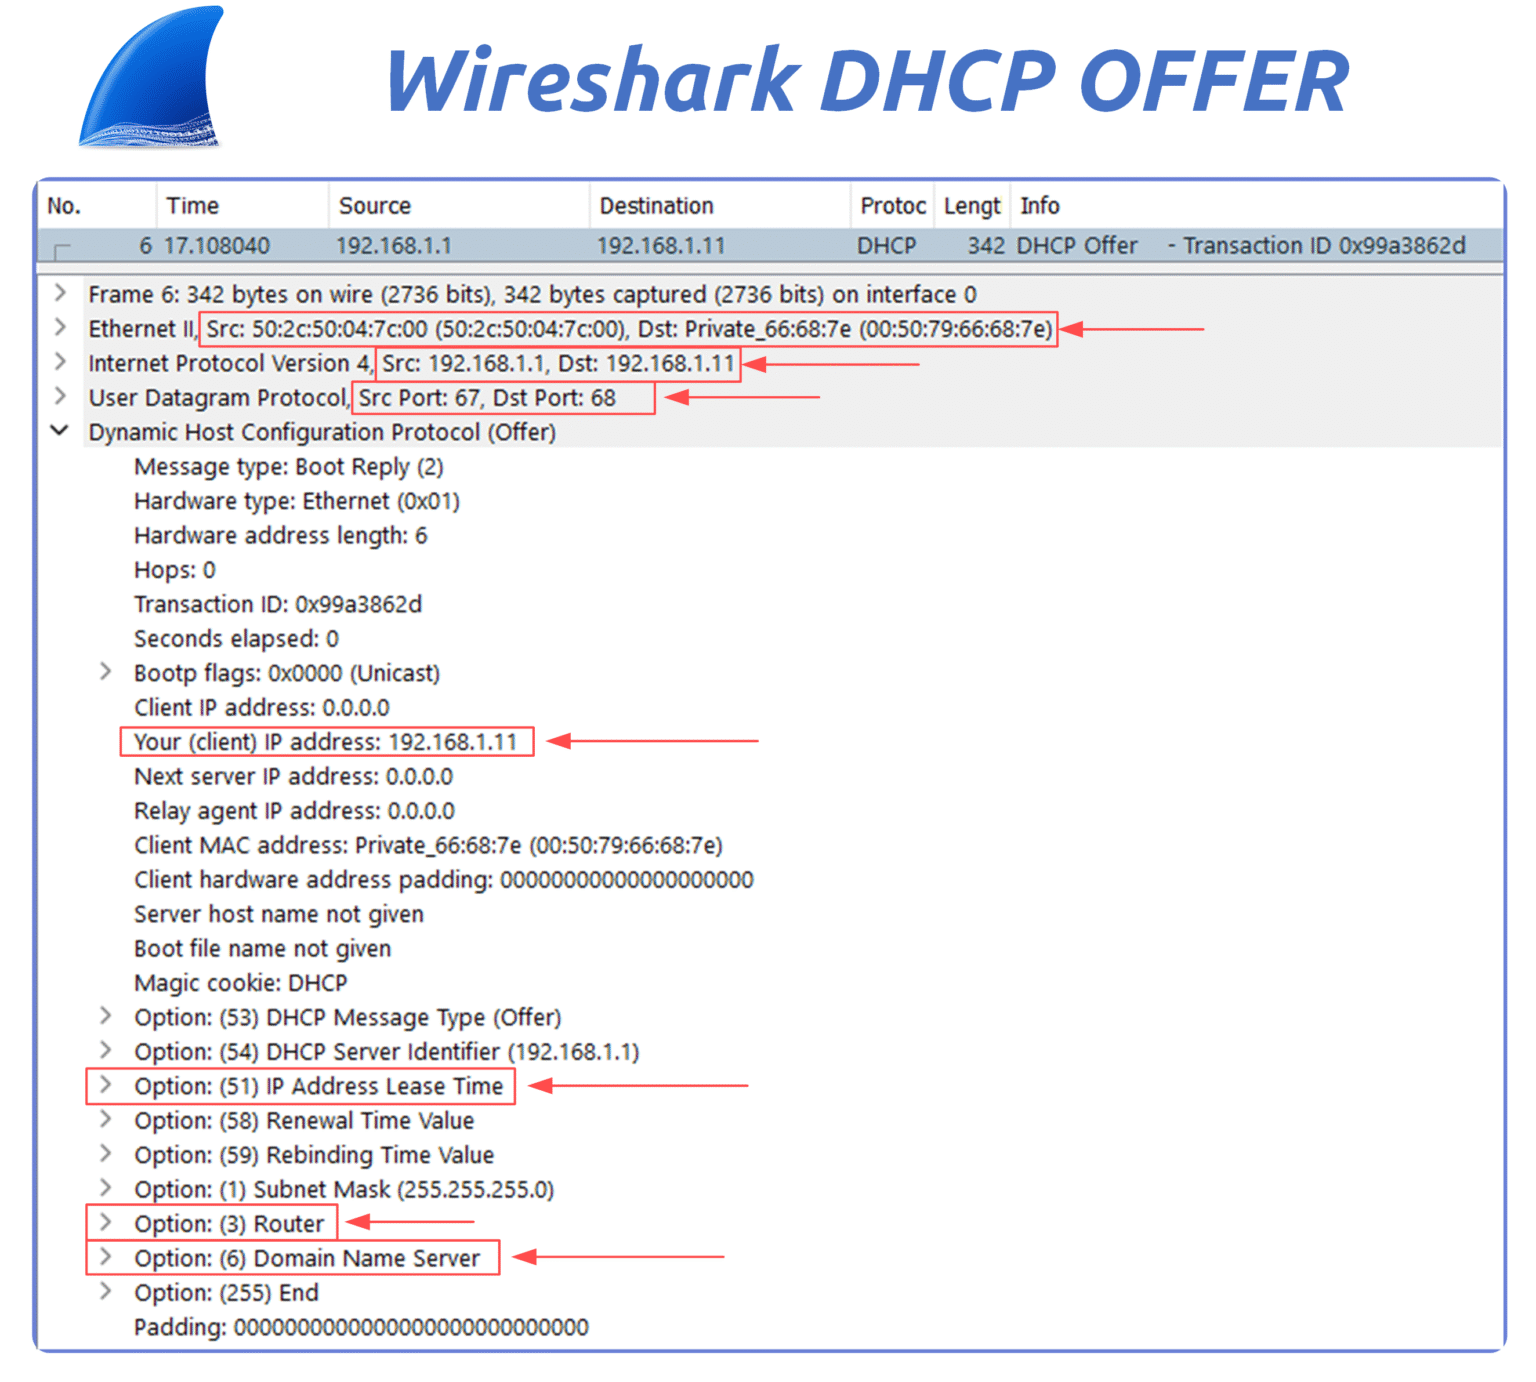
Figure 6 – Wireshark capture of a DHCP Offer proposing IP 192.168.1.11 to the client.
Source IP: DHCP server IP (192.168.1.1)
Destination IP: proposed IP for the client (192.168.1.11)
Destination MAC: MAC address of the client (learned from Discover)
UDP Ports: source port 67 (server), destination port 68 (client)
Your (Client) IP Address field: proposed IP (192.168.1.11)
DHCP Options:
Option 51: Lease time
Option 6: DNS servers
Option 3: Default gateway
The client can now decide whether to accept the proposed configuration.
Answer the question below
What message does the server send after Discover?
The client now has an offer in hand. The last two messages turn it into a confirmed lease.
Step 3 — DHCP Request
After receiving the Offer, the client replies with a DHCP Request to confirm it wants to use the proposed IP address.
This message is broadcast to inform all DHCP servers that one has been selected.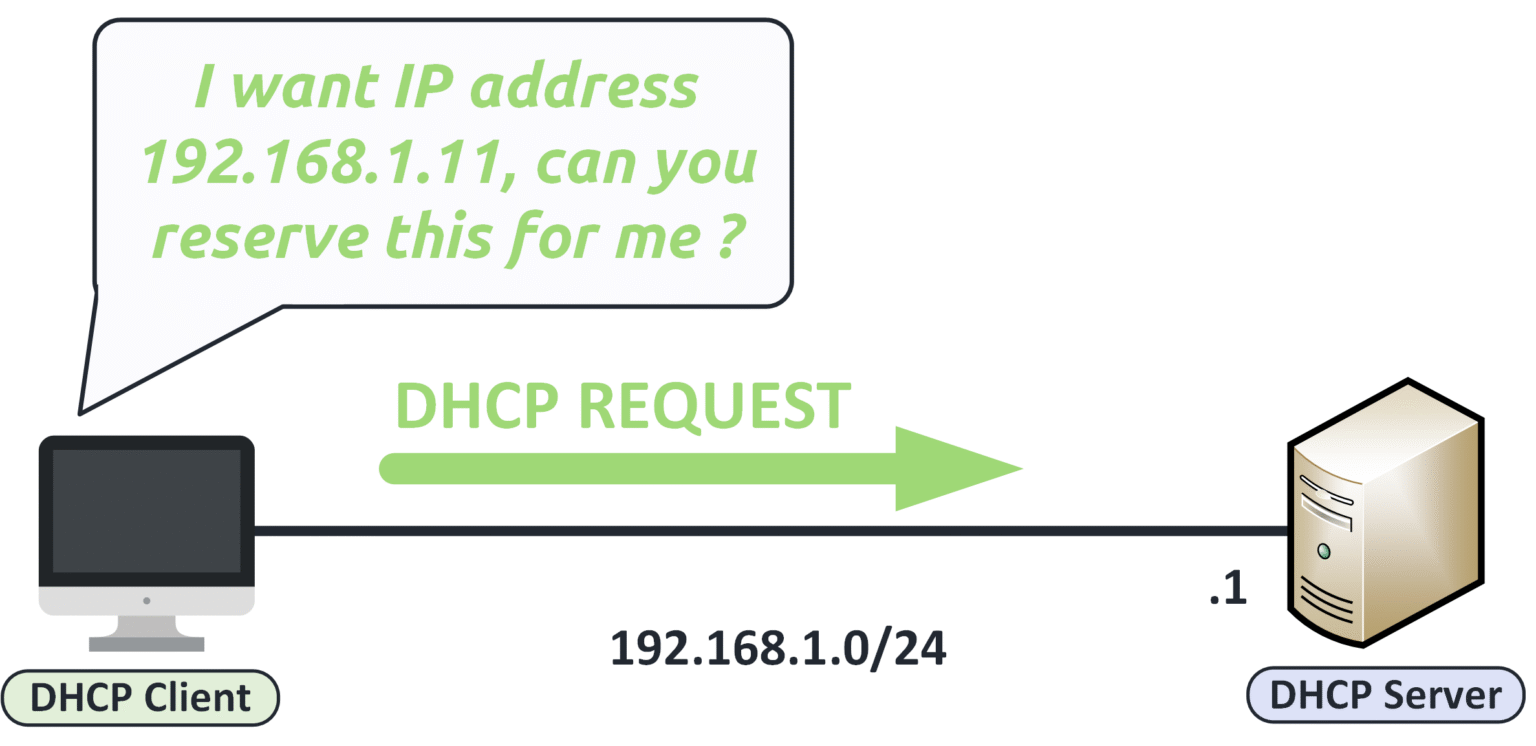
Figure 7 – DHCP client sending a Request to reserve the offered IP address.
In this capture, we can observe:
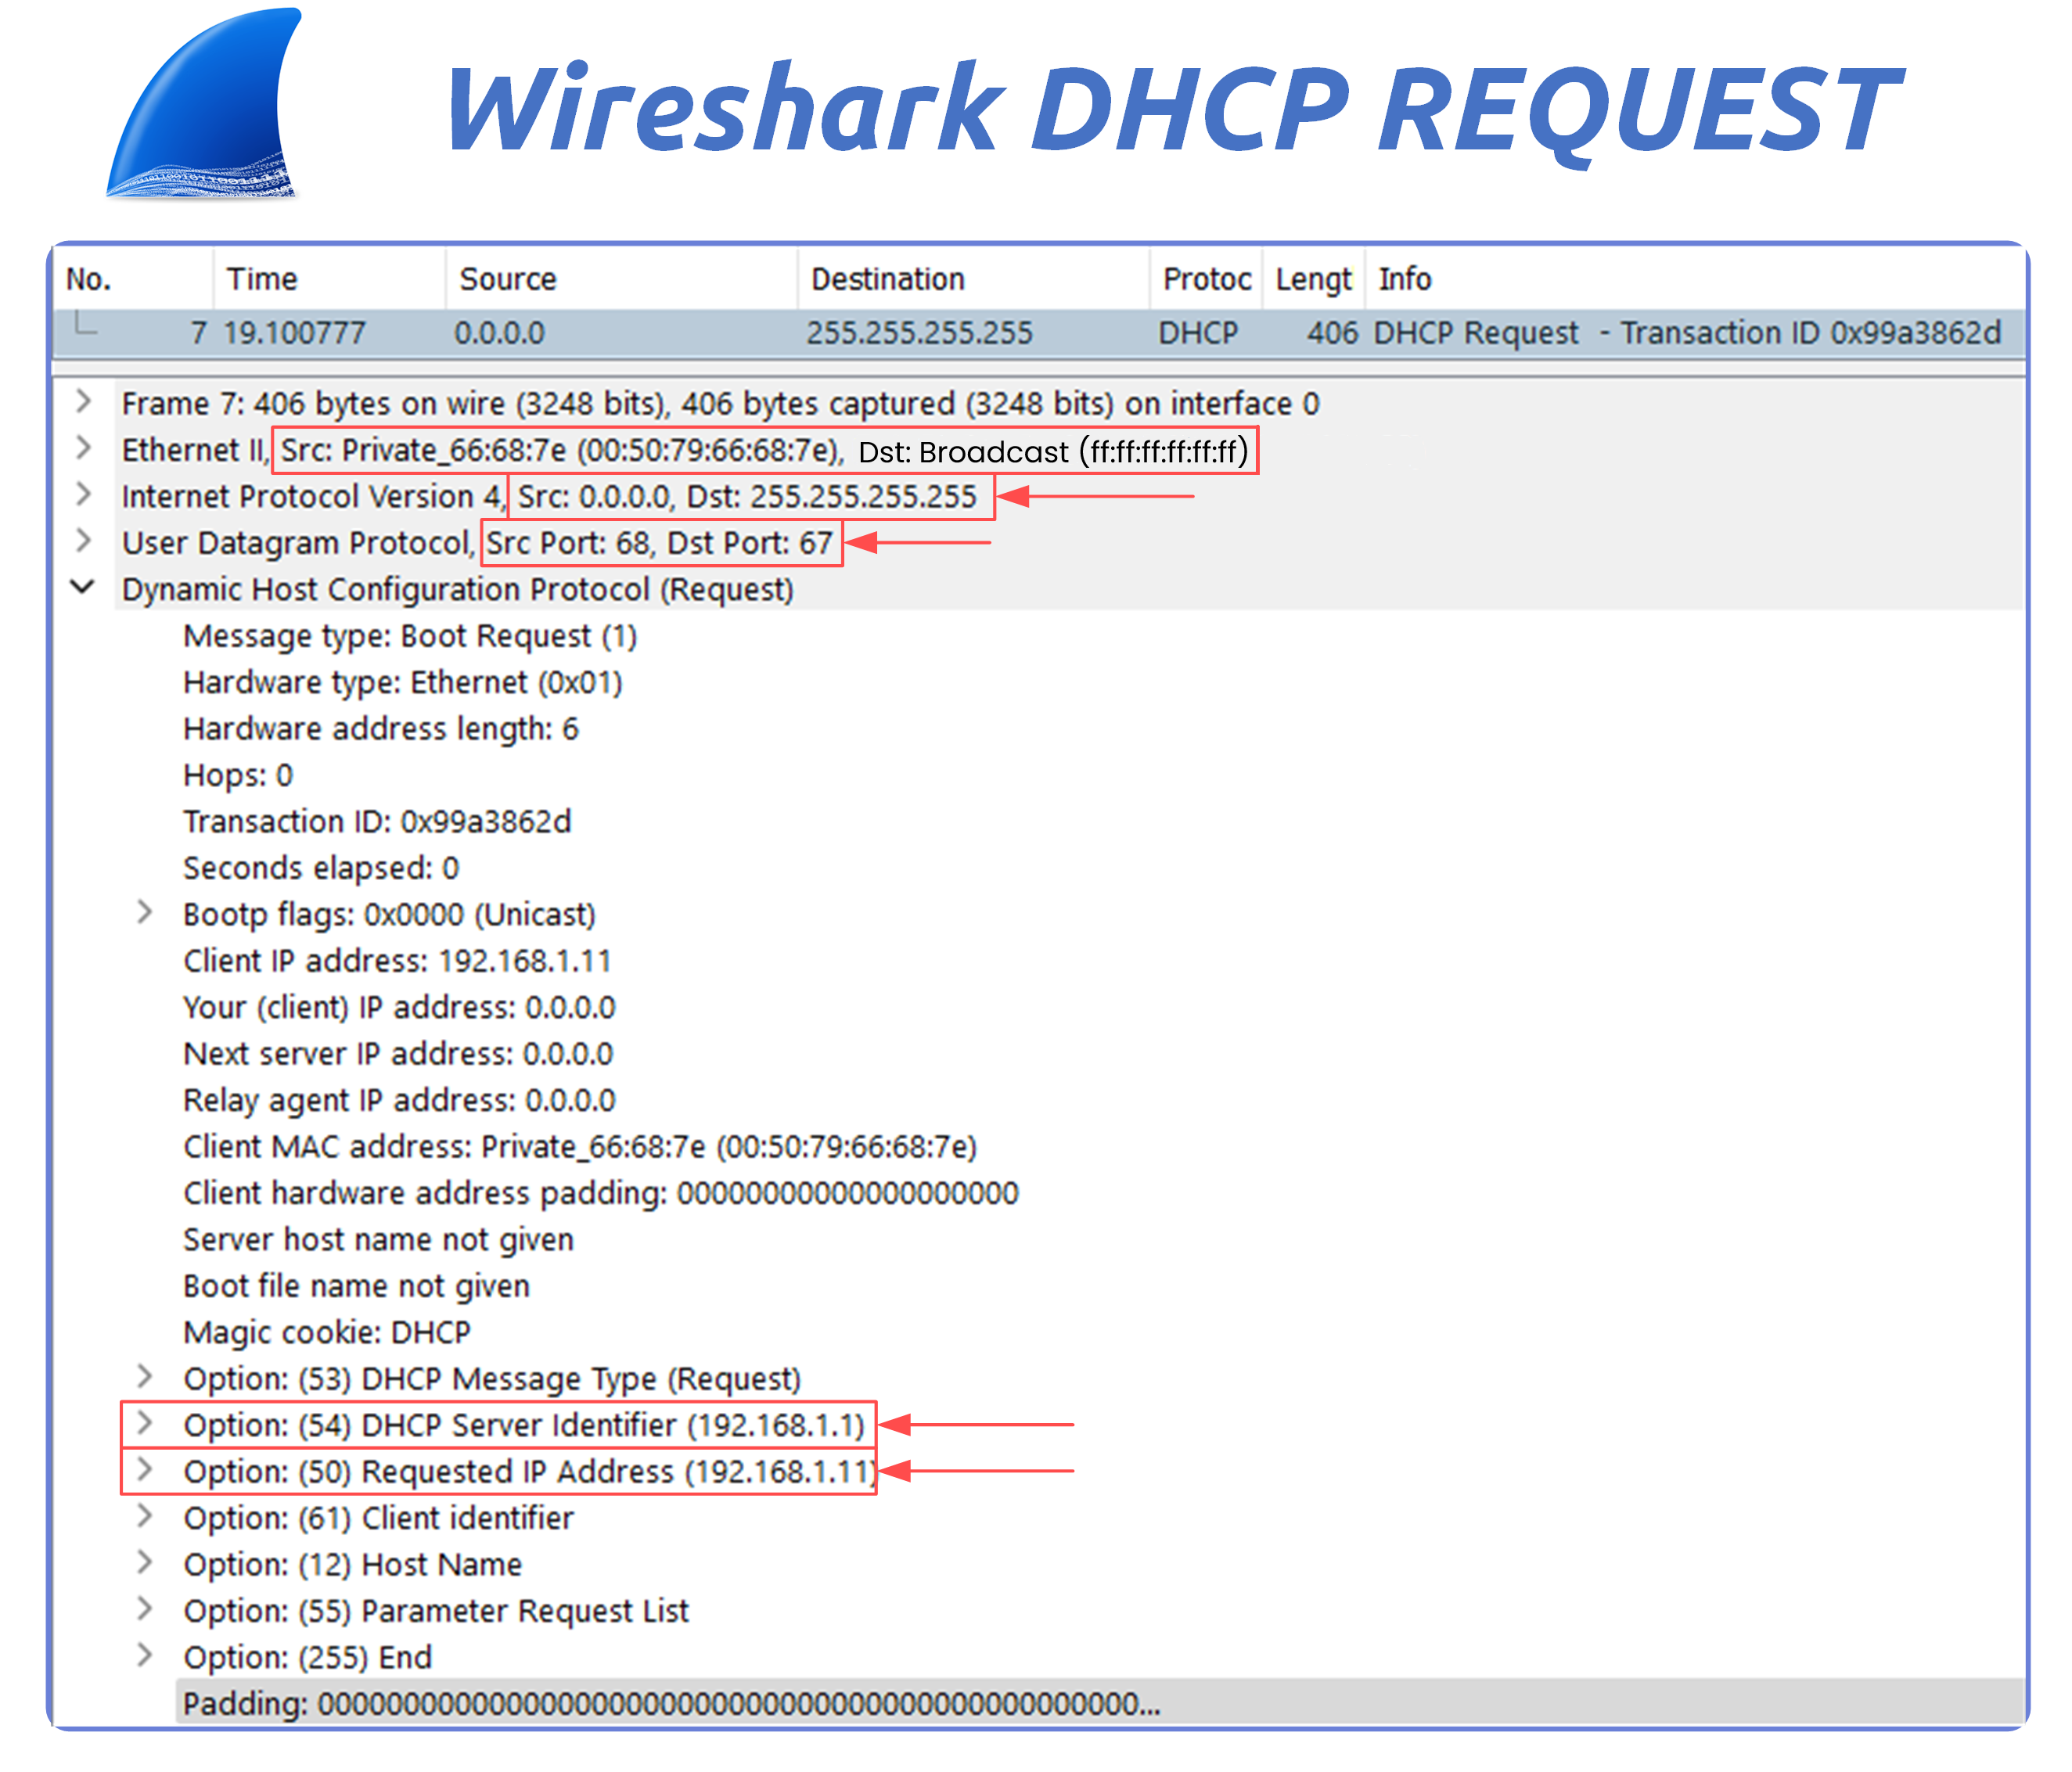
Figure 8 – Wireshark capture of a DHCP Request for IP 192.168.1.11.
Source IP: 0.0.0.0 (the client still doesn’t have an IP)
Destination IP: 255.255.255.255 (broadcast)
Destination MAC: FF:FF:FF:FF:FF:FF (broadcast)
UDP Ports: source port 68 (client), destination port 67 (server)
DHCP Options:
Option 50: Requested IP address (192.168.1.11)
Option 54: DHCP Server Identifier (192.168.1.1)
This message tells the server:
“I accept your offer. Please assign me this IP.”
Other DHCP servers that may have sent an offer now know their proposal was declined.
Answer the question below
What message does the client send to accept the offered IP?
Step 4 — DHCP ACK
Once the client has requested the offered IP, the DHCP server replies with a DHCP ACK to finalize the process.
This message confirms that the IP address is officially assigned and provides all necessary configuration parameters.
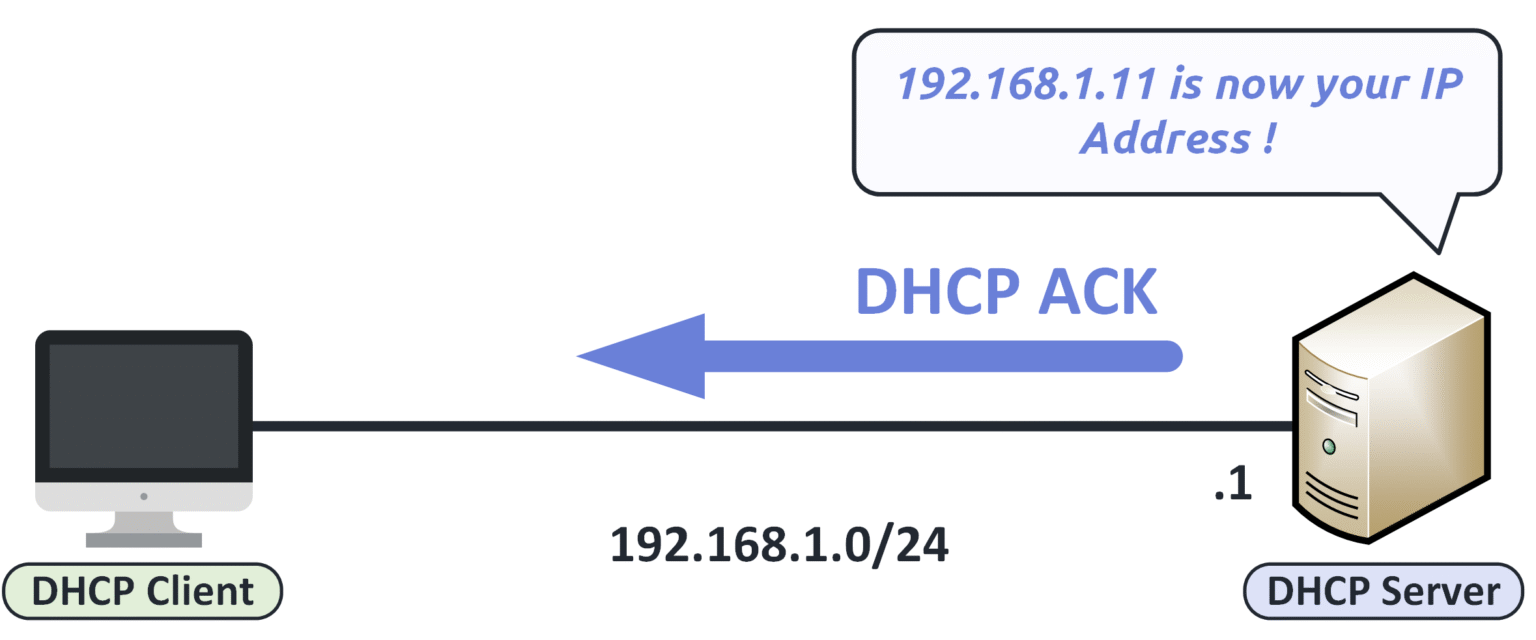
Figure 9 – DHCP server sending an ACK to confirm IP assignment to the client.
In this capture, we can observe:
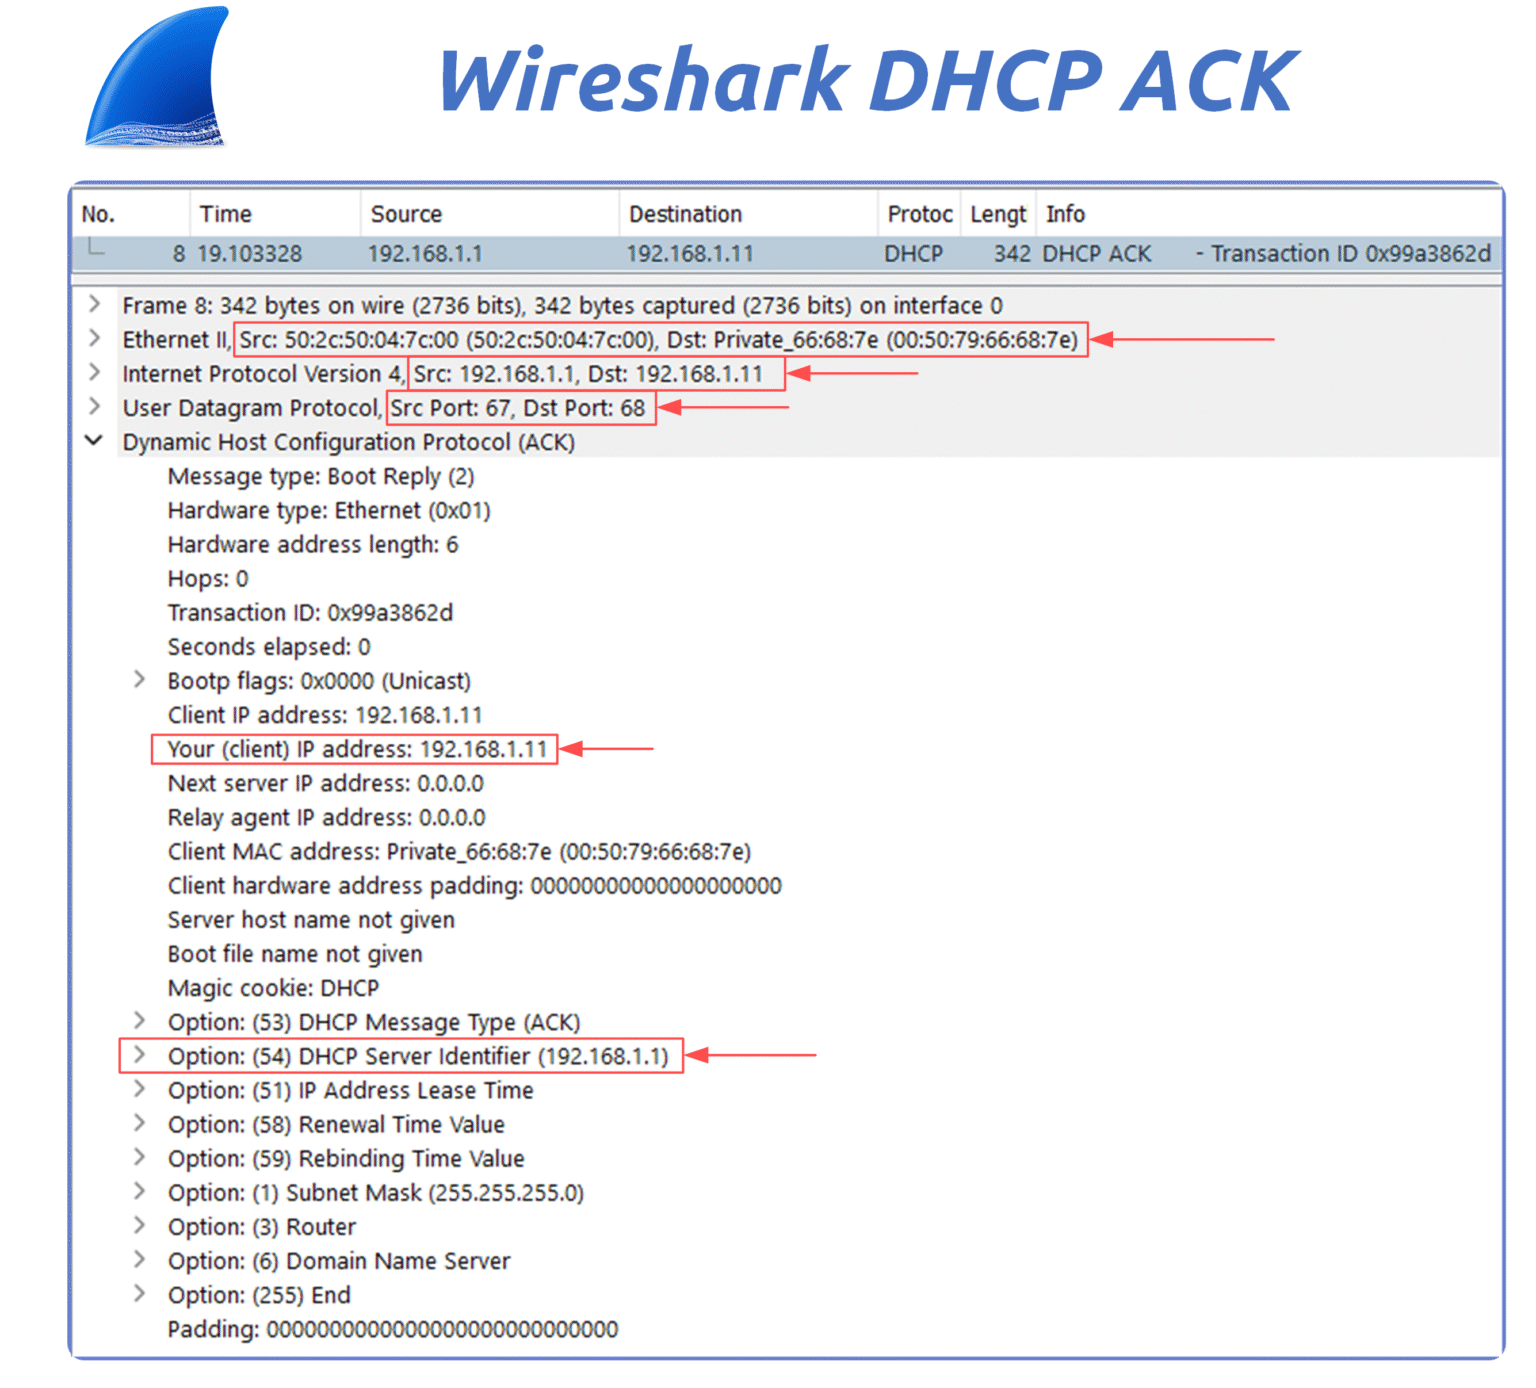
Figure 10 – Wireshark capture of a DHCP ACK confirming IP assignment to the client.
Source IP: 192.168.1.1 (the DHCP server)
Destination IP: 192.168.1.11 (the client’s new IP)
Destination MAC: the client’s MAC address (unicast)
UDP Ports: source port 67 (server), destination port 68 (client)
DHCP Options:
Option 51: Lease duration
Option 6: DNS servers
Option 3: Default gateway
Once the client receives this ACK, it can officially use the assigned IP address.
You can verify this directly on the PC:
C:\Users\PingMyNetwork> ipconfig /all

Ethernet adapter Ethernet 3:

   Connection-specific DNS Suffix  . :
   Description . . . . . . . . . . . : Realtek USB GbE Family Controller #2
   Physical Address. . . . . . . . . : 38-7C-76-11-B0-70
   DHCP Enabled. . . . . . . . . . . : Yes
   Autoconfiguration Enabled . . . . : Yes
   IPv4 Address. . . . . . . . . . . : 192.168.1.19(Preferred)
   Subnet Mask . . . . . . . . . . . : 255.255.255.0
   Lease Obtained. . . . . . . . . . : Monday, January 27, 2025 10:47:39 PM
   Lease Expires . . . . . . . . . . : Tuesday, January 28, 2025 10:47:39 AM
   Default Gateway . . . . . . . . . : 192.168.1.254
   DHCP Server . . . . . . . . . . . : 192.168.1.254
   DNS Servers . . . . . . . . . . . : 192.168.1.254
   NetBIOS over Tcpip. . . . . . . . : Enabled
From this output, you can see:
DHCP is enabled
An IP address was assigned
A gateway and DHCP server are listed
This confirms the DORA process completed successfully.
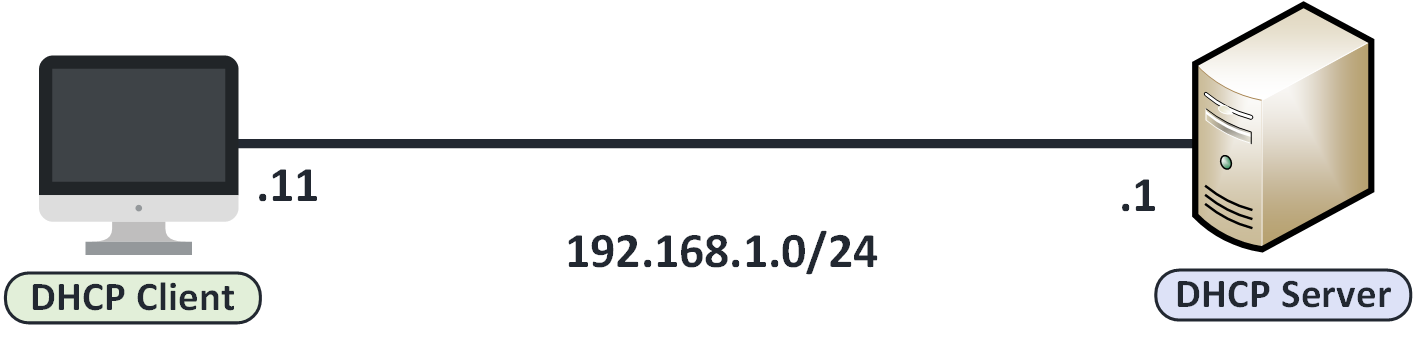
Figure 11 – Client fully configured with assigned IP address from the DHCP server.
Answer the question below
Which DHCP message confirms that the IP address is officially assigned?
The DHCP process follows four key steps, known by the acronym DORA:
Discover — The client sends a broadcast to find any available DHCP server.
Offer — The server responds with an IP address and network details.
Request — The client formally requests to use the offered IP.
Acknowledge — The server confirms the lease and finalizes the configuration.
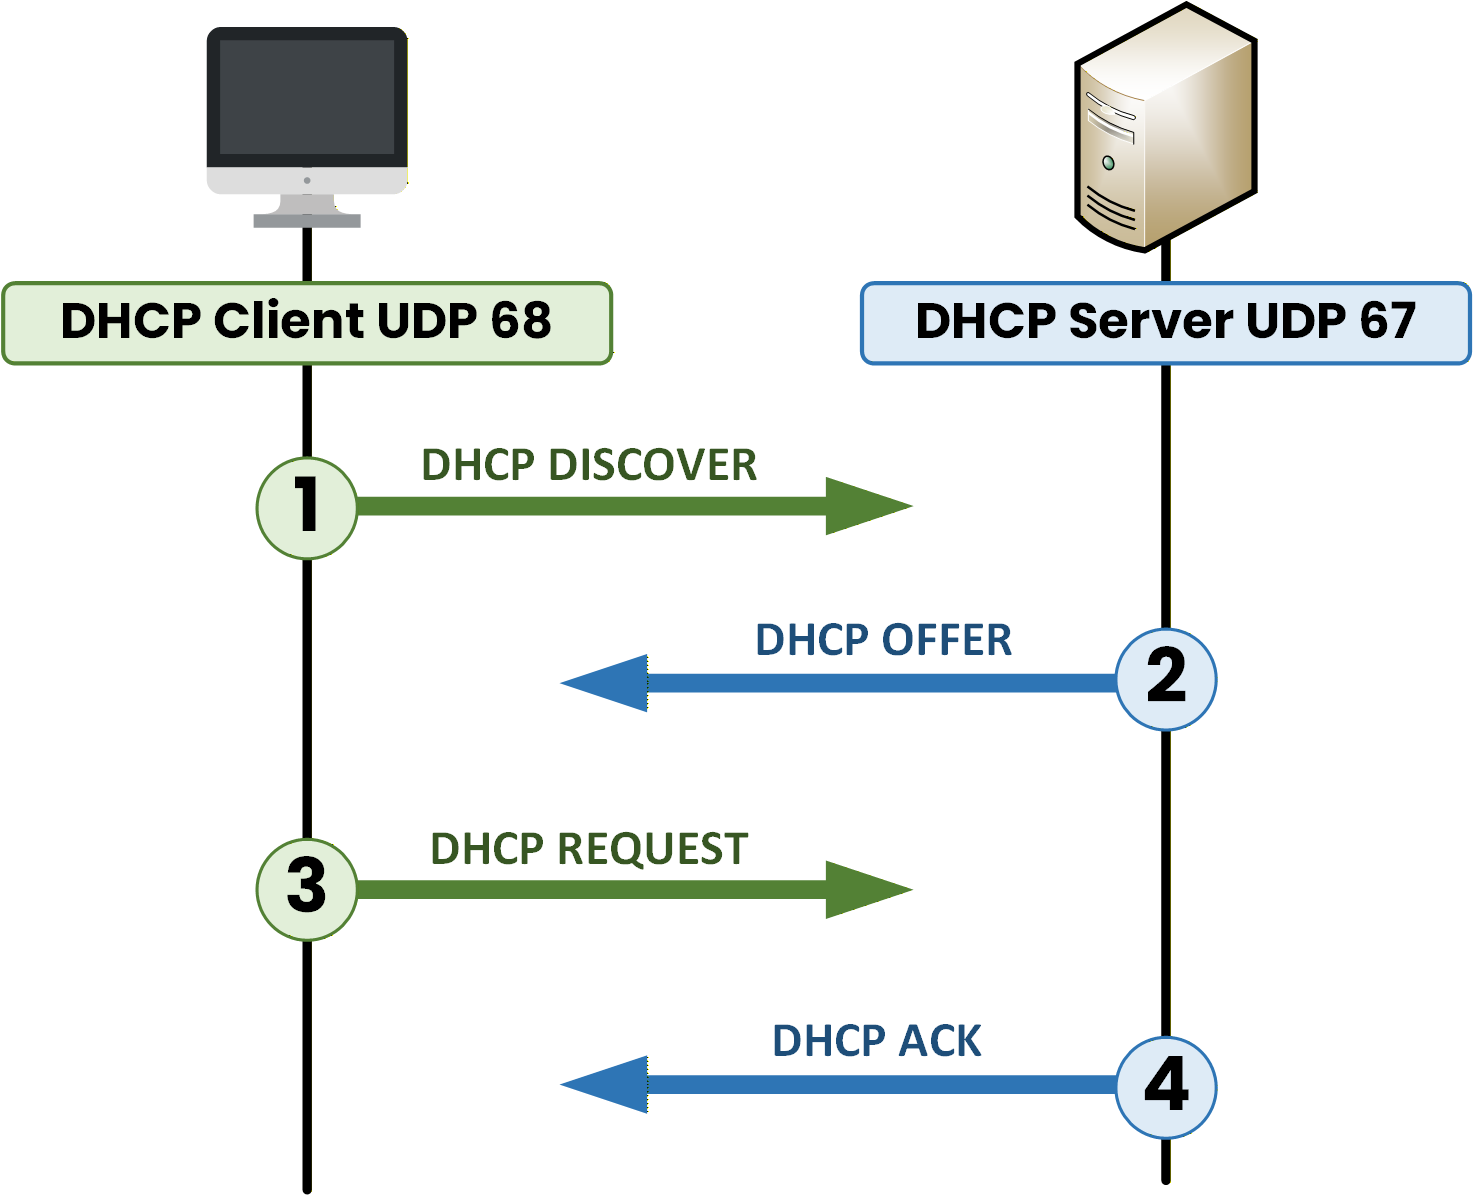
Figure 12 – The four DHCP DORA steps: Discover, Offer, Request, and Acknowledge.
Each step is essential for automatic IP configuration. Make sure you understand them well: this is a common topic on the CCNA exam.
Answer the question below
What does the “O” in the DORA process stand for?
In this lesson, you discovered how DHCP automates IP address assignment in a network.
You learned:
How the DORA process works (Discover, Offer, Request, Acknowledge)
The UDP ports used: 67 (server) and 68 (client)
How to analyze DHCP traffic with Wireshark
What’s Next?
In the next lesson, we’ll see how to configure a Cisco router as a DHCP server.
Let’s move from theory to practice!Answer the question below
Click 'Complete' to continue