In this course, we’ll look at Cisco SSH Configuration and why it matters for network administrators. Secure Shell (SSH) is a protocol that enables secure remote communication with network devices.
When you work with Cisco routers or switches, knowing how to configure SSH is essential to manage them safely.
Unlike older protocols like Telnet, SSH encrypts all communication to ensure confidentiality and integrity.
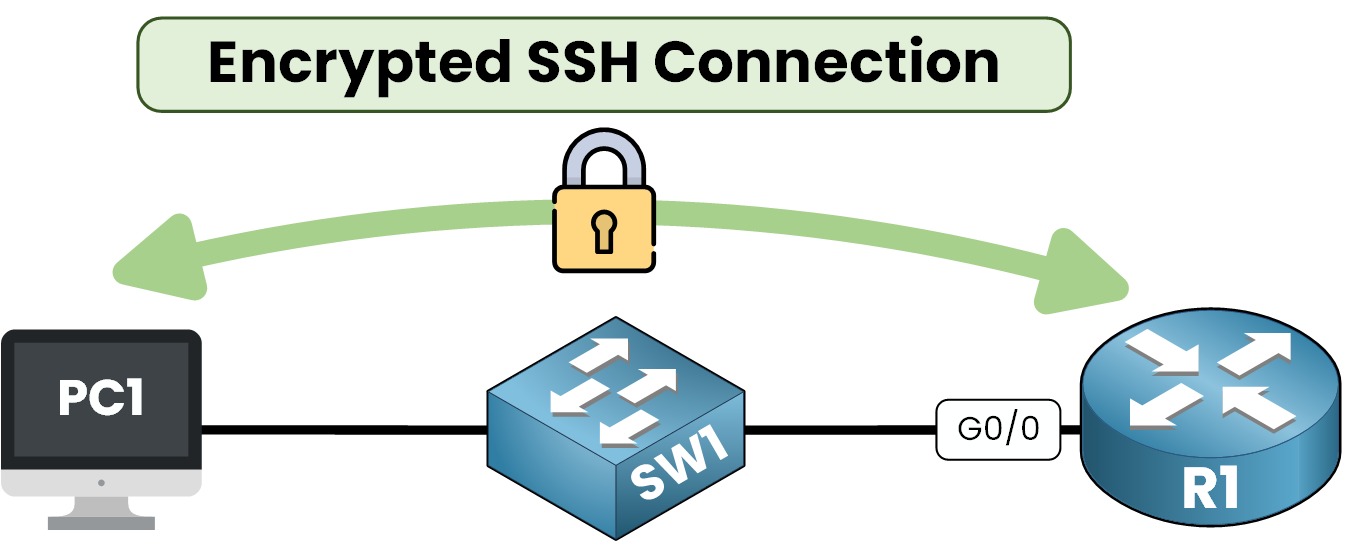
Figure 1 – SSH Access to Router
Imagine this case, you are a network administrator and you need to configure a interface on your router. SSH ensures that the commands you send are encrypted and protected against unauthorized access.
Benefits of Using SSH
SSH offers several important advantages :
1. Enhanced Security: Encrypted data reduces the risk of traffic interception.
2. User Authentication: Only authorized users can access the device.
3. Remote Device Management: SSH allows secure remote access to Cisco routers and switches.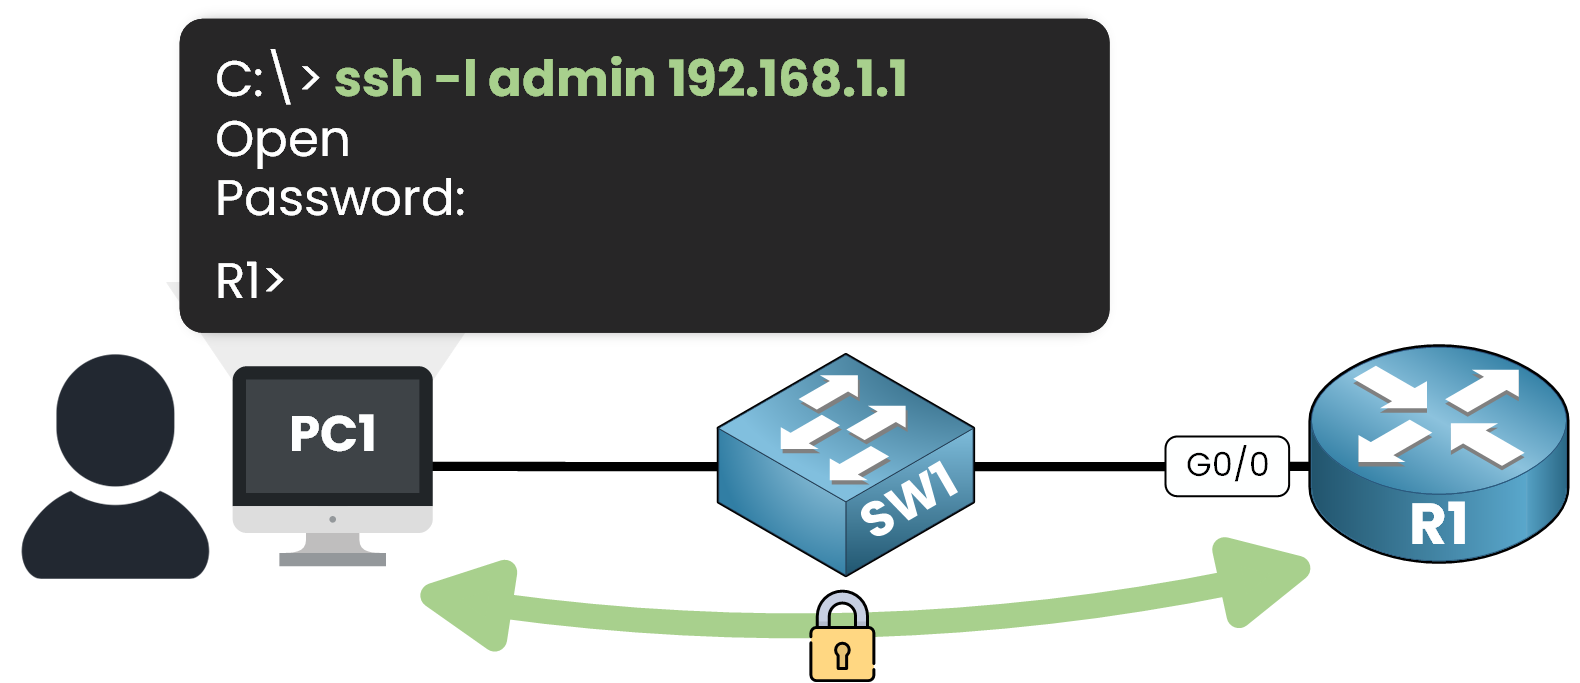
Figure 2 – Network Admin Login via SSH
SSH vs Telnet
SSH is often compared to Telnet, an older remote access protocol.
Here are the key differences:Encryption:
SSH: Encrypts all data to prevent eavesdropping
Telnet: Sends data in plain text, making it vulnerable

Figure 3 – Insecure Remote Access with Telnet
Default Ports:
SSH uses TCP port 22
Telnet uses TCP port 23
Comparison Table
Here’s a comparison table you can refer to anytime to remember the key differences between SSH and Telnet:
Feature
SSH
Telnet
Encryption
✅ Yes (Encrypted)
❌ No (plain text)
Port
TCP 22
TCP 23
Use Case
Secure device management
Rarely used
Table 1 – SSH vs Telnet comparison summary
Now, let’s walk through the steps to prepare and configure SSH on a Cisco device, step by step.
Answer the question below
To enable SSH on a Cisco device, you need to meet specific requirements and follow a clear configuration process. Everything is covered in this section.
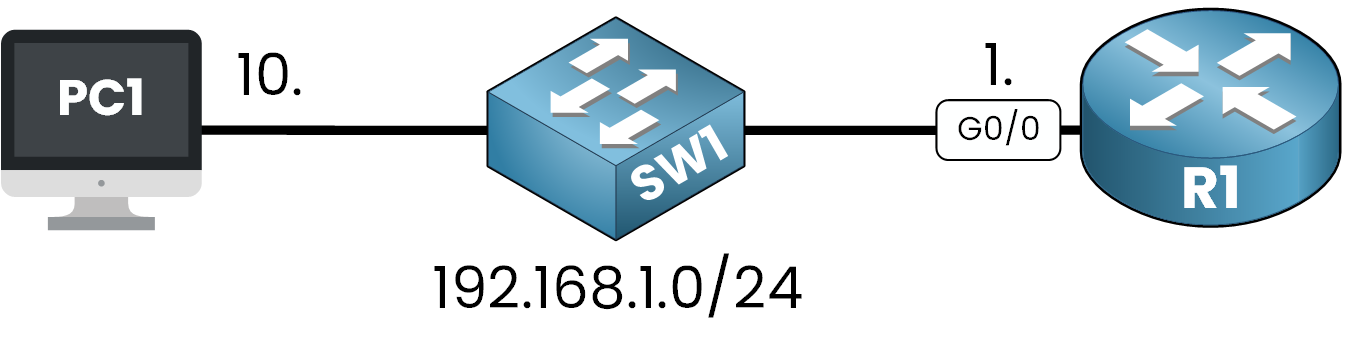
Figure 4 – SSH Lab Topology
IOS Requirement for SSH
Your Cisco device must run an IOS image that supports cryptographic functions.
Check the IOS version:
Router# show version

Cisco IOS Software, C2900 Software (C2900-UNIVERSALK9-M), Version 15.1(4)M4, RELEASE SOFTWARE (fc2)
Technical Support: http://www.cisco.com/techsupport
Copyright (c) 1986-2012 by Cisco Systems, Inc.
Compiled Thurs 5-Jan-12 15:41 by pt_team

// OUTPUT OMITTED
Look for a
kin the image name (universalk9).
If it’s not present, SSH cannot be enabled on the device.Step 1 – Set the Hostname and Domain Name
Both the hostname and domain name are required to generate RSA keys.
Router> enable
Router# configure terminal
Enter configuration commands, one per line.  End with CNTL/Z.
Router(config)# hostname R1
R1(config)# ip domain-name pingmynetwork.com
Step 2 – Generate RSA Key Pair
Generate the cryptographic keys used by SSH.
40 % Complete: you’re making great progress
Unlock the rest of this lesson
If you’d like to continue your CCNA journey, create your free account now.
Access all free CCNA lessons
Practice with quizzes and level test
Progress tracking in your dashboard
Made by network engineers - CCNP certified
Create your Free Account1151 learners continued their CCNA journey this month